
Oh, the smell of apples and cinnamon baking in the oven. For me, that aroma instantly brings back memories of crisp autumn days, cozy kitchens, and the warmth of family gatherings. There’s just something magical about fall baking, and I’m so excited to share one of my absolute favorite recipes with you today: my Apple Fritter Cake Recipe.
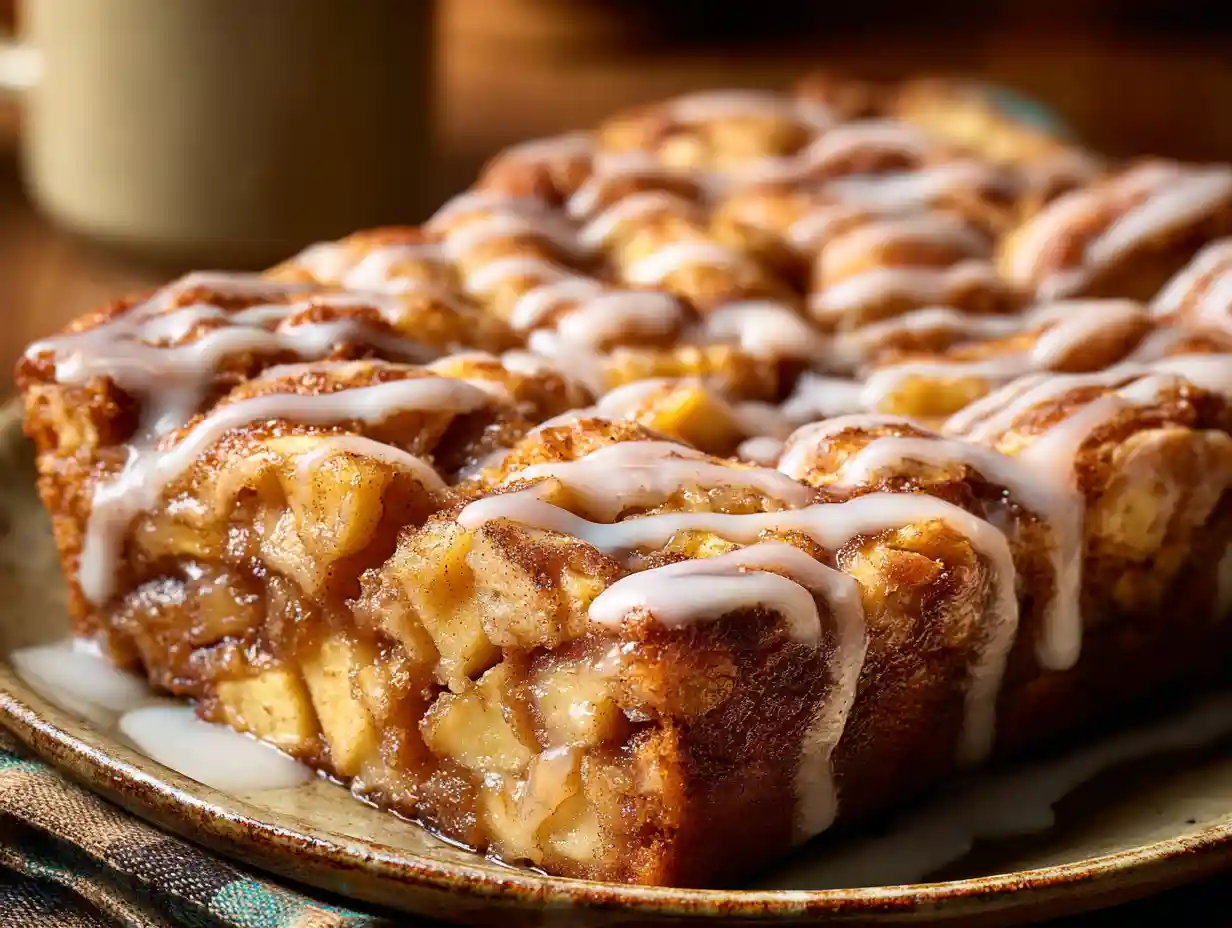
This cake is everything I love about a classic apple fritter, but without the fuss of deep-frying. It’s incredibly moist, packed with tender spiced apples, and topped with an irresistible sweet glaze.
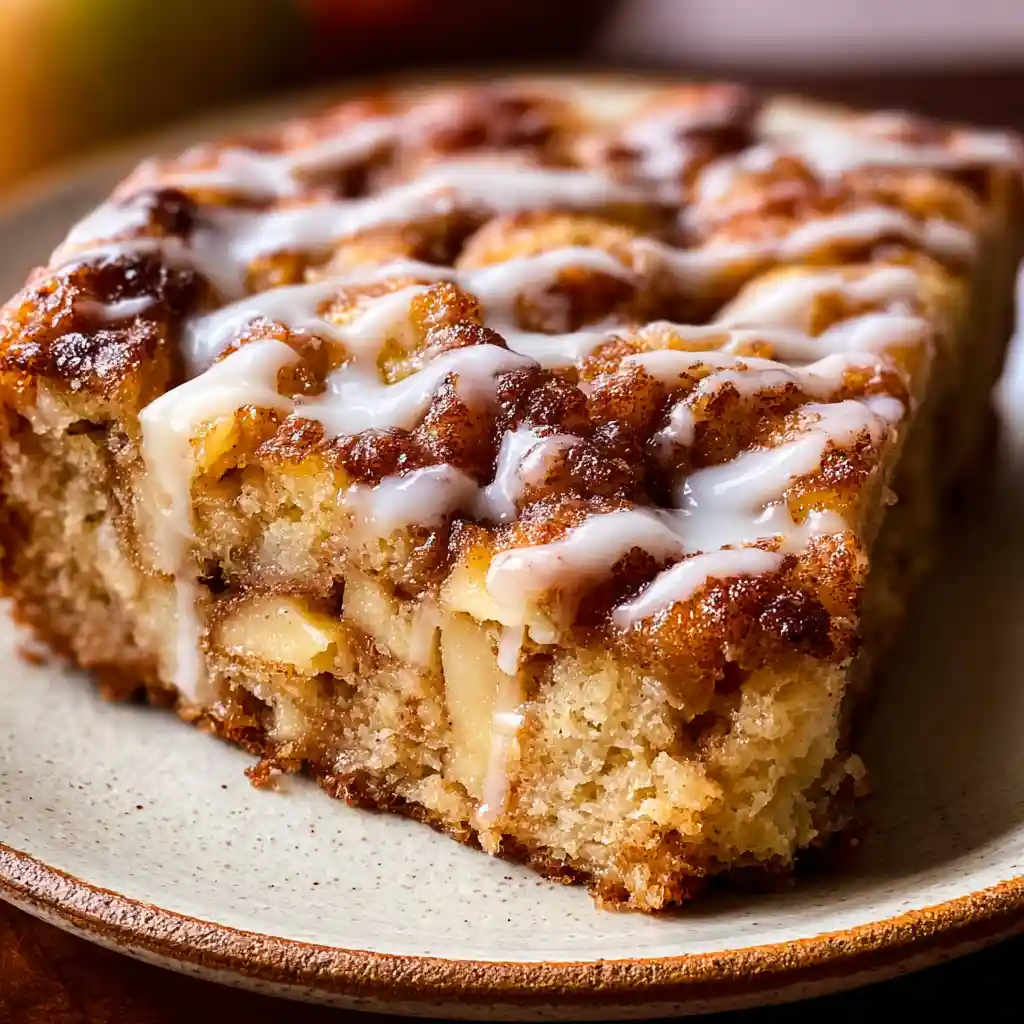
The best part? It looks impressive but is delightfully easy to make, with an active time of around 45-50 minutes. It’s the kind of dessert that feels like a big, comforting hug, perfect for sharing around your own kitchen table.
Table of Contents
Why You’ll Adore This Apple Fritter Cake Recipe
I truly believe this Apple Fritter Cake Recipe will become a staple in your home, just like it has in mine. First, it’s so incredibly simple to put together, even on a busy weeknight. I love that I can get that wonderful apple fritter flavor without the mess and time commitment of frying.
The cake itself is wonderfully moist, thanks to a secret ingredient I’ll share, and the spiced apple filling is perfectly tender, not mushy. Then there’s the sweet, pour-over glaze that seeps into every crevice, making each bite utterly divine. It’s the ideal balance of warmth, sweetness, and spice, creating a dessert that feels both nostalgic and fresh.
If you are looking for another easy dessert, try this delicious apple spice cake using box cake mix.
A Glimpse into History: The Sweet Origins of Apple Fritters
While my recipe transforms the classic into a cake, the inspiration, apple fritters, have a rich history. Fritters, in general, have been around for centuries, originating as simple fried dough snacks. Often made with fruit, they were a popular way to enjoy seasonal produce, especially apples.
Over time, these humble fried treats evolved into various forms across different cultures. The concept of a fritter, essentially a piece of food coated in batter and fried, is something many civilizations have embraced. I think it’s charming how a simple idea can lead to so many delicious variations, like this wonderful cake.
Gather Your Tools: Essential Equipment for This Apple Fritter Cake
Before I dive into the delicious details, let’s make sure you have everything you need in your kitchen. Having the right tools makes the baking process so much smoother and more enjoyable.
Here’s what I recommend:
- 9×13 inch baking pan: This is essential for the size and thickness of this sheet cake.
- Stand mixer with a paddle attachment (or a hand mixer): While you can mix by hand, a mixer makes creaming the butter and sugar much easier and ensures a light, fluffy batter.
- Medium saucepan: You’ll use this to cook down the apple filling until it’s perfectly tender and thickened.
- Several mixing bowls: I always have a few on hand for separating dry ingredients, wet ingredients, and preparing the glaze.
- Whisk: For combining dry ingredients.
- Rubber spatula: Great for scraping down the sides of the bowl and folding ingredients.
Choosing Your Apples: The Key to a Perfect Apple Fritter Cake
The type of apple you choose truly makes a difference in this Apple Fritter Cake Recipe. I always lean towards apples that hold their shape well during baking and offer a nice balance of tartness to complement the sweetness of the cake.
My top recommendation is Granny Smith apples. Their tartness cuts through the richness of the cake and they maintain a lovely texture when cooked. Other fantastic choices include Honeycrisp, Braeburn, or Fuji apples. These varieties are firm enough to withstand baking and won’t turn to mush. I try to avoid softer, sweeter apples like Red Delicious, as they tend to break down too much and can make the filling watery.
Ingredients for Your Irresistible Apple Fritter Cake
Gathering all my ingredients beforehand always makes the baking process so much more enjoyable. Here’s exactly what you’ll need to create this delightful Apple Fritter Cake.
For the Apple Filling:
- 2 cups peeled and large diced Granny Smith Apples (about 2 medium)
- 1/3 cup granulated sugar
- 1/2 teaspoon cinnamon
- 2 tablespoons cornstarch
- 2 teaspoons water
For the Brown Sugar Topping:
- 1/2 cup dark brown sugar
- 1/2 teaspoon cinnamon
For the Cake Batter:
- 1/3 cup butter, room temperature
- 3/4 cup granulated sugar
- 1/2 cup applesauce
- 1 teaspoon vanilla
- 2 eggs
- 2 1/4 cups flour
- 1 teaspoons baking powder
- 1 teaspoons baking soda
- 1/2 teaspoon kosher salt
- 1 teaspoon cinnamon
- 1 cup Greek yogurt or sour cream
For the Glaze:
- 2 cups powdered sugar
- 1/3 cup milk
- 1 teaspoon vanilla
Step-by-Step: Crafting Your Apple Fritter Cake
Now for the fun part! I’ll walk you through each step to create this amazing Apple Fritter Cake. You’ll see how easily it all comes together.
- In a medium saucepan combine apples, granulated sugar, cinnamon, cornstarch and water.
- Heat on medium heat for 5-6 minutes until apples soften and the liquid thickens. Set aside to cool.
- Mix the dark brown sugar and remaining 1/2 teaspoon cinnamon in a small bowl and set aside.
- Preheat oven to 350°F. Coat a 9×13 pan with nonstick spray. Set aside.
- In the bowl of your stand mixer, fitted with the paddle attachment mix the butter and sugar together for 3 minutes until fluffy.
- Add the applesauce, vanilla, and eggs and mix on medium until combined, scraping the sides of the bowl as necessary.
- In a separate bowl whisk together flour, baking powder, baking soda, salt, and cinnamon.
- Add the dry mixture and the Greek yogurt in alternating parts, starting and ending with the dry. Mix until just combined.
- Spread 1/2 of the cake batter in the bottom of the prepared pan. Top with the apple mixture, spreading carefully to cover the batter. Then top with 2/3 of the brown sugar, sprinkling all over the apple mixture.
- Cover with the remaining batter and sprinkle the remaining 1/3 of the brown sugar all over the top.
- Bake 35-40 minutes, or until the center of the cake is set.
- When the cake has only a few minutes left baking, prepare the glaze by mixing the powdered sugar, milk and vanilla in a medium bowl until smooth.
- When cake is done, immediately poke holes in the cake using a butter knife, about 30 pokes.
- Pour the glaze over the top of the cake spreading to cover it completely. Let the glaze set up for about 20 minutes before serving.
Evelyn’s Expert Baking Tips for Your Apple Fritter Cake
I’ve learned a few tricks over the years that help ensure this Apple Fritter Cake turns out perfectly every time. Here are my best tips for you:
- Don’t overmix the batter: Once you add the dry ingredients and yogurt, mix only until just combined. Overmixing develops the gluten in the flour, which can lead to a tough, dense cake. I want a tender, soft cake, and I’m sure you do too!
- Room temperature ingredients are key: Make sure your butter, eggs, and Greek yogurt are all at room temperature. This allows them to emulsify properly, creating a smoother, more uniform batter that results in a lighter cake. I usually set them out about an hour before I start baking.
- Cool the apple filling completely: It’s so important to let your cooked apple filling cool before adding it to the cake batter. If it’s warm, it can start to cook the batter prematurely and affect the cake’s texture.
- Achieving the perfect glaze consistency: If your glaze seems too thick, add a tiny splash more milk, a teaspoon at a time, until it reaches a pourable but still thick consistency. If it’s too thin, stir in a bit more powdered sugar. I like it thick enough to coat, but thin enough to seep into those holes.
- Make-ahead magic: You can actually cook the apple filling a day or two in advance and store it in an airtight container in the refrigerator. Just bring it to room temperature before assembling the cake. I find this helps cut down on my active baking time!
Common Substitutions for Your Apple Fritter Cake
I know sometimes you might not have every ingredient on hand, or you might prefer to try something a little different. Here are some common substitutions I’ve found work well for this Apple Fritter Cake, though keep in mind they might slightly alter the texture or flavor.
| Ingredient | Substitution | Notes |
|---|---|---|
| Greek Yogurt/Sour Cream | Buttermilk, heavy cream | Buttermilk adds tang, heavy cream adds richness. |
| Granulated Sugar | Brown sugar (in batter) | Will result in a deeper, more caramel-like flavor. |
| Applesauce | Mashed ripe banana (small amount) | Can add a subtle banana flavor, use sparingly. |
| Milk (in glaze) | Cream, half-and-half | Will result in a richer, thicker glaze. |
Elevate Your Cake: Creative Glaze Variations
While my classic powdered sugar glaze is absolutely perfect, sometimes I like to get a little creative! If you’re looking to try something new, here are a few glaze variations that pair wonderfully with this Apple Fritter Cake. This recipe falls under the larger category of desserts and drinks, offering even more inspiration for sweet treats.
| Glaze Variation | Key Ingredients | Notes |
|---|---|---|
| Brown Butter Glaze | Browned butter, powdered sugar, milk | Adds a nutty, rich depth of flavor. |
| Caramel Drizzle | Store-bought caramel sauce, sea salt | A quick and decadent addition. |
| Cream Cheese Glaze | Cream cheese, butter, powdered sugar, vanilla | Tangy and creamy, perfect for a richer finish. |
Dietary Considerations for Your Apple Fritter Cake
I often get asked about making recipes fit different dietary needs, and I’m happy to share some thoughts on adapting this Apple Fritter Cake.
For a gluten-free version, I recommend using a 1:1 gluten-free all-purpose flour blend. Many brands work wonderfully for cakes, but results can vary slightly, so I might suggest checking reviews. The texture might be a little different, perhaps a touch more delicate, but it will still be delicious.
If you need a dairy-free option, you can substitute plant-based Greek yogurt or sour cream alternatives. For the butter, use a good quality plant-based butter substitute, and for the milk in the glaze, any dairy-free milk (like almond or oat milk) will work.
Just be aware that these substitutions can subtly change the cake’s texture and richness, but it will still be a lovely treat.
If you are also looking for a breakfast recipe, check out this Easy Sausage and Egg Casserole: A Delightful Recipe!
Scaling & Pan Sizes: Adjusting Your Apple Fritter Cake Recipe
This recipe is written for a 9×13 inch pan, which yields a generous cake perfect for sharing with family or friends. However, I know you might want to adjust the size, so here are my tips:
- For a smaller cake (8×8 or 9×9 inch square pan): I recommend halving all the ingredients. The baking time will likely be similar, but start checking for doneness around 25-30 minutes.
- For a larger cake (e.g., two 9×13 pans or a half-sheet pan): You would need to double the recipe. Keep the oven temperature the same, but the baking time might increase slightly. I always rely on the visual cue of a set center and a clean toothpick.
Always remember that adjusting the size means keeping a close eye on the baking time, as ovens can vary.
Serving Suggestions: Enjoying Your Apple Fritter Cake
Oh, the ways to enjoy this Apple Fritter Cake are endless! While it’s absolutely divine on its own, especially with that sweet glaze, I love to offer a few extra touches.
A warm slice is heavenly with a scoop of creamy vanilla bean ice cream melting over the top. A dollop of freshly whipped cream also adds a lovely, light contrast. And for those crisp mornings, it pairs perfectly with a hot cup of coffee or tea, making it a fantastic breakfast treat.
For a touch of seasonal charm, I might sprinkle a few extra pinches of cinnamon or a light dusting of powdered sugar just before serving.
Storing and Freezing Your Apple Fritter Cake
I want you to enjoy every last crumb of this cake! Here’s how I recommend storing it to keep it fresh:
- At Room Temperature: Covered tightly with plastic wrap or in an airtight container, this Apple Fritter Cake will stay fresh for 2-3 days. I find the glaze helps seal in the moisture.
- In the Refrigerator: If you want to extend its life, you can store the cake in the refrigerator, again, in an airtight container. It will last for up to 5 days. I usually let it come closer to room temperature before serving, or give it a quick zap in the microwave for a warm treat.
- Freezing: This cake freezes beautifully! Once completely cooled and glazed, I cut it into individual servings. I wrap each piece tightly in plastic wrap, then place them in a freezer-safe bag or container. It will keep well for up to 3 months. The apples might have a slightly softer texture after freezing and thawing, but the flavor will still be fantastic. Just thaw individual pieces at room temperature or warm them gently in the microwave.
FAQs About Apple Fritter Cake
I get a lot of questions about baking, and I love helping clear things up. Here are some common questions about this Apple Fritter Cake Recipe:
Can I make this Apple Fritter Cake in advance?
Absolutely! This cake is actually wonderful the day after it’s baked, as the flavors meld even more. You can bake the entire cake and glaze it, then store it covered at room temperature. The apple filling can also be made a day or two ahead and stored in the fridge.
What makes this cake soft?
Several things contribute to its incredible softness! The combination of applesauce and Greek yogurt adds moisture without making it greasy. Also, the baking soda and baking powder provide a lovely lift, and my tip about not overmixing the batter is crucial for a tender crumb.
Can I use a round pan instead of a 9×13?
Yes, you can, but you’ll likely need two 8-inch or 9-inch round cake pans. You would divide the batter and filling between them. The baking time might be slightly less, so I’d start checking for doneness around 30 minutes.
Why did my glaze get too thin?
This often happens if you add too much milk at once. Remember to add it slowly, just a teaspoon at a time, until you reach your desired consistency. Different types of milk can also affect the thickness.
How do I know the apples are cooked enough in the filling?
I look for them to be tender when pierced with a fork, but still holding their shape. The liquid should also be noticeably thickened, coating the apples. You don’t want them completely mushy, but definitely not crunchy.
Final Thoughts and Your Turn!
There you have it, my absolute favorite Apple Fritter Cake Recipe! This cake embodies everything I love about Gather and Cook: comforting, delicious, and a little bit magical. I truly hope you bring this recipe into your own kitchen and share it with the people you love. There’s nothing quite like the joy of baking and then gathering around the table to enjoy something homemade.
I would absolutely love to hear from you! Please leave a comment below and tell me if you tried this Apple Fritter Cake, what you thought, or any questions you might have.
Follow us on Pinterest for more cozy homemade recipes, comforting desserts, and easy family favorites!

Apple Fritter Cake Recipe
Ingredients
Equipment
Method
- In a medium saucepan combine apples, granulated sugar, cinnamon, cornstarch and water.
- Heat on medium heat for 5-6 minutes until apples soften and the liquid thickens. Set aside to cool.
- Mix the dark brown sugar and remaining 1/2 teaspoon cinnamon in a small bowl and set aside.
- Preheat oven to 350°F. Coat a 9×13 pan with nonstick spray. Set aside.
- In the bowl of your stand mixer, fitted with the paddle attachment mix the butter and sugar together for 3 minutes until fluffy.
- Add the applesauce, vanilla, and eggs and mix on medium until combined, scraping the sides of the bowl as necessary.
- In a separate bowl whisk together flour, baking powder, baking soda, salt, and cinnamon.
- Add the dry mixture and the Greek yogurt in alternating parts, starting and ending with the dry. Mix until just combined.
- Spread 1/2 of the cake batter in the bottom of the prepared pan. Top with the apple mixture, spreading carefully to cover the batter. Then top with 2/3 of the brown sugar, sprinkling all over the apple mixture.
- Cover with the remaining batter and sprinkle the remaining 1/3 of the brown sugar all over the top.
- Bake 35-40 minutes, or until the center of the cake is set.
- When the cake has only a few minutes left baking, prepare the glaze by mixing the powdered sugar, milk and vanilla in a medium bowl until smooth.
- When cake is done, immediately poke holes in the cake using a butter knife, about 30 pokes.
- Pour the glaze over the top of the cake spreading to cover it completely. Let the glaze set up for about 20 minutes before serving.