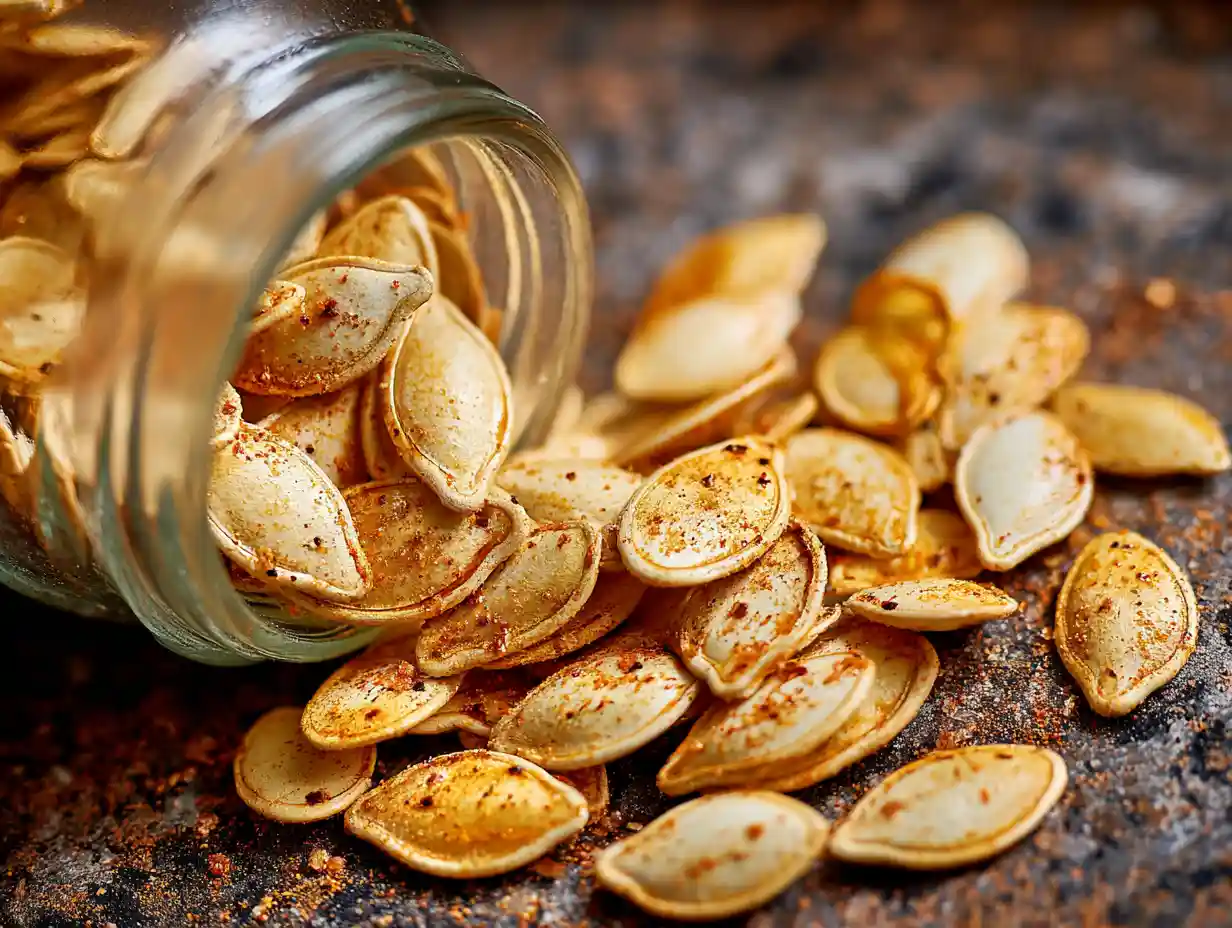

There’s nothing quite like the crisp air of autumn, the cozy blankets coming out, and the comforting scent of seasonal treats wafting from the kitchen. For me, one of my favorite annual rituals is turning a humble pumpkin into a delightful array of snacks and dishes. Carving pumpkins might be fun, but the real treasure, in my opinion, lies within. I’m talking about those glorious pumpkin seeds, destined to become the easiest, most satisfying homemade snack.
This classic roasted pumpkin seeds recipe is a staple in my home, transforming what might otherwise be compost into a crunchy, flavorful bite. It is surprisingly simple to make, and from start to finish, you’re looking at about 20-25 minutes total prep and cook time. I promise, once you try these, you will never throw out another pumpkin seed again!
Table of Contents
Why This Is Your New Favorite Pumpkin Seeds Recipe
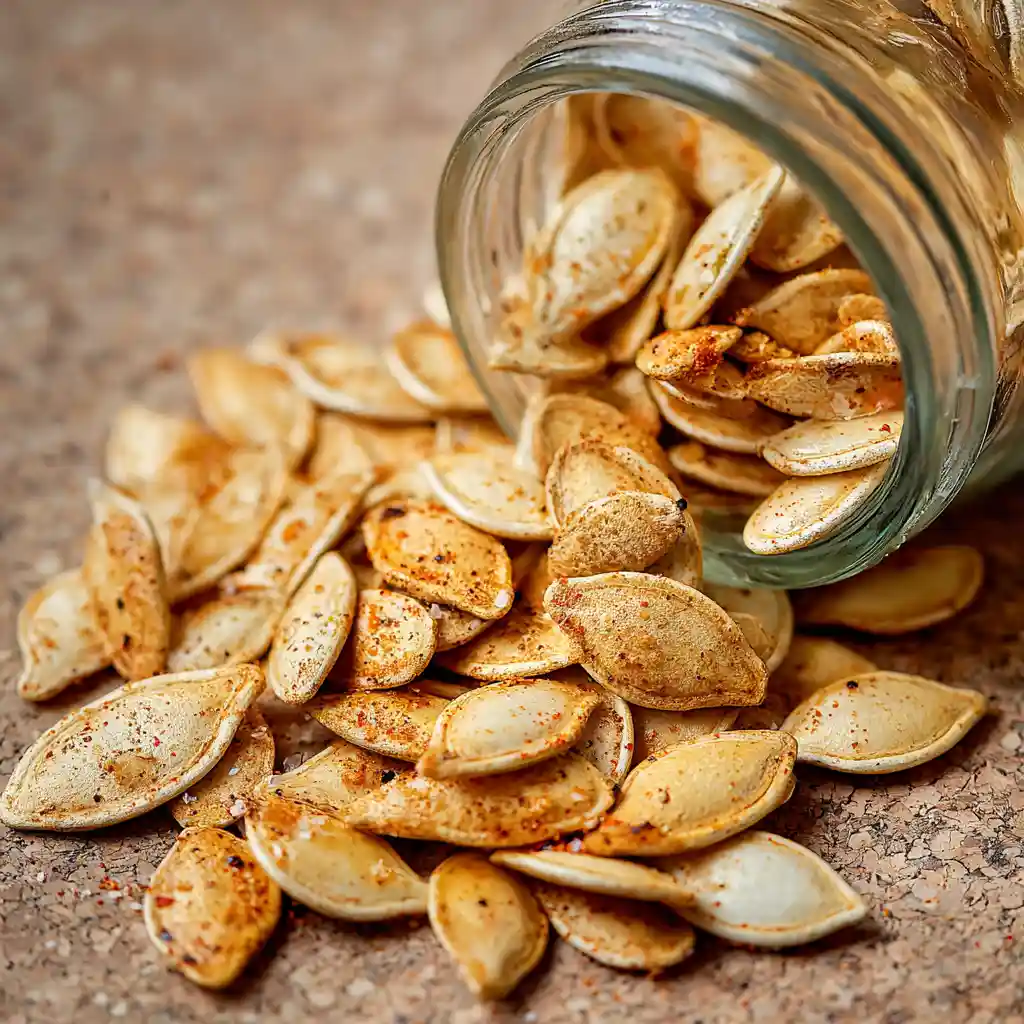
I truly believe this method will become your go-to for roasted pumpkin seeds. Here is why I love it so much:
- Perfectly Crispy, Every Time: My specific cleaning and drying techniques ensure your seeds achieve that irresistible crunch, avoiding any chewiness.
- Endlessly Customizable: While I give you a classic seasoning, I also share ideas for countless flavor variations, allowing you to tailor them to any craving.
- Simple Ingredients: You likely have most of the seasonings on hand already, making this a spontaneous snack you can whip up any time.
- Zero-Waste Joy: This recipe is a wonderful way to utilize every part of your fall pumpkins, turning “guts” into a gourmet treat.
The Science Behind Perfectly Roasted Pumpkin Seeds
Achieving that perfect, shatteringly crisp roasted pumpkin seed isn’t magic; it’s a little bit of science! When you properly clean and thoroughly dry your seeds, you are preventing steaming. Any residual moisture on the seeds will turn into steam in the hot oven, which essentially “steams” the seeds instead of roasting them, leaving you with a chewy texture instead of a crunchy one. Drying them completely ensures the heat can directly crisp the seed.
Adding a small amount of olive oil is also key. The oil acts as a fantastic conductor of heat, helping to cook the seeds evenly and achieve that beautiful golden-brown color. It also provides a surface for your seasonings to adhere to, ensuring every seed is packed with flavor. Finally, maintaining a consistent oven temperature is crucial for even roasting without scorching. I want them toasted, not burnt!
Essential Tools for Your Pumpkin Seeds Recipe
You do not need a lot of fancy gadgets for this pumpkin seeds recipe. Here are the essential tools I use in my kitchen:
- Colander: Indispensable for washing the seeds and draining excess water.
- Small Bowl: For tossing the seeds with oil and seasonings.
- Sheet Pan: A good quality, heavy-duty sheet pan ensures even heat distribution.
- Parchment Paper: I love using this to line my sheet pan for easy cleanup and to prevent sticking.
- Measuring Spoons: For precise seasoning measurements.
- Sturdy Spatula or Spoon: Crucial for stirring the seeds during roasting.
Choosing the Best Pumpkin Seeds for Roasting
While you can roast seeds from almost any pumpkin or winter squash, I have found that the type does make a slight difference. Seeds from large carving pumpkins, like the ones you might use for Halloween, tend to be larger and have a slightly thicker shell. These often require a touch more roasting time.
Smaller pie pumpkins or sugar pumpkins, on the other hand, usually yield smaller, more tender seeds that roast up a bit quicker. Don’t limit yourself to just pumpkins, though! Seeds from butternut squash, spaghetti squash, and even delicata squash are absolutely delicious when roasted. Just remember that smaller, thinner seeds will cook faster, so I always keep a closer eye on them.
Ingredients for Our Classic Roasted Pumpkin Seeds Recipe
Here are the simple ingredients I use for my go-to roasted pumpkin seeds:
- ¾ cup raw pumpkin seeds
- 1 tablespoon olive oil
- ½ teaspoon kosher salt
- ¼ teaspoon garlic powder
- ¼ teaspoon paprika (optional)
- ⅛ teaspoon black pepper
Step-by-Step: How to Make This Perfect Pumpkin Seeds Recipe
Let me walk you through the entire process, from preparing your seeds to pulling them, perfectly roasted, from the oven.
Prepping Your Seeds: Cleaning & Drying for Maximum Crispness
This step is critical for perfectly crispy seeds!
First, I wash my pumpkin seeds in a colander under cold running water. I use my fingers to gently rub and remove all the clinging pumpkin pulp and stringy fibers. It can be a bit messy, but it is worth it.
For an even deeper clean and pre-seasoning, I sometimes boil my seeds first. I bring a pot of salted water to a boil, add the cleaned seeds, and boil for about 5-10 minutes. This method helps to remove any stubborn slime and infuses the seeds with a subtle saltiness from the inside out, making them even more flavorful.
Once clean, whether boiled or not, thoroughly dry the seeds with a kitchen towel. I usually spread them out on a clean towel and pat them very dry. For maximum crispness, you can also air dry them overnight by spreading them in a single layer on a baking sheet.
Alternatively, I sometimes do a quick low-oven dry: spread them on a baking sheet and bake at 200°F (93°C) for about 10-15 minutes, stirring occasionally, until completely dry before proceeding with seasoning.
Seasoning Your Pumpkin Seeds
Once your seeds are clean and perfectly dry, it’s time for the flavor! In a small bowl, I combine the dried pumpkin seeds with the olive oil, kosher salt, garlic powder, paprika (if I’m using it), and black pepper. I toss everything together thoroughly, making sure every single seed is lightly coated with the oil and seasonings. This even coating is key for consistent flavor in every bite.
Roasting to Perfection
Now for the best part: roasting!
I preheat my oven to 350°F (177ºC). Then, I lightly grease a sheet pan with olive oil, or I line it with parchment paper for easier cleanup. I evenly spread the seasoned pumpkin seeds in a single layer on the prepared sheet pan. It is really important not to overcrowd the pan; this allows the air to circulate properly and ensures the seeds roast, rather than steam.
I bake the seeds until they are toasted and wonderfully crunchy, which typically takes about 12 to 15 minutes. To ensure even toasting and prevent any burning, I stir them every 5 minutes. With each stir, I like to taste a seed to check for that perfect crunchiness.
I also listen for subtle popping or crackling sounds and look for a beautiful golden-brown color. Once they are perfectly done, I transfer the roasted pumpkin seeds to a bowl to cool down. They will get even crispier as they cool!
Get Creative! Flavor Variations for Your Pumpkin Seeds Recipe
While I adore the classic seasoning, roasted pumpkin seeds are a fantastic canvas for so many different flavors! Here are some of my favorite ways to get creative:
| Flavor Profile | Ingredients to Add (per ¾ cup seeds) |
|---|---|
| Savory | |
| Ranch Dusted | 1 tsp dried dill, 1 tsp dried chives, ½ tsp onion powder, ¼ tsp garlic powder |
| Everything Bagel | 1 tbsp “Everything Bagel” seasoning |
| Smoky Chipotle | ½ tsp smoked paprika, ¼ tsp chipotle powder, ⅛ tsp cumin |
| Sweet | |
| Cinnamon Sugar Crunch | 1 tsp granulated sugar, ½ tsp ground cinnamon |
| Maple Glazed | 1 tsp maple syrup (toss with oil), ½ tsp cinnamon, pinch of nutmeg |
| Cocoa Coconut | 1 tsp unsweetened cocoa powder, 1 tsp shredded coconut, 1 tsp sugar |
| Spicy | |
| Spicy Chili Lime | ½ tsp chili powder, ¼ tsp cumin, ¼ tsp lime zest, pinch of cayenne pepper |
| Wasabi Kick | 1 tsp wasabi powder, pinch of salt |
Troubleshooting Your Roasted Pumpkin Seeds Recipe
I know it can be frustrating when a recipe doesn’t turn out quite right, so I want to help you tackle any issues you might encounter with your pumpkin seeds recipe.
- Chewy seeds: This is the most common issue, and it almost always comes down to moisture. Make sure your seeds are exceptionally dry before seasoning and roasting. If they’re still chewy, try lowering the oven temperature slightly (e.g., to 325°F/160°C) and roasting for a longer period, allowing more time for moisture to evaporate.
- Burnt seeds: Ovens can vary, and seeds can go from perfect to burnt quickly! Lower your oven temperature next time. Be diligent about stirring every 5 minutes, as I recommend, and remove them from the oven as soon as they are golden brown and crunchy, even if it is a few minutes before the recipe suggests. Adjusting your oven rack to a lower position can also help prevent scorching.
- Unevenly roasted: This often happens if the seeds are crowded on the pan or if they are not stirred enough. Always spread your seeds in a single layer, giving them space. Stirring frequently ensures all sides get exposed to the heat. Also, try to use seeds of similar sizes if you’re mixing different squash types, as smaller seeds will roast faster than larger ones.
Creative Ways to Enjoy Your Roasted Pumpkin Seeds
Beyond just eating them by the handful (which I do often!), roasted pumpkin seeds are incredibly versatile. Here are some of my favorite ways to enjoy them:
- Homemade Granola: Add them to your morning granola mix for extra crunch and nutrients.
- Yogurt Parfaits: Sprinkle them over Greek yogurt with berries and a drizzle of honey.
- Trail Mix: Combine with nuts, dried fruit, and chocolate chips for a custom energy boost.
- Salad Topping: A fantastic way to add texture and flavor to any green salad.
- Soup Garnish: Perfect for creamy squash soups or even a hearty lentil soup.
- Roasted Vegetables: Scatter them over roasted Brussels sprouts or sweet potatoes for a gourmet touch.
- Baked Goods: Fold them into pumpkin muffins, quick breads, or even cookies.
If you want a fall-themed dessert recipe, check out this maple pecan pie stuffed cookies recipe.
How to Store Roasted Pumpkin Seeds for Freshness
To keep your delicious roasted pumpkin seeds fresh and crunchy, proper storage is key. Once they have completely cooled, transfer them to an airtight container. I store mine in a cool, dark pantry or cupboard, away from direct sunlight and heat.
Stored this way, they will maintain their crispness and flavor for up to 1-2 weeks at room temperature. If you want to extend their shelf life further, you can refrigerate them, which can keep them fresh for up to a month.
The Amazing Health Benefits of This Pumpkin Seeds Recipe
Not only are these roasted pumpkin seeds incredibly tasty, but they are also packed with fantastic health benefits! I love knowing I am nourishing my body with every crunchy bite. Pumpkin seeds are a wonderful source of healthy fats, including omega-3s, which are great for heart health.
They are also rich in essential minerals like magnesium, vital for muscle and nerve function, blood sugar control, and blood pressure regulation. Zinc, another key mineral found in pumpkin seeds, plays a crucial role in immune function, cell growth, and wound healing. You will also find good amounts of iron, phosphorus, and Vitamin K, which supports bone health.
Plus, they offer a decent amount of fiber, aiding in digestion and keeping you feeling fuller longer. It’s a win-win! Pumpkin seeds also provide approximately 8.8 mg per 100 g, which is significant for addressing IDA.
FAQs About Roasting Pumpkin Seeds
I often get questions about roasting pumpkin seeds, so I wanted to answer some of the most common ones here for you!
Do you have to dry pumpkin seeds before roasting?
Yes, absolutely! Drying the pumpkin seeds thoroughly is the most crucial step to ensure they roast up crispy and don’t turn out chewy. Any moisture will cause them to steam instead of roast.
Can you eat pumpkin seed shells?
Yes, the shells are completely edible! When roasted properly, the shells become crisp and delicious. My recipe is designed for roasting the seeds with their shells on.
How do you get the slime off pumpkin seeds?
The easiest way is to wash them vigorously in a colander under cold running water, using your hands to rub away the pulp and slime. For stubborn bits, I sometimes boil them briefly in salted water, which helps loosen any remaining fibers.
Can I use seeds from other types of squash?
Definitely! Seeds from butternut squash, spaghetti squash, delicata squash, and other winter squashes can all be roasted using this same method. Just keep in mind that smaller seeds may roast a bit faster.
What is the best way to clean pumpkin seeds?
I find washing them in a colander under running water while rubbing them with my hands is the most effective. Following that with a thorough towel drying, or even an air dry, ensures they are perfectly clean and ready for roasting.
You can also try this easy cranberry turkey stuffing balls recipe for another flavorful fall treat.
Conclusion
I hope this guide has inspired you to turn those pumpkin seeds into a truly irresistible snack! This pumpkin seeds recipe is a testament to how simple ingredients, combined with a little love and attention, can create something wonderfully delicious. It is easy, versatile, and oh-so-satisfying.
I would love to hear from you! What is your favorite seasoning variation for roasted pumpkin seeds? Do you have any questions about roasting I did not cover? Share your success stories and photos with the Gather And Cook community in the comments below. Pull up a chair, and let’s keep those kitchen conversations going!
Into zero-waste kitchen wins and quick bakes? Follow us on Pinterest for step-by-step ideas.

The Ultimate Easy Pumpkin Seeds Recipe
Ingredients
Equipment
Method
- Let me walk you through the entire process, from preparing your seeds to pulling them, perfectly roasted, from the oven.
- This step is critical for perfectly crispy seeds!
- First, I wash my pumpkin seeds in a colander under cold running water. I use my fingers to gently rub and remove all the clinging pumpkin pulp and stringy fibers. It can be a bit messy, but it is worth it.
- For an even deeper clean and pre-seasoning, I sometimes boil my seeds first. I bring a pot of salted water to a boil, add the cleaned seeds, and boil for about 5-10 minutes. This method helps to remove any stubborn slime and infuses the seeds with a subtle saltiness from the inside out, making them even more flavorful.
- Once clean, whether boiled or not, thoroughly dry the seeds with a kitchen towel. I usually spread them out on a clean towel and pat them very dry. For maximum crispness, you can also air dry them overnight by spreading them in a single layer on a baking sheet. Alternatively, I sometimes do a quick low-oven dry: spread them on a baking sheet and bake at 200°F (93°C) for about 10-15 minutes, stirring occasionally, until completely dry before proceeding with seasoning.
- Once your seeds are clean and perfectly dry, it’s time for the flavor! In a small bowl, I combine the dried pumpkin seeds with the olive oil, kosher salt, garlic powder, paprika (if I’m using it), and black pepper. I toss everything together thoroughly, making sure every single seed is lightly coated with the oil and seasonings. This even coating is key for consistent flavor in every bite.
- Now for the best part: roasting!
- I preheat my oven to 350°F (177ºC). Then, I lightly grease a sheet pan with olive oil, or I line it with parchment paper for easier cleanup. I evenly spread the seasoned pumpkin seeds in a single layer on the prepared sheet pan. It is really important not to overcrowd the pan; this allows the air to circulate properly and ensures the seeds roast, rather than steam.
- I bake the seeds until they are toasted and wonderfully crunchy, which typically takes about 12 to 15 minutes. To ensure even toasting and prevent any burning, I stir them every 5 minutes. With each stir, I like to taste a seed to check for that perfect crunchiness. I also listen for subtle popping or crackling sounds and look for a beautiful golden-brown color. Once they are perfectly done, I transfer the roasted pumpkin seeds to a bowl to cool down. They will get even crispier as they cool!