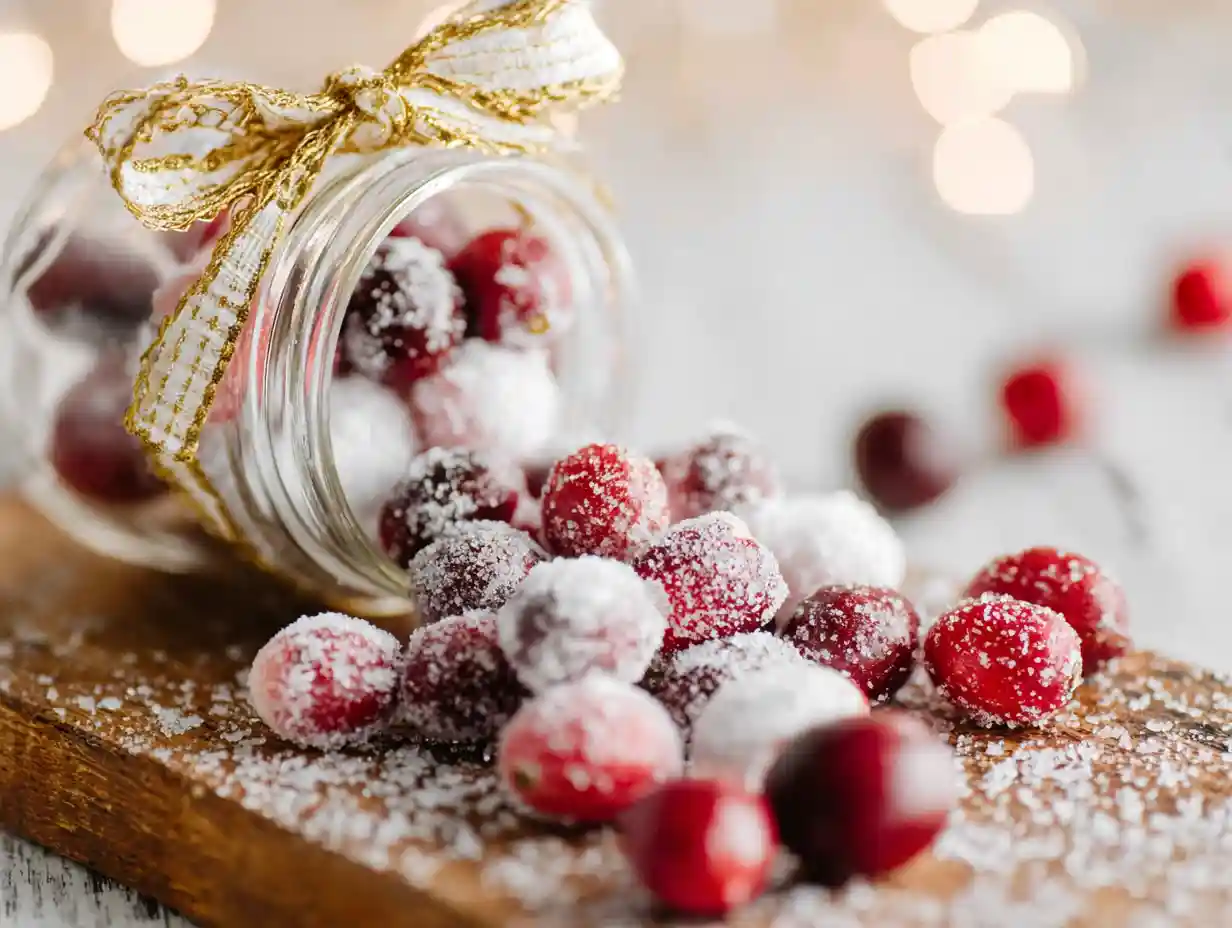

Welcome to Gather and Cook! I always feel a special kind of joy when the holidays roll around, and my kitchen starts to sparkle. One of my absolute favorite ways to add that festive twinkle is with beautiful, glistening candied cranberries.
These little ruby gems are perfectly sweet, wonderfully tart, and surprisingly easy to make. I promise, the active prep time is only about 15 minutes, with a little extra drying time where they mostly just do their own thing!
Table of Contents
Candied vs. Sugared Cranberries: What’s the Delicious Difference?
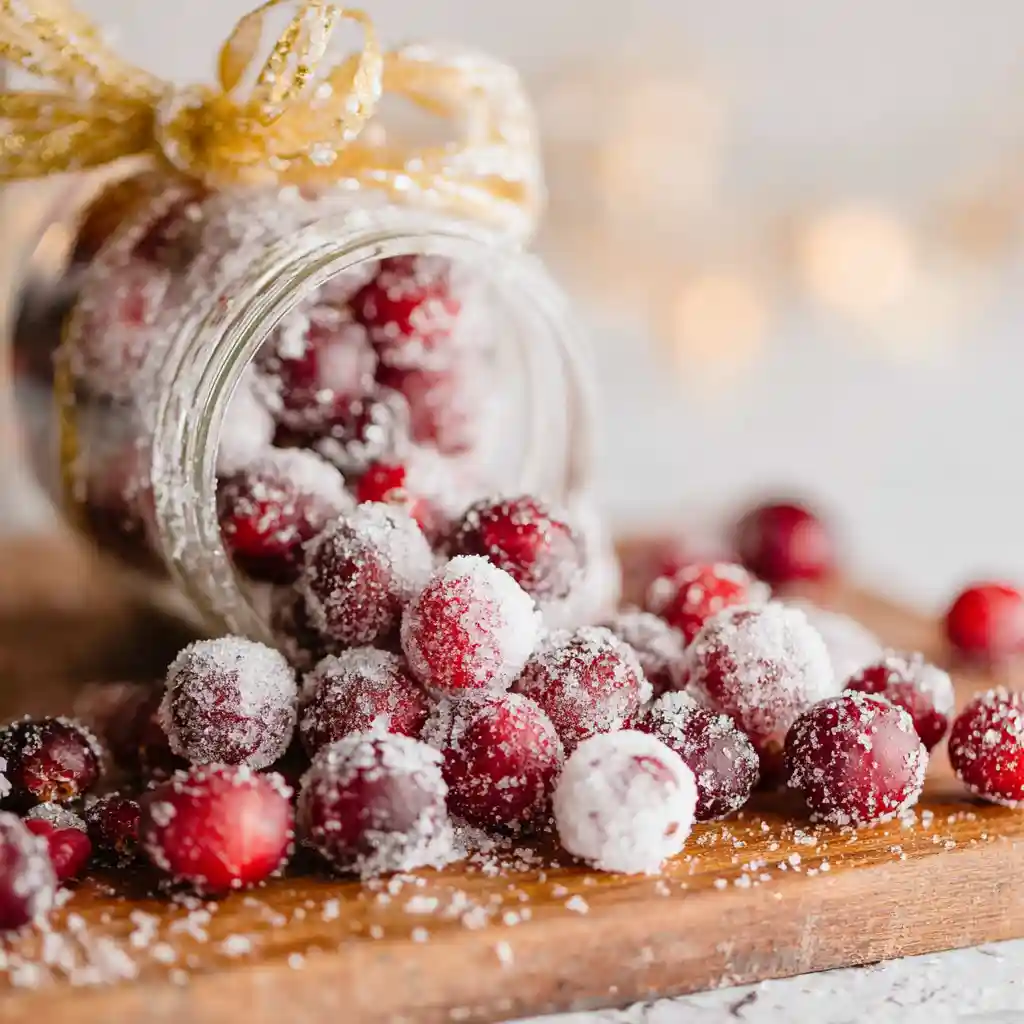
I’ve noticed that the terms “candied cranberries” and “sugared cranberries” are often used interchangeably, and I want to clear up any confusion! While some recipes for “candied cranberries” might involve coating them in powdered sugar and baking them, my recipe focuses on the elegant, sparkling version. These are what I call “sugared cranberries,” which truly fit the “candied” description because they’re coated in a sugary shell.
My method involves a simple syrup soak that plumps up the cranberries and preps them for their dazzling transformation. After a quick dip, they get tossed in granular sugar and then air-dried. This creates that beautiful, delicate crystalline sparkle I adore. Both methods yield delicious results, but I find the air-dried, granular sugar method for these sparkling beauties offers a classic appeal and a truly stunning garnish that’s hard to beat.
If you need a savory dish to balance the sweetness, consider this Amazing Cranberry Salsa Over Cream Cheese Recipe.
Why You’ll Love These Easy Candied Cranberries
I’m confident you’ll adore this recipe as much as I do! Here’s why I think these easy candied cranberries will become a staple in your kitchen:
- No Baking Required: That’s right, you won’t need to turn on your oven for these. It’s a simple stovetop and air-dry method.
- Beautiful Crystalline Sparkle: The two-stage sugaring and drying process creates an absolutely gorgeous, delicate, and truly sparkling coating.
- Perfect Sweet-Tart Balance: These aren’t overly sweet. The natural tartness of the cranberries shines through, balanced by the sugary coating.
- Incredibly Versatile: They’re perfect for garnishing almost anything, or simply enjoying as a delightful, festive snack.
Essential Tools for Crafting Perfect Candied Cranberries
I find that having the right tools makes any recipe smoother and more enjoyable. For these candied cranberries, I recommend having a few specific items ready:
- Medium Heat-Safe Bowl: This is where your fresh cranberries will soak in the warm syrup.
- Medium Saucepan: For simmering your simple syrup to perfection.
- Whisk: Essential for ensuring your sugar dissolves completely in the water.
- Slotted Spoon: This makes transferring the cranberries from the syrup to the drying sheet so much easier, leaving excess syrup behind.
- Baking Sheet: You’ll need this for drying.
- Parchment Paper or Silicone Baking Mat: I always use one of these to prevent sticking and make cleanup a breeze.
- Large Bowl: For the final sugar toss.
Ingredients for Your Sparkling Candied Cranberries
I believe quality ingredients make all the difference, even for something as simple as these candied cranberries. Here is exactly what you’ll need:
- 1 cup (120g) fresh cranberries: I really emphasize using fresh, firm cranberries for this recipe. Frozen cranberries simply won’t give you the same beautiful texture and sparkle.
- 3/4 cup (180g/ml) water: Just regular tap water works perfectly here.
- 1 and 1/4 cups (250g) granulated sugar, divided: This is your standard white sugar, which creates the perfect delicate, shimmering coating.
How to Make Perfect Candied Cranberries (Step-by-Step Instructions)
I’m excited to guide you through making these show-stopping candied cranberries. Follow these steps, and you’ll have a gorgeous batch in no time!
- Place the cranberries in a medium heat-safe bowl. I usually just set them aside on my counter for a moment while I prepare the syrup.
- In a medium saucepan set over medium heat, bring the water and 3/4 cup (150g) of sugar to a simmer. I whisk continuously until the sugar has completely dissolved, then I remove the pan from the heat and let it cool for 5 minutes.
- Pour the sugar syrup over the cranberries and stir gently to ensure they are all coated. I cover the bowl and set it aside for 15 minutes, allowing the cranberries to soak up that sweet goodness.
- Line a baking sheet with parchment paper or a silicone baking mat. Using a slotted spoon, I carefully transfer the cranberries from the sugar syrup and spread them in a single layer on the prepared baking sheet. I allow them to dry, uncovered, for 1 hour. They will be quite sticky at this point, but that’s perfectly normal!
- Pour the remaining 1/2 cup (100g) sugar into a large bowl. I gently toss the sticky cranberries in the sugar, ensuring they are coated all the way around. Then, I return the sugared cranberries to the lined baking sheet and let them dry, uncovered, for at least 1 hour at room temperature or in the refrigerator.
- I like to use these immediately for the freshest sparkle, but you can store them, tightly covered, in the refrigerator for up to 3 days. If I notice they start to look a little wet, I just toss them in a little more sugar to refresh them.
These are delicious, but for a more savory side dish you should try my The Ultimate Cranberry Sauce Recipe You’ll Love.
The Science Behind the Sparkle: Why They Turn Out So Beautiful!
I often get asked about how these cranberries get their magical sparkle, and it’s all thanks to a little kitchen science! When I first soak the fresh cranberries in the warm sugar syrup, the berries absorb some of that sweetness, plumping them up slightly. As the syrup cools and then the cranberries dry for that first hour, the remaining syrup on their surface becomes perfectly tacky.
This tackiness is crucial! It acts as a natural adhesive for the second coating of granulated sugar. When I toss the sticky, syrup-coated cranberries in the dry sugar, those tiny sugar crystals adhere to the surface, forming a beautiful, sparkling shell.
The final drying stage, either at room temperature or in the refrigerator, allows that granular sugar coating to fully set and crystallize, creating the gorgeous, non-sticky, sparkling finish you see. It’s truly a beautiful transformation to watch!
Expert Tips for the Best Candied Cranberries Every Time
I’ve made my share of candied cranberries, and I’ve learned a few tricks that I’m happy to share to ensure your batch is perfect every time!
- Cranberry Quality is Key: I cannot stress enough how important it is to use only fresh, firm cranberries. Frozen cranberries release too much moisture when thawed, making them soft and difficult for the sugar to adhere properly. Always pick out any soft or shriveled berries before you start.
- Syrup Control is Important: When I make the simple syrup, I always ensure the sugar is fully dissolved before removing it from the heat. I also let the syrup cool for about 5 minutes before pouring it over the cranberries. This prevents the cranberries from cooking, keeping their fresh, firm texture intact.
- Embrace the Drying Stages: Each drying period serves a specific purpose. The first hour after the syrup soak allows the cranberries to become perfectly tacky, which is essential for the granular sugar to stick. The second drying stage, after they’ve been coated, helps the sugar coating to set and crystallize fully, preventing stickiness. My recipe’s 15-minute soak is ideal for this method; it allows enough absorption without oversaturating the cranberries.
- Troubleshooting Sticky Cranberries: If, after the final drying stage, your cranberries still feel a bit sticky, don’t worry! I find a little extra drying time, perhaps another hour, or tossing them in a tiny bit more granulated sugar, usually does the trick. Sometimes humidity can play a role, so a drier environment helps.
Customization & Flavor Variations
I love experimenting with flavors, and these candied cranberries are a fantastic base for creativity! Here are some ideas I’ve tried that you might enjoy:
| Variation | How to Implement | Flavor Impact |
|---|---|---|
| Orange Zest | I add 1 tsp of orange zest to the simple syrup while simmering. | Bright, citrusy, festive |
| Spiced | I add a cinnamon stick or 1/4 tsp ground cardamom to the syrup while simmering. | Warm, aromatic, cozy |
| Vanilla | I stir 1/2 tsp vanilla extract into the cooled simple syrup before soaking cranberries. | Sweet, classic, comforting |
You can even get creative with the liquid in your syrup. Instead of just water, I’ve used apple juice or a bit of orange juice in the past for a different base flavor, though I note it can make the syrup a little stickier so adjustments might be needed for drying time.
You can find many more great ideas in our desserts & drinks category.
Troubleshooting Common Candied Cranberry Issues
I understand that sometimes things don’t go exactly as planned in the kitchen, and that’s okay! Here are some common issues I’ve encountered with candied cranberries and how I usually fix them:
- Why isn’t the sugar sticking? This is usually because the cranberries are too wet. I find they need more drying time after the simple syrup soak before being tossed in the granular sugar. Make sure you use a slotted spoon to drain off as much syrup as possible. You might also need a bit more granular sugar in the bowl for tossing.
- Why are they still sticky after cooling? This can happen for a few reasons. Maybe there wasn’t enough air circulation during the drying stages, or perhaps your kitchen is very humid. I always ensure they are spread in a single layer. Often, tossing them in a little more granulated sugar and letting them dry for an additional hour will resolve this.
- What if they’re too soft? If your cranberries turn out too soft, it’s likely they either soaked for too long in the syrup or weren’t dried enough after the syrup soak. I stick to the 15-minute soak time to keep them firm.
- “Soapy” taste issue: I’ve heard of this happening, and it’s usually due to using cranberries that are bruised or not completely fresh. Sometimes, if too much simple syrup remains on the surface and doesn’t crystallize properly, it can also contribute to an off-flavor. I always start with the freshest berries I can find.
Creative Ways to Use Your Candied Cranberries
I truly believe these candied cranberries are edible jewels that can elevate so many dishes. Here are some of my favorite ways to use them:
- Garnish Perfection: They make stunning garnishes for holiday desserts, especially cakes, pies, and cheesecakes. I also love dropping a few into festive cocktails for an extra flourish.
- Effortless Snack: I often find myself popping a few into my mouth straight from the fridge; they’re such a delightful sweet-tart treat all on their own!
- Elevate Your Cheese Boards: Their vibrant color and flavor are a fantastic addition to any festive cheese and charcuterie board.
- Pop of Flavor in Salads: I sprinkle them on green salads for a beautiful pop of color and a burst of sweet-tart flavor. They pair wonderfully with nuts and goat cheese.
- Thoughtful Gift-Giving: Packaged in pretty jars or cellophane bags, they make wonderful homemade holiday gifts for friends and family.
- Baked Goods (with a note): While the sugar coating might dissolve slightly, I have folded them into muffins, scones, or quick breads for an added burst of cranberry flavor.
Storing & Freezing Candied Cranberries for Lasting Sparkle
I want you to enjoy your beautiful candied cranberries for as long as possible! Here’s how I store them to maintain their quality and sparkle:
- Short-Term Storage: I store my candied cranberries in an airtight container, tightly covered, in the refrigerator for up to 3 days. This helps maintain their crisp coating and prevents them from getting too sticky.
- Refreshing Sticky Cranberries: If I notice they’ve absorbed some moisture and look a little wet, I simply give them another gentle toss in a tablespoon or two of fresh granulated sugar. Then, I let them air dry on a baking sheet for another hour.
- Freezing for Longer: Yes, you can freeze candied cranberries! To do this, I first arrange them in a single layer on a parchment-lined baking sheet and freeze them until solid (about 1-2 hours). Once frozen, I transfer them to an airtight, freezer-safe container or bag. This prevents them from clumping together. When I’m ready to use them, I thaw them in the refrigerator, and if they look a little wet, I give them a quick re-sugar and dry.
Scaling the Recipe: Making More (or Less!) Candied Cranberries
I find this recipe incredibly forgiving, which means it’s very easy to scale up or down depending on your needs. Whether you’re making a small batch for a weeknight dessert or a huge quantity for a holiday party, I simply maintain the ratios of ingredients.
If I want to double the recipe, I double the cranberries, water, and granulated sugar. The same goes for tripling or halving. The main considerations I have are the size of my saucepan and the number of baking sheets I’ll need for drying. Just ensure you still spread the cranberries in a single layer for optimal drying; don’t overcrowd them. You might also find that larger batches need a little extra drying time, especially in humid conditions.
FAQs About Candied Cranberries
I know you might have a few more questions, so I’ve put together some answers to common queries about candied cranberries:
Can I use frozen cranberries?
No, I strongly advise against using frozen cranberries for this recipe. They tend to release too much moisture when thawed, becoming soft and mushy, which makes it very difficult for the sugar coating to adhere properly and achieve that beautiful sparkle.
How long do candied cranberries last?
I recommend storing them tightly covered in the refrigerator for up to 3 days to maintain their best texture and sparkle. They can be frozen for longer, as I outlined above.
Can I use a different type of sugar?
For that classic sparkling look, I stick to granulated white sugar. Other sugars, like turbinado or brown sugar, won’t give you the same delicate, crystalline finish. Powdered sugar is also a different method entirely and won’t work for this specific technique.
What if my cranberries aren’t sticking well to the sugar?
This almost always means they are still too wet after the simple syrup soak. I would ensure you drain them very well with a slotted spoon and allow them to dry for a full hour, or even a bit longer, before tossing them in the granular sugar.
Are these good for baking?
While delicious, the sugar coating on these candied cranberries will likely melt and dissolve if baked into muffins, breads, or other items. They are primarily designed as a garnish or snack where their sparkling coating can be seen and enjoyed.
Can I make these ahead of time for a party?
Absolutely! These are a fantastic make-ahead treat. Since they store well in the refrigerator for up to 3 days, I often prepare them a day or two before an event.
Your Holiday Table Awaits!
I truly hope you feel inspired to bring the magic of these sparkling candied cranberries into your kitchen! They are such a simple joy to create, and their dazzling appearance and delightful sweet-tart flavor instantly elevate any occasion. From garnishing festive desserts to simply being a delightful snack, I know you’ll find countless ways to enjoy them.
As cranberries are a good source of vitamin C, these candied cranberries can be a tasty and nutritious treat.
I always love hearing from you! Please leave a comment below and let me know your favorite way to use these beautiful berries. Do you have any questions I didn’t cover, or perhaps a creative idea for a flavor variation? Share your results with the Gather And Cook community; I can’t wait to see your sparkling creations!
Bring the magic home! Follow us on Pinterest for simple, elegant recipes that make every celebration shine.

Amazing Candied Cranberries Recipe That Sparkles
Ingredients
Equipment
Method
- Place the cranberries in a medium heat-safe bowl. I usually just set them aside on my counter for a moment while I prepare the syrup.
- In a medium saucepan set over medium heat, bring the water and 3/4 cup (150g) of sugar to a simmer. I whisk continuously until the sugar has completely dissolved, then I remove the pan from the heat and let it cool for 5 minutes.
- Pour the sugar syrup over the cranberries and stir gently to ensure they are all coated. I cover the bowl and set it aside for 15 minutes, allowing the cranberries to soak up that sweet goodness.
- Line a baking sheet with parchment paper or a silicone baking mat. Using a slotted spoon, I carefully transfer the cranberries from the sugar syrup and spread them in a single layer on the prepared baking sheet. I allow them to dry, uncovered, for 1 hour. They will be quite sticky at this point, but that’s perfectly normal!
- Pour the remaining 1/2 cup (100g) sugar into a large bowl. I gently toss the sticky cranberries in the sugar, ensuring they are coated all the way around. Then, I return the sugared cranberries to the lined baking sheet and let them dry, uncovered, for at least 1 hour at room temperature or in the refrigerator.
- I like to use these immediately for the freshest sparkle, but you can store them, tightly covered, in the refrigerator for up to 3 days. If I notice they start to look a little wet, I just toss them in a little more sugar to refresh them.