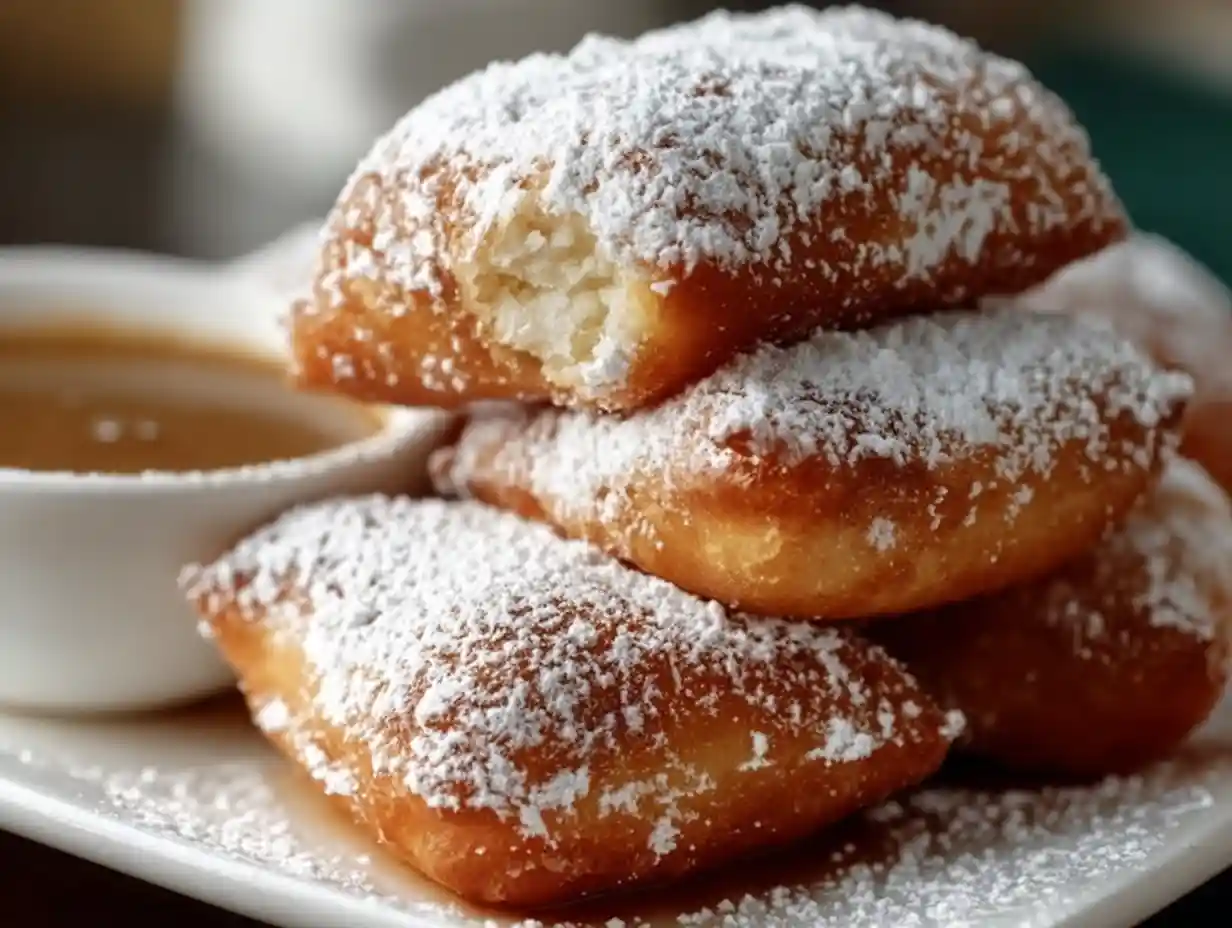

Oh, darling friends, welcome to my kitchen at Gather and Cook! I am so thrilled you’re here today because I’m about to share a recipe that truly makes my heart sing. Imagine a little cloud of heaven, pillowy soft, kissed with the sweet essence of vanilla, and dusted generously with powdered sugar. That’s exactly what I’m talking about when I describe these irresistible Vanilla French Beignets.
I promise you, making these delightful treats at home is a joy, and the aroma alone will make your entire house feel warm and inviting. This recipe guides you through creating perfect results with under an hour of active time, and just over two hours from start to finish. Get ready to fall in love with homemade Vanilla French Beignets!
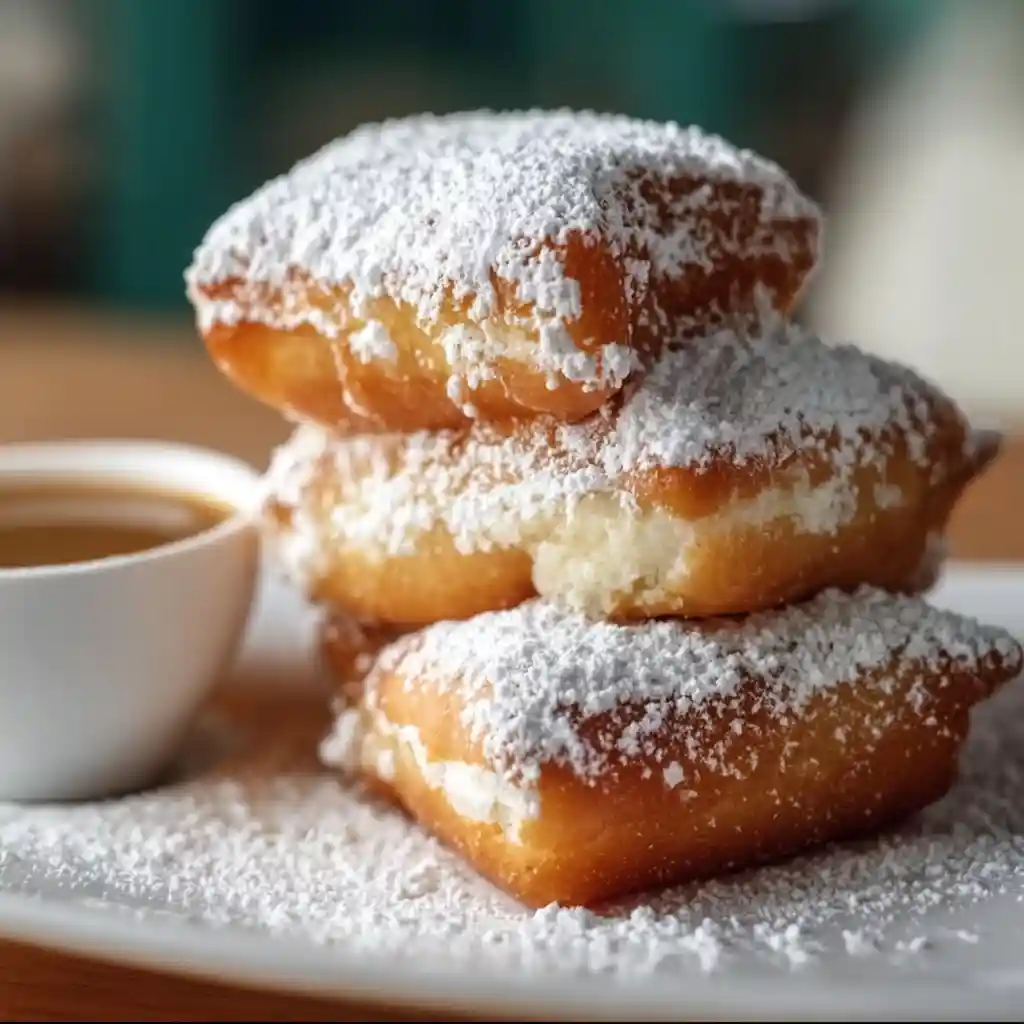
Table of Contents
French vs. New Orleans Beignets: A Sweet Clarification
When I talk about beignets, many people immediately picture those iconic square, powdered sugar-dusted treats from New Orleans. And honestly, they’re often what I’m dreaming of too! However, I think it’s lovely to understand their sweet heritage. True “French Beignets” are traditionally more varied, often round and sometimes even filled, similar to what you might know as ‘boules de Berlin’.
New Orleans, with its rich French history, adopted this delicious tradition and made it its own. They perfected the art of the square, fluffy fried dough, serving it piping hot and piled high with powdered sugar. My recipe for Vanilla French Beignets takes that beloved New Orleans style, infusing it with a truly special vanilla flavor, while still acknowledging its deeply rooted French origins. I know you’ll adore this vanilla-forward spin.
Why You’ll Love These Vanilla French Beignets
I truly believe this recipe will become a cherished one in your kitchen, just as it has in mine. Here’s why I think these Vanilla French Beignets stand out:
- Effortlessly Delicious: While they might seem fancy, I promise you, I’ve designed this recipe to be straightforward and rewarding, even if you’re new to working with yeast dough.
- Unforgettable Vanilla Flavor: I don’t hold back on the vanilla here! The generous amount of vanilla extract ensures every bite is fragrant and wonderfully sweet, setting these apart from plainer versions.
- Perfectly Pillowy Texture: Thanks to enriched dough and careful rising, these beignets fry up incredibly light and airy, melting in your mouth with every bite.
- A Touch of Nostalgia: There’s something so comforting about a warm, homemade treat. These beignets bring that cozy, joyful feeling right to your table, reminiscent of happy mornings and sweet indulgence.
Essential Equipment for Perfect Vanilla French Beignets
Having the right tools can make all the difference, especially when you’re working with dough and hot oil. I rely on a few key pieces of equipment to make my Vanilla French Beignets absolutely perfect:
- Stand Mixer with Paddle Attachment: This is a huge help for beating the butter and sugar, and then for bringing the dough together. It saves your arms and ensures a consistently smooth dough.
- Large, Greased Bowl: Essential for the dough’s first rise, giving it plenty of room to expand comfortably.
- Plastic Wrap: I use this for covering the dough during both rises, creating a warm, humid environment for optimal puffiness.
- Rolling Pin: You’ll need this to roll out the dough evenly before cutting your beignet rounds.
- 3″ Biscuit Cutter: This is my secret to perfectly uniform, round beignets, ensuring they cook evenly.
- Parchment Paper-Covered Baking Sheet: Great for resting your cut beignets and for easy transfer to the hot oil.
- Deep Heavy-Bottomed Pot or Dutch Oven: Crucial for safe, even frying. The heavy bottom helps maintain a consistent oil temperature.
- Candy Thermometer or Deep-Fry Thermometer: I consider this non-negotiable! Maintaining the correct oil temperature (350°F) is the key to golden, non-greasy beignets.
- Spider or Slotted Spoon: Perfect for safely adding and removing the beignets from the hot oil.
- Paper Towel-Lined Plate: Essential for draining excess oil from your freshly fried beignets.
- Fine-Mesh Sieve: My favorite tool for dusting powdered sugar evenly over the warm beignets, giving them that signature snowy look.
Ingredients for Your Pillowy Vanilla French Beignets
Gathering all your ingredients before you start is one of my top tips for smooth cooking. Here’s exactly what you’ll need for these delightful Vanilla French Beignets:
- 2.25 tsp active dry yeast
- 3/4 cup milk, warmed to 105°F
- 1 whole egg
- 1 egg yolk
- 3/4 cup granulated sugar
- 2 tbsp unsalted butter, softened
- 1.5 tsp vanilla extract
- 1/2 tsp kosher salt
- 3 cups all-purpose flour, plus more for dusting
- 2 cups vegetable oil, for frying
- powdered sugar, for sprinkling on top
Crafting Your Irresistible Vanilla French Beignets: Step-by-Step Instructions
I find that breaking down a recipe into clear steps makes it so much more approachable. Here’s how I make my favorite Vanilla French Beignets, one joyful step at a time!
Activate the Yeast
In a small bowl, I add the dry yeast and the warm milk. I give it a light stir, then I let the mixture rest for 10 minutes. You’ll see it get a little foamy, which means your yeast is happy and ready to work!
Prepare the Enriched Dough
In the bowl of a stand mixer fitted with the paddle attachment, I beat the softened butter and sugar together until light and fluffy, which usually takes about 2 minutes. Then, I add the yeast mixture, the egg and egg yolk, salt, and vanilla extract. I turn the mixer onto low to combine everything well. While the mixer is running, I slowly add the flour in. I mix until I get a smooth dough.
First Rise: Developing Flavor and Texture
I grab the dough and shape it into a smooth round. Then, I place the dough in a large, greased bowl and cover it with a sheet of plastic wrap. I let the dough rest in a warm place for approximately 1 hour, until it’s slightly expanded in size. This slow rise is key for flavor!
Shaping Your Beignets
I turn the dough out onto a lightly floured surface and roll the dough out into a 1/4″ thick oval or rectangle. I use a 3″ biscuit cutter to cut out rounds from the dough. I place these rounds on a parchment paper-covered baking sheet. Then, I cover them loosely with a sheet of plastic wrap and let the rounds rest for 30 minutes. This second short rise helps them get extra puffy.
Heating the Frying Oil
I heat the oil in a saucepan until it’s either 350°F, or a scrap of dough dropped in the oil immediately starts to bubble. A thermometer is truly your best friend here for consistent results.
Frying to Golden Perfection
I add the dough rounds in, 2 or 3 at a time maximum, ensuring I don’t overcrowd the pot. I fry each side until it’s golden brown. This usually takes just a minute or two per side. Then, I transfer the fried beignets to a paper towel-lined plate to drain.
Dust and Serve Warm
Once they’re no longer hot but instead just warm, I dust them generously with powdered sugar and serve immediately. There’s truly nothing better than a fresh, warm beignet!
Mastering the Dough: Tips for Light & Fluffy Beignets
Working with yeast dough can feel a little intimidating at first, but I promise, with a few tips, you’ll be a pro in no time! The secret to truly light and fluffy Vanilla French Beignets lies in mastering the dough.
Ensuring Active Yeast
When you combine your yeast with warm milk, I always look for visual cues. Within about 5-10 minutes, you should see a foamy, bubbly layer forming on top. This is your yeast waking up! If you don’t see any foam, your yeast might be old, or your milk wasn’t the right temperature. I recommend discarding it and starting again with fresh yeast and properly warmed milk (around 105°F is perfect, feeling like warm bath water).
Kneading Perfection
My recipe uses a stand mixer, which does most of the kneading for you. You’ll know the dough is sufficiently kneaded when it looks smooth and elastic, and is no longer sticking aggressively to the sides of the bowl.
A great test is the “windowpane test”: tear off a small piece of dough, and gently stretch it with your fingers. If you can stretch it thin enough to see light through it without it tearing, your dough is perfectly kneaded!
Optimal Rising Conditions
Yeast loves warmth and hates drafts! I always find a cozy spot for my dough to rise. Ideas include a slightly warm oven (turned off, of course, with just the light on), a sunny spot on the counter, or even near a warm stove.
If your dough doesn’t seem to be rising, it could be that the room is too cold, your yeast wasn’t active, or the dough wasn’t kneaded enough. Patience is also a virtue here; sometimes dough just needs a little more time.
Handling Enriched Dough
This dough is enriched with butter and eggs, which makes it incredibly flavorful but also a bit softer and stickier than a basic bread dough. Don’t be afraid to use a light dusting of flour on your work surface and hands when you’re rolling and cutting.
The key word is light; too much flour can make your beignets tough, so I use just enough to prevent sticking.
The Art and Science of Frying Perfect Beignets
Frying might seem daunting, but it’s really an art and a science that I’ve learned to love. The right technique makes all the difference for those golden, airy Vanilla French Beignets!
Choosing the Right Oil
For frying, I always reach for neutral-flavored oils with a high smoke point. Vegetable oil, canola oil, or peanut oil are all excellent choices for these beignets.
They won’t impart any unwanted flavors, and they can handle the heat needed for frying without smoking or breaking down too quickly. I tend to stick with vegetable oil because I usually have it on hand.
Temperature Control is Key
I cannot stress enough how important consistent oil temperature is. I aim for a steady 350°F. If your oil is too hot, your beignets will brown quickly on the outside but remain raw and doughy in the center.
If the oil is too cool, your beignets will absorb too much oil, becoming greasy and heavy. I adjust the heat frequently as I fry, using my thermometer as a guide. Don’t worry if it fluctuates a little, just try to bring it back to that sweet spot.
Frying Cues & Preventing Greasiness
I look for a beautiful golden-brown color on each side, and I know my beignets are done when they puff up wonderfully in the oil. To prevent them from becoming greasy, I make sure not to overcrowd the pot; frying just 2 or 3 at a time helps maintain oil temperature.
And always, always transfer them directly to a paper towel-lined plate after frying. The paper towels do an amazing job of wicking away any excess oil.
Vanilla Variations & Flavor Twists
While my Vanilla French Beignets are perfect as is, I love exploring variations! Vanilla itself has so much depth, and there are endless ways to play with toppings and fillings.
A Deep Dive into Vanilla
For maximum flavor in these beignets, I truly recommend using a high-quality vanilla extract. You can also experiment with other forms:
- Vanilla Extract: My go-to, offers a lovely, classic vanilla flavor.
- Vanilla Bean Paste: This provides little flecks of vanilla bean and a more intense, complex vanilla aroma and taste. I might use this if I’m feeling extra fancy!
- Vanilla Bean: For the absolute purest vanilla experience, you can scrape the seeds from half a vanilla bean into your dough. This adds unparalleled depth, though it’s the most expensive option.
Vanilla is more often used because it’s a flavor enhancer. It complements and mellows, balancing sharper notes and contributing a sweet and floral flavor.
Beyond Powdered Sugar: Creative Toppings and Fillings
Sometimes I like to dress up my beignets a little more. Here are some of my favorite ways to add extra magic:
| Variation Type | Ideas | Notes |
|---|---|---|
| Fillings | Pastry Cream, Raspberry Jam, Lemon Curd, Chocolate Ganache | I inject these into cooled beignets using a piping bag fitted with a long, thin tip. It’s like a surprise in every bite! |
| Glazes | Simple Vanilla Glaze (powdered sugar + milk + vanilla), Coffee Glaze, Cinnamon Sugar | I either dip warm beignets into a glaze or drizzle it over them. For cinnamon sugar, I toss them while still warm. |
| Toppings | Cinnamon Sugar, Chopped Nuts, Chocolate Shavings | I sprinkle these over freshly dusted beignets for added texture and flavor. |
Pro Tips & Troubleshooting Common Beignet Issues
I’ve learned a few things over the years that help me achieve perfect beignets every time, and I’ve also run into my fair share of hiccups! Here are my best tips and how I troubleshoot common issues:
- Beignets Not Puffing Up: This is often a sign that your yeast wasn’t active, your milk was too hot (killing the yeast), or your dough wasn’t allowed enough time to rise in a warm spot. Make sure your yeast is fresh and your rising environment is cozy.
- Beignets Absorbing Too Much Oil/Being Greasy: This almost always means your oil temperature was too low. The beignets sat in the oil instead of quickly frying and forming a crispy crust. Use that thermometer! Also, ensure you’re not overcrowding the pot, as that can drop the oil temp.
- Tough Dough: Over-flouring your dough during mixing or when rolling it out can lead to tough beignets. I only use enough flour to prevent sticking. Also, overworking the dough excessively can develop too much gluten, making it less tender.
- Uneven Frying: This is usually due to inconsistent oil temperature. Make sure your pot isn’t too crowded, and check your thermometer between batches.
- Flavor Boost: Don’t skip the vanilla extract! It makes these Vanilla French Beignets truly special. I sometimes even add a tiny pinch of freshly grated nutmeg to the dough for an extra layer of warmth.
- Don’t Overcrowd: It’s worth repeating: frying too many beignets at once drops the oil temperature and leads to greasy, unevenly cooked results. Work in small batches, I promise it’s worth the extra time.
What to Serve with Your Vanilla French Beignets
While a mountain of powdered sugar is a classic pairing, I love to think about what drinks and accompaniments truly elevate these Vanilla French Beignets.
My absolute favorite is a steaming mug of strong Café au Lait. The rich, dark coffee with warm milk is the perfect counterpoint to the sweet, ethereal beignets.
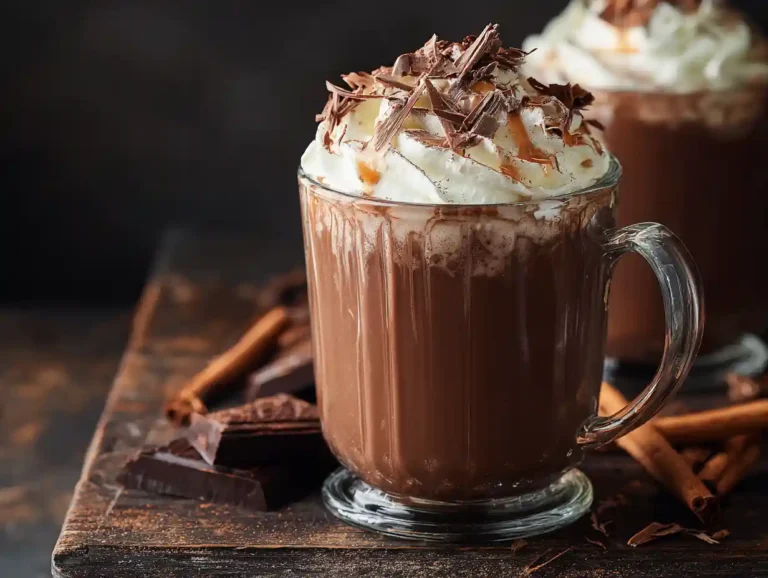
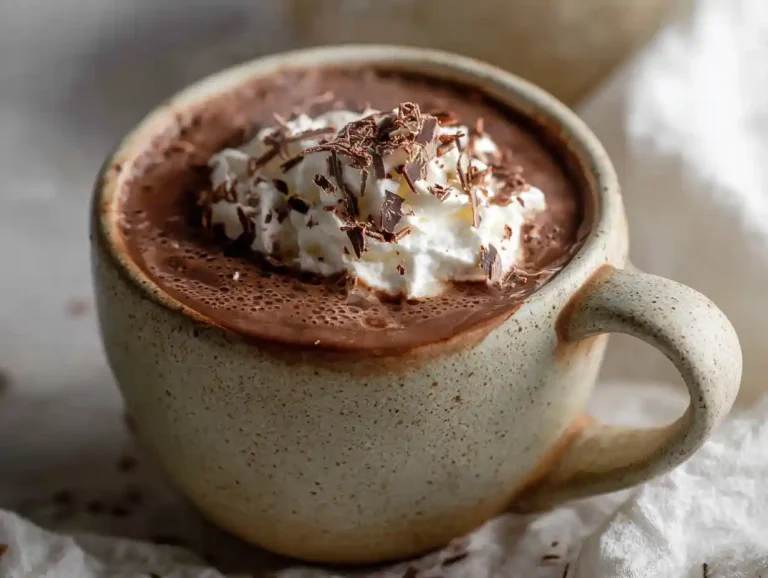
A cup of Mexican hot chocolate, with its hint of cinnamon and chili, also creates a delightful pairing, adding a cozy warmth.
For tea lovers, I find a robust Earl Grey or a fragrant chai tea complements the vanilla beautifully. If I’m feeling particularly indulgent, and perhaps serving these for a special brunch, I’ve even enjoyed them with a small glass of a light, sparkling dessert wine.
Storage and Make-Ahead Tips
Let’s be honest, fresh beignets are best! However, I understand that sometimes you want to prepare ahead or find yourself with a few delightful leftovers.
I find that fried beignets are truly at their peak when served warm, shortly after frying. If you do have leftovers, I recommend storing them in an airtight container at room temperature for up to a day. They won’t be quite as pillowy, but they’re still delicious.
To reheat, I like to pop them in a 300°F oven for about 5-7 minutes, just until warmed through, then dust with fresh powdered sugar.
For making ahead, you can absolutely prepare the dough the night before. After the first rise, instead of rolling and cutting, simply punch the dough down gently, reshape it into a ball, and place it back in the greased bowl.
Cover it tightly with plastic wrap and refrigerate overnight. The next morning, let the dough sit at room temperature for about 30-45 minutes to take off the chill, then proceed with shaping, the second rise, and frying as directed. This makes entertaining so much easier!
FAQs About Vanilla French Beignets
What’s the difference between a donut and a beignet?
While both are delicious fried dough, I see them as distinct! Donuts are typically leavened with yeast or baking powder and come in various shapes, often with a hole in the middle or filled. Beignets, especially the New Orleans style my recipe emulates, are almost always yeast-leavened dough, traditionally square, and fried until puffy and golden, then generously dusted with powdered sugar. My Vanilla French Beignets offer a round, pillowy take on this classic.
What do Vanilla French Beignets taste like?
Imagine a soft, airy cloud with a delicate crispness on the outside, a rich, sweet, and comforting vanilla flavor throughout, and a wonderfully light texture. They aren’t overly sweet beneath all that powdered sugar, allowing the vanilla and rich dough to shine.
Can I make these beignets ahead of time?
Absolutely! I suggest preparing the dough through its first rise, then punching it down, covering it tightly, and refrigerating it overnight. The next day, let it come to room temperature for about 30-45 minutes before rolling, cutting, and proceeding with the second rise and frying.
How long do beignets last, and how should I store them?
Vanilla French Beignets are definitely best enjoyed fresh and warm, right after frying. If you have any leftovers, I recommend storing them in an airtight container at room temperature for up to one day. Reheating them gently in a warm oven can help refresh them a bit.
Can I freeze the beignet dough?
Yes, you can! After the first rise, I like to punch down the dough, form it into a disk, and wrap it tightly in plastic wrap, then place it in a freezer-safe bag. It can be frozen for up to 2-3 weeks. When you’re ready to use it, thaw the dough overnight in the refrigerator, then let it come to room temperature for about an hour before proceeding with shaping and the second rise.
Why didn’t my beignets puff up properly when frying?
If your beignets aren’t puffing, I would first check your yeast. Was it active and foamy when mixed with the milk? Also, make sure your oil temperature is correct (350°F). If the oil is too cool, they’ll be dense, not puffy. Lastly, ensure your dough had enough time for both rises in a warm, draft-free spot.
Can I use a different type of milk in this recipe?
I use whole milk for its richness, but I’ve had success with 2% milk as well. I haven’t tested this recipe with non-dairy milks, but if you’re comfortable with substitutions, I would suggest a full-fat non-dairy milk like oat or soy for the best texture.
Can I fill these beignets with other sweet treats?
Oh, absolutely! That’s one of my favorite ways to get creative. Once your beignets are fried and cooled, you can use a piping bag with a long, thin tip to inject them with things like pastry cream, raspberry jam, lemon curd, or even a luscious chocolate ganache.
Conclusion
I truly hope you’ve enjoyed this journey into making homemade Vanilla French Beignets with me. There’s such a unique satisfaction that comes from creating something so utterly delicious from scratch, especially when it fills your home with such a beautiful aroma. These pillowy, vanilla-scented delights are perfect for a special breakfast, a cozy brunch, or simply a sweet treat to brighten any day. You might also like this recipe for Amazing Vanilla Magic Custard Cake Recipe.
I would absolutely love to hear about your beignet-making adventures! Please leave a comment below and tell me how they turned out, if you tried any variations, or if you have any questions. Don’t forget to share pictures of your delicious creations; it always makes my day to see what you’re cooking up in your kitchens. Pull up a chair, and let’s keep gathering and cooking!
Also, these beignets would be a welcome addition to any brunch, so check out our other breakfast and brunch recipes for more inspiration. If you’re more of a sweets person, then you might also like this recipe for The Ultimate Apple Cheesecake Buns With Crumble Topping.
Follow us on Pinterest for more irresistible French-inspired desserts, cozy brunch recipes, and sweet treats to make every day feel special!

Amazing Vanilla French Beignets: Easy Recipe!
Ingredients
Equipment
Method
- In a small bowl, I add the dry yeast and the warm milk. I give it a light stir, then I let the mixture rest for 10 minutes. You’ll see it get a little foamy, which means your yeast is happy and ready to work!
- In the bowl of a stand mixer fitted with the paddle attachment, I beat the softened butter and sugar together until light and fluffy, which usually takes about 2 minutes. Then, I add the yeast mixture, the egg and egg yolk, salt, and vanilla extract. I turn the mixer onto low to combine everything well. While the mixer is running, I slowly add the flour in. I mix until I get a smooth dough.
- I grab the dough and shape it into a smooth round. Then, I place the dough in a large, greased bowl and cover it with a sheet of plastic wrap. I let the dough rest in a warm place for approximately 1 hour, until it’s slightly expanded in size. This slow rise is key for flavor!
- I turn the dough out onto a lightly floured surface and roll the dough out into a 1/4″ thick oval or rectangle. I use a 3″ biscuit cutter to cut out rounds from the dough. I place these rounds on a parchment paper-covered baking sheet. Then, I cover them loosely with a sheet of plastic wrap and let the rounds rest for 30 minutes. This second short rise helps them get extra puffy.
- I heat the oil in a saucepan until it’s either 350°F, or a scrap of dough dropped in the oil immediately starts to bubble. A thermometer is truly your best friend here for consistent results.
- I add the dough rounds in, 2 or 3 at a time maximum, ensuring I don’t overcrowd the pot. I fry each side until it’s golden brown. This usually takes just a minute or two per side. Then, I transfer the fried beignets to a paper towel-lined plate to drain.
- Once they’re no longer hot but instead just warm, I dust them generously with powdered sugar and serve immediately. There’s truly nothing better than a fresh, warm beignet!