
There’s something truly special about the smell of a homemade dessert baking in the oven. It fills the kitchen with warmth and promise, immediately making any house feel like a home.
For me, an Apple Cobbler Recipe is one of those timeless, comforting treats that always brings a smile. It’s a simple pleasure that reminds me of childhood kitchens and bustling family gatherings. This particular recipe is a family favorite for a reason; it’s incredibly easy to make, yet delivers an irresistible flavor that tastes like pure joy.
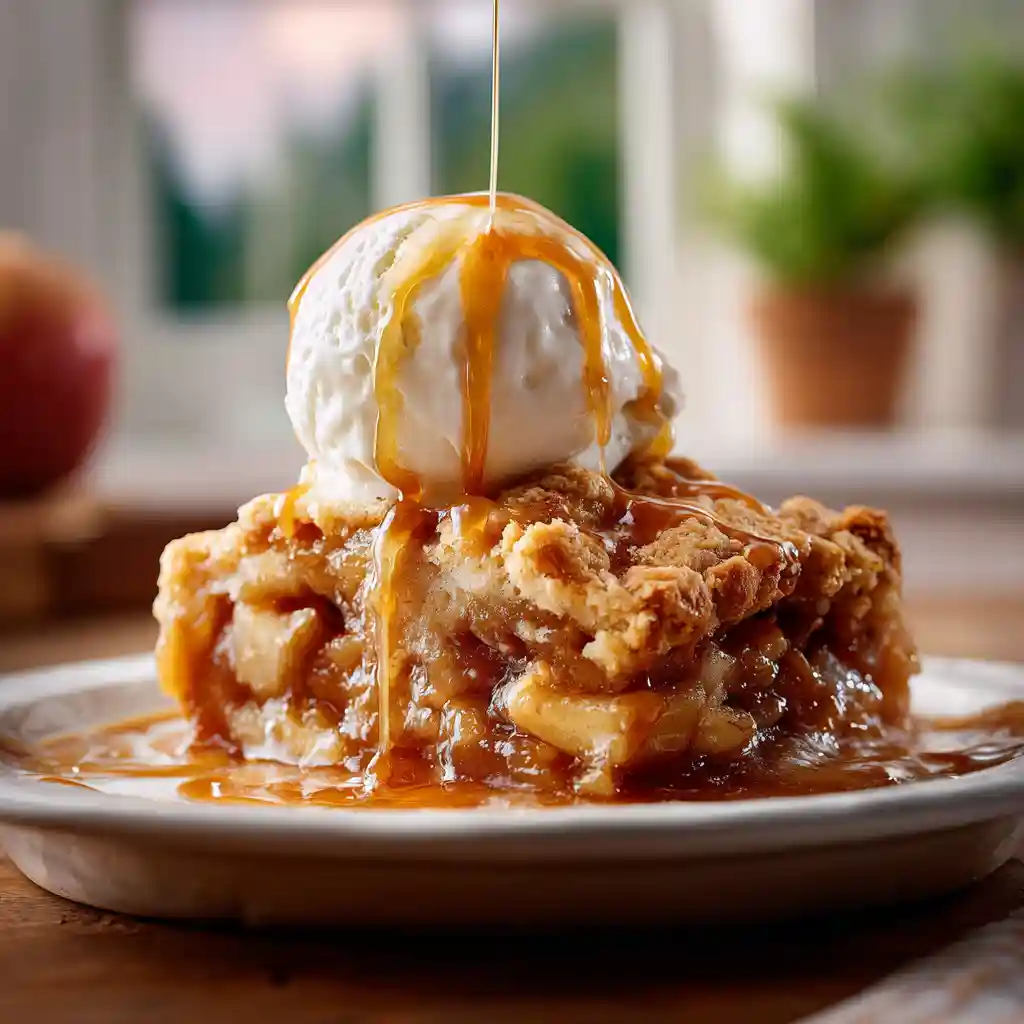
With a total prep and bake time that’s wonderfully achievable, you can whip up this cozy dessert for any occasion, big or small.
Table of Contents
Why You’ll Love This Apple Cobbler Recipe
I truly believe this Apple Cobbler Recipe will become a staple in your home, just as it is in mine. One of the main reasons I adore it is the perfectly tender apples, which come from a little pre-cooking step that makes all the difference.
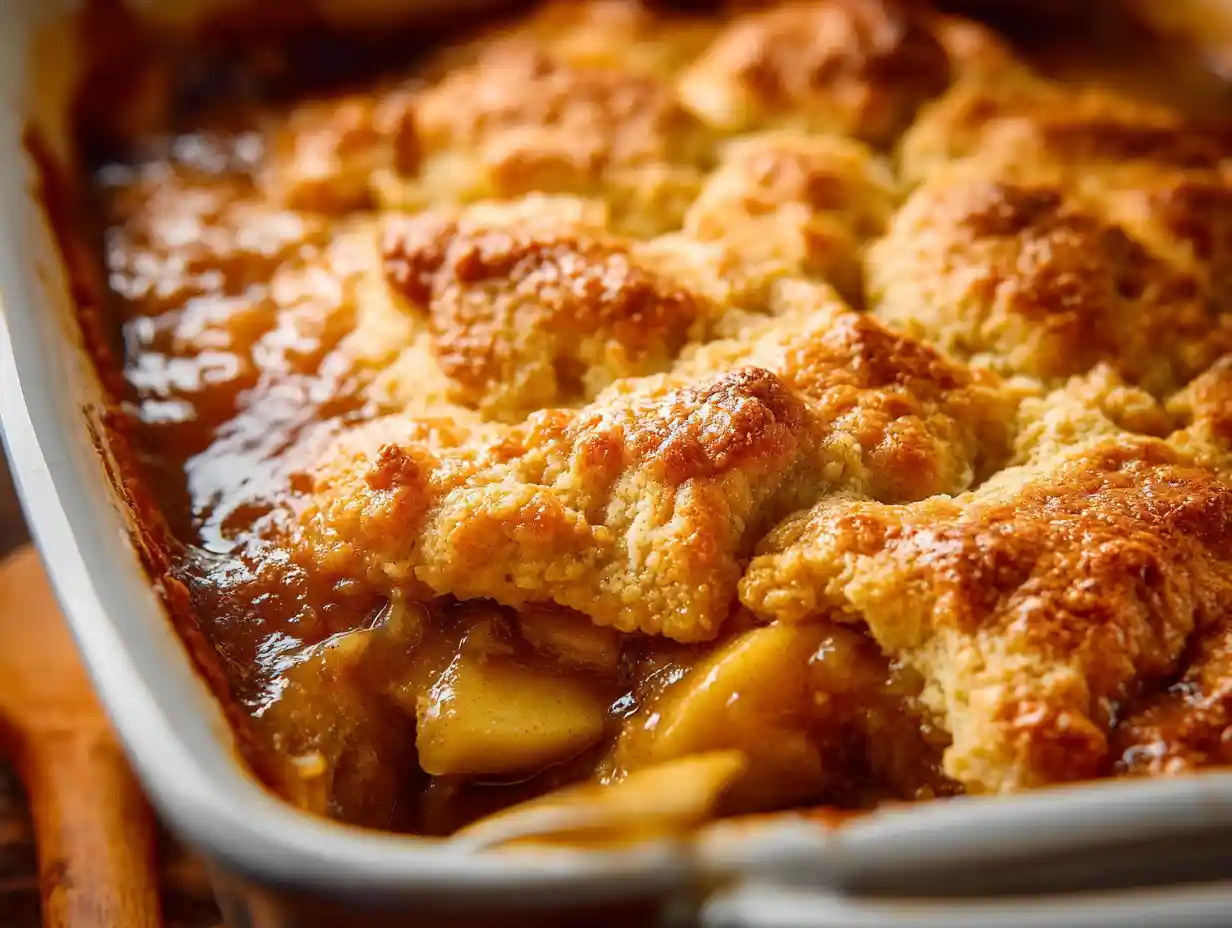
You will never have crunchy apples in a soft cobbler again, I promise! The topping is another highlight; it’s a comforting, cake-like layer that’s golden and fluffy, not crumbly, providing the perfect contrast to the sweet, spiced fruit underneath.
This recipe is also incredibly forgiving and much easier than tackling a traditional apple pie, making it perfect for bakers of all skill levels. Plus, the aroma alone as it bakes will make your kitchen the happiest place in the house. It’s simply a bowl of warm, spiced, apple goodness, ready to be shared with those you love.
Apple Cobbler vs. Apple Crisp: What’s the Difference?
When I talk about cobblers, I often get asked how they differ from crisps or crumbles. It’s a great question, and understanding the distinction really helps appreciate each dessert! The main difference lies in the topping.
A cobbler, like this Apple Cobbler Recipe, typically features a biscuit, scone, or cake-like topping that’s dropped or spread over the fruit. As it bakes, it creates a lovely, slightly irregular, “cobbled” appearance, hence the name.
An apple crisp, on the other hand, is characterized by a streusel-like topping. This topping usually contains oats, flour, butter, and sugar, which bakes into a delightful, well, crispy layer.
Both are delicious ways to enjoy baked fruit, but I personally love the soft, comforting texture of a cobbler topping with juicy apples. If you enjoy the taste of cobbler, you may also enjoy these easy incredible peach cobbler cookies.
The Best Apples for Your Apple Cobbler Recipe
Choosing the right apples is key to a fantastic Apple Cobbler. For baking, I always reach for varieties that hold their shape well and offer a good balance of sweetness and tartness. Granny Smith apples are a classic choice for me because their tartness provides a wonderful contrast to the sweet filling and they maintain their structure beautifully.
Golden Delicious apples are another excellent option, offering a milder sweetness and still holding up well to baking. Sometimes I even mix varieties to get a more complex flavor!
As for peeling, I always peel my apples for cobbler; it ensures a smoother, more tender texture in the filling that I find more appealing. According to the Harvard School of Public Health, one medium apple contains about 25 grams of carbohydrates, and are a good source of natural sugars.
Pre-Cooking the Apples: The Secret to a Perfect Filling
I cannot stress enough how important this step is for achieving the best Apple Cobbler. Pre-cooking the apples is my secret weapon! First, it ensures that your apples are perfectly tender throughout the cobbler, rather than being crunchy or unevenly cooked. This process also helps to release some of the apple’s natural juices and concentrate their flavor, making for a richer, more vibrant filling.
Crucially, pre-cooking prevents a watery filling. By simmering the apples with the cornstarch, the juices thicken beautifully before they even go into the oven.
If I were to skip this step, I would risk having apples that are too firm and a runny, lackluster filling, which is certainly not what I want in my cobbler! Consider making this delicious apple spice cake too.
Gather Your Ingredients
Making this Apple Cobbler Recipe starts with gathering all your wonderful ingredients. It makes the whole process so much smoother, I find. Here is exactly what you will need:
- 6 medium apples (Granny Smith, Golden Delicious, or other good baking apple), peeled and sliced ¼ inch thick
- 1 cup water (or apple juice)
- 1/3 cup brown sugar, packed
- 1 Tablespoon cornstarch
- 1 Tablespoon lemon juice
- 1/2 teaspoon vanilla extract
- 1 teaspoon ground cinnamon
- 1/2 teaspoon ground nutmeg
- 1/8 teaspoon salt
- 1 cup all-purpose flour
- 1 cup granulated sugar
- 2 teaspoons baking powder
- 1/4 teaspoon salt
- 3/4 cup milk
- 5 Tablespoons butter, melted
- ground cinnamon for topping
Step-by-Step Instructions for the Best Apple Cobbler
With just about 15 minutes of prep time and around 40 minutes of baking, you’ll have a delicious Apple Cobbler ready to enjoy. Follow these simple steps for perfection:
- Preheat the oven to 350°F and grease a 9×13 inch pan lightly with cooking spray.
- Stir together brown sugar, water, cornstarch, lemon juice, vanilla, cinnamon, nutmeg, and salt together in a saucepan. Stir in apples. Cook over medium heat for 3-5 minutes, stirring.
- Pour mixture into prepared pan.
- In a large bowl mix together the flour, sugar, baking powder, and salt. Stir in the milk and melted butter, just until combined.
- Pour the mixture over the apples in the pan. Sprinkle lightly with cinnamon.
- Bake for about 38-40 minutes or until a toothpick inserted into the topping comes out clean.
- Allow to cool for at least 15 minutes before serving. Serve warm with vanilla ice cream, if desired.
- Cover and store leftovers in the refrigerator for up to 4 days.
Essential Equipment You’ll Need
Having the right tools always makes baking a joy, not a chore. For this Apple Cobbler Recipe, I find these items indispensable:
- 9×13 inch baking dish: This is the perfect size for this recipe, ensuring even baking and enough delicious cobbler for everyone.
- Saucepan: You will need a medium-sized saucepan for pre-cooking the apples.
- Large mixing bowls: One for the apple filling and another for the topping ingredients.
- Measuring cups and spoons: Accuracy is important in baking, so I always have a full set handy.
- Whisk: Essential for combining the dry ingredients and ensuring a smooth batter for the topping.
- Paring knife or apple peeler: For preparing those beautiful apples.
Tips for Apple Cobbler Perfection
I love helping you achieve baking success, so here are a few extra tips for your Apple Cobbler. To get that perfect golden-brown topping, keep an eye on it during the last 10 minutes of baking. If it starts browning too quickly, you can loosely tent the dish with foil. This cake-like topping will be light golden and slightly puffed when ready.
Beyond the toothpick test, I also look for the fruit filling bubbling up around the edges of the pan. This indicates that the apples are tender and the filling has fully thickened.
The topping itself should be firm to the touch in the center, not wobbly. Trust me, these little details make all the difference! Be sure to check out our other delicious desserts & drinks too.
Apple Cobbler Variations & Flavor Enhancements
I love how versatile this Apple Cobbler Recipe is, allowing for all sorts of delicious tweaks. Here are some of my favorite ways to change things up and enhance the flavors:
| Variation/Enhancement | Description |
|---|---|
| Other Fruits | Add 1/2 cup fresh or frozen cranberries, blueberries, or sliced pears to the apple mix for new flavors. |
| Spice Variations | Introduce 1/4 teaspoon ground ginger, a pinch of cardamom, or allspice for added aromatic depth. |
| Nut Additions | Fold 1/2 cup toasted pecans or walnuts into the apple filling or sprinkle over the topping before baking. |
| Alcoholic Additions | Stir 1-2 Tablespoons of bourbon, rum, or apple brandy into the apple filling for a sophisticated kick. |
Ingredient Substitutions for Your Apple Cobbler
Sometimes, I need to make a few adjustments to fit dietary needs or just what I have on hand. Here are some common substitutions that work well for this Apple Cobbler Recipe:
| Ingredient | Substitution | Impact on Outcome |
|---|---|---|
| All-purpose flour | Use a 1:1 gluten-free baking flour blend (ensure it contains xanthan gum). | Texture might be slightly different, but generally good results. |
| Milk | Any dairy-free milk alternative (almond, soy, oat). | Flavor might subtly change depending on the milk chosen; texture generally unaffected. |
| Butter | Dairy-free butter substitute (melted). | Ensure it’s a good quality baking substitute for best flavor and texture. |
| Granulated sugar | Maple syrup, agave, or other granular sugar alternatives. | Adjust liquid content if using liquid sweeteners; texture and sweetness may vary. |
Make-Ahead, Storage, and Reheating Instructions
I often find myself wanting to get ahead with baking, or making sure leftovers are just as good! You can assemble this Apple Cobbler Recipe up to 24 hours in advance. Simply prepare the apple filling and topping batter, assemble it in the pan, cover it tightly with plastic wrap, and refrigerate. When you’re ready to bake, remove it from the fridge while the oven preheats, then bake as directed, adding a few extra minutes if necessary.
For storing leftovers, I always cover the cooled cobbler tightly with plastic wrap or foil and keep it in the refrigerator for up to 4 days. To reheat, I prefer the oven; cover it loosely with foil and bake at 300°F for about 15-20 minutes, or until warmed through. If I’m just reheating a single serving, a quick minute or two in the microwave works perfectly, though the topping might be a little softer.
Troubleshooting Common Apple Cobbler Issues
I know baking can sometimes throw a curveball, so I want to address some common issues you might encounter with your Apple Cobbler Recipe:
- “Why is my cobbler topping soggy?” This usually happens if the apples release too much liquid or if the topping is undercooked. My pre-cooking step largely prevents this. Make sure your oven is at the correct temperature and bake until the topping is golden and firm.
- “Why are my apples not soft enough?” This often comes from skipping the pre-cooking step or using apples that are too firm to begin with. Ensure your apples are sliced thinly, about ¼ inch, and cook them for the full 3-5 minutes before baking.
- “Why is my topping too dry/tough?” Overmixing the topping batter can develop the gluten too much, leading to a tough texture. Mix just until combined, no more. Also, be sure to measure your flour accurately.
- “How to prevent apples from sinking?” Because I pre-cook the apples and the topping is a thicker batter, sinking isn’t usually an issue with this recipe. If you’re adapting it, ensuring your apples are not too heavy or your topping batter is thick enough helps.
FAQs about Apple Cobbler
I get a lot of questions about making the perfect Apple Cobbler, so I’ve compiled some of the most common ones here for you!
What size pan is best for this recipe?
I specifically designed this Apple Cobbler Recipe for a 9×13 inch baking pan, which is a standard size that works wonderfully.
Can I halve this Apple Cobbler recipe?
Absolutely! You can easily halve all the ingredients and bake it in an 8×8 inch square baking dish. The baking time might be slightly reduced, so I would start checking for doneness around 30 minutes.
Can I freeze this dessert (baked or unbaked)?
Yes, you can! For baked cobbler, let it cool completely, then wrap it tightly in plastic wrap and then foil. It will last for up to 2-3 months. For unbaked, assemble it, wrap it well, and freeze for up to 1 month. Thaw in the refrigerator overnight before baking.
How long does homemade apple cobbler last?
Once baked, your homemade Apple Cobbler will last for up to 4 days in the refrigerator when covered tightly.
Serving Suggestions for Your Homemade Apple Cobbler
While this Apple Cobbler Recipe is absolutely divine on its own, I love to elevate it with a few simple serving suggestions. My ultimate favorite is a generous scoop of cold vanilla ice cream melting over the warm, spiced apples. The contrast in temperature and creaminess is just heavenly!
Another delightful option is a dollop of freshly whipped cream, perhaps with a touch of cinnamon or vanilla. For an extra touch of indulgence, I sometimes drizzle a little warm caramel sauce over each serving, or sprinkle on some toasted pecans or walnuts for a lovely textural crunch.
Any way you serve it, it’s sure to be a hit. For another great recipe, try this Easy Sausage and Egg Casserole.
A Little History of Cobblers
I find the history of our favorite dishes absolutely fascinating, and cobblers are no exception. This beloved dessert actually originated in the British American colonies, created by early European settlers who didn’t have access to traditional English suet puddings.
They needed a way to use fruit with a simple topping, and so they “cobbled” together this rustic dish. The name itself is thought to come from the way the irregular dollops of dough resemble cobblestones. From humble beginnings, this comforting dessert has become a cherished part of American culinary tradition, symbolizing resourcefulness and delicious simplicity.
There’s truly nothing quite like the simple joy of a homemade Apple Cobbler Recipe, filling your kitchen with warmth and your home with happy memories. I really hope you feel inspired to pull out your apron and give this recipe a try. It’s a wonderful way to bring comfort to your table and gather your loved ones around.
I would absolutely love to hear about your baking experience! Did you try any variations? What did your family think? Please leave a comment below to share your delicious results or ask any questions you might have. Happy baking, friends!
Follow us on Pinterest for more cozy homemade dessert recipes like this Apple Cobbler; warm, easy, and straight-from-the-heart comfort!

Apple Cobbler Recipe That’s Surprisingly Easy
Ingredients
Equipment
Method
- Preheat the oven to 350°F and grease a 9×13 inch pan lightly with cooking spray.
- Stir together brown sugar, water, cornstarch, lemon juice, vanilla, cinnamon, nutmeg, and salt together in a saucepan. Stir in apples. Cook over medium heat for 3-5 minutes, stirring.
- Pour mixture into prepared pan.
- In a large bowl mix together the flour, sugar, baking powder, and salt. Stir in the milk and melted butter, just until combined.
- Pour the mixture over the apples in the pan. Sprinkle lightly with cinnamon.
- Bake for about 38-40 minutes or until a toothpick inserted into the topping comes out clean.
- Allow to cool for at least 15 minutes before serving. Serve warm with vanilla ice cream, if desired.
- Cover and store leftovers in the refrigerator for up to 4 days.