


There’s nothing quite like the smell of warm peaches and cinnamon filling your kitchen, is there? I get so excited to share recipes that bring comfort and joy, and these Peach Cobbler Cookies truly hit that sweet spot. They take everything I adore about a classic peach cobbler and transform it into a chewy, spiced cookie, complete with a luscious peach filling, a crunchy crumble, and an optional sweet glaze.
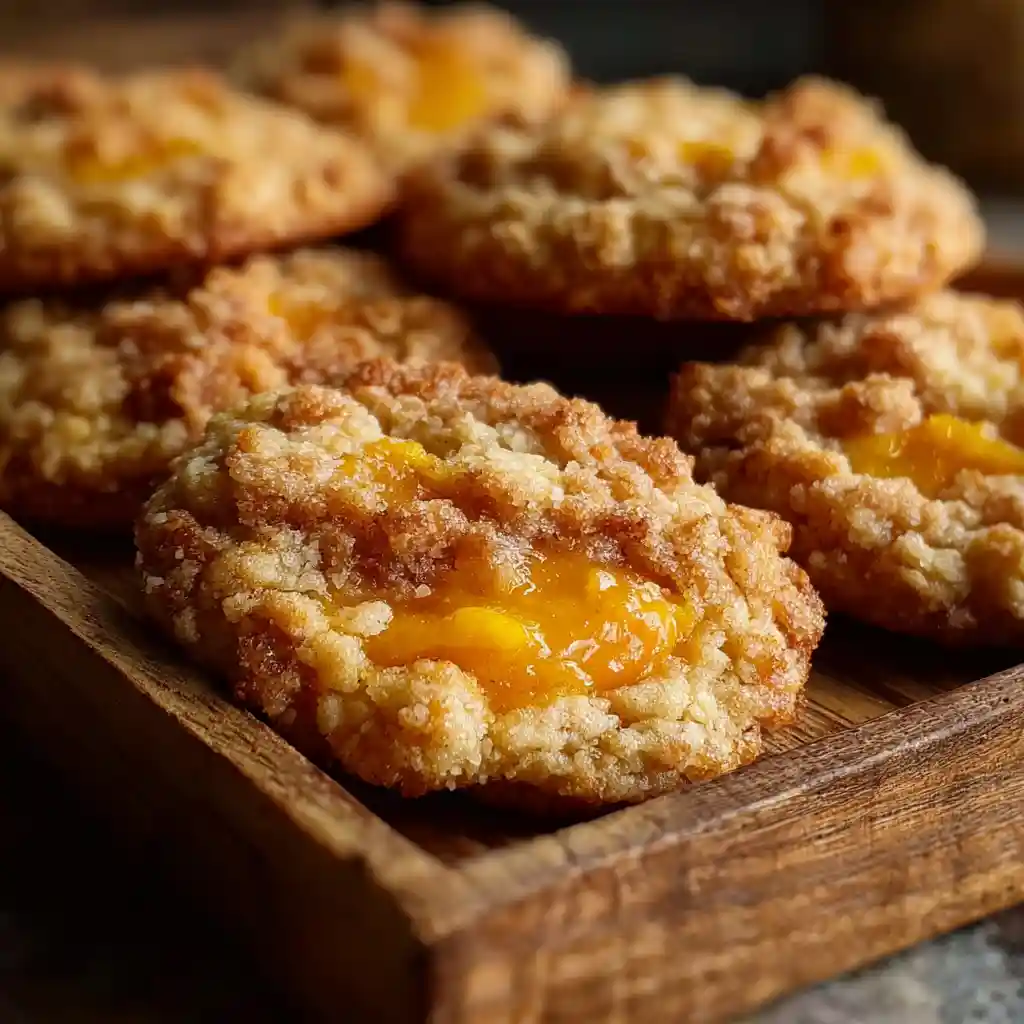
While the active prep and bake time for these beauties is approximately 45-60 minutes, a little patience with chilling the dough makes all the difference for the best results. Trust me, the wait is absolutely worth it for these comforting, flavorful cookies!
Table of Contents
What Makes These Peach Cobbler Cookies So Special?
I believe these cookies capture the very essence of a homemade peach cobbler in every single bite, which is what makes them so special to me. Imagine a tender, chewy cookie, warmly spiced with cinnamon and nutmeg, acting as the perfect base. Then, I fill that with a sweet, jammy peach concoction that tastes just like the filling from your favorite cobbler.
But I don’t stop there! I add a delightful, buttery streusel crumble on top, providing that satisfying crunch that’s quintessential to cobbler. Finally, a sweet, milky glaze brings everything together, creating a symphony of flavors and textures. It’s a truly unique dessert experience that brings back all those cozy, nostalgic feelings, and I just know you’ll love it.
For another delightful fall dessert, be sure to try this Irresistible and Easy Pumpkin Pie Crisp Recipe.
Ingredients for Irresistible Peach Cobbler Cookies
I always say that good baking starts with good ingredients. Using fresh, quality produce and pantry staples will make all the difference in the flavor and texture of your finished Peach Cobbler Cookies.
Here’s how I approach selecting the star of the show, along with everything else you’ll need.
Choosing the Best Peaches: Fresh, Frozen, or Canned?
When peaches are in season, I absolutely love using fresh, ripe ones. I look for peaches that have a vibrant color, feel heavy for their size, and give slightly when I gently press them. To prepare fresh peaches, I usually blanch them briefly in boiling water, then transfer them to an ice bath, which makes the skin incredibly easy to peel. Then I just dice them up!
If fresh peaches aren’t available, or if I’m short on time, frozen or canned peaches work wonderfully too.
For frozen peaches, I recommend thawing them completely and draining any excess liquid to prevent the filling from becoming too watery.
Canned peaches should also be well-drained and perhaps even gently patted dry. Just be sure to use peaches packed in water or light syrup, not heavy syrup, to avoid an overly sweet filling. Consider these tips and more when browsing other desserts & drinks.
All the Sweet Details: The Exact Ingredients You’ll Need
Here is the full list of ingredients I use for these delicious cookies:
For the Peach Filling:
- 4 large ripe peaches, diced (about 4 cups, 25 ounces, or 701 grams)
- 1/4 cup granulated sugar (53 grams)
- 1/4 cup + 1 tbsp light brown sugar, packed (69 grams)
- 3/4 tsp cinnamon
- 1/4 tsp nutmeg
- 1 tsp lemon juice
- 2 tsp corn starch
- 2 tsp water
- 1/2 tsp vanilla extract
For the Cookie Dough:
- 1 cup vegetable shortening, softened at room temperature (226 grams)
- 1 cup granulated sugar (210 grams)
- 1/2 cup light brown sugar, packed (110 grams)
- 1 and 1/2 tsp vanilla extract
- 2 large eggs
- 3 cups all-purpose flour, spooned & leveled or weighed out (390 grams)
- 1 tsp baking soda
- 1 tsp baking powder
- 1/4 tsp salt
- 1 and 1/2 tsp cinnamon
- 1/2 tsp nutmeg
For the Cinnamon Sugar Coating:
- 1/2 cup granulated sugar (105 grams)
- 2 tsp cinnamon
- 1/8 tsp nutmeg
For the Crumble:
- 1/4 cup vegetable shortening, melted (57 grams)
- 1/3 cup light brown sugar, packed (73 grams)
- 1/2 cup + 1 tbsp all-purpose flour (73 grams)
- 3/4 tsp cinnamon
For the Optional Glaze:
- 1/3 cup powdered sugar (38 grams)
- 1/4 tsp vanilla extract
- pinch of cinnamon (to taste – start small!)
- 1-2 tbsp milk (15 to 30 mL)
How to Bake Perfect Peach Cobbler Cookies: A Step-by-Step Guide
Baking these Peach Cobbler Cookies might look like a lot of steps, but I promise each one is straightforward and fun! I’ve broken it down to make the process as easy and enjoyable as possible. Just follow along, and you’ll have a batch of these irresistible cookies in no time.
Step 1: Crafting the Luscious Peach Filling
To start, I make the peach filling. I add the diced peaches, sugars, lemon juice, cinnamon, and nutmeg to a medium saucepan over medium heat. I cook this mixture for 6 minutes, and it will get quite bubbly.
Then, I stir the corn starch and water together in a small bowl before stirring that mixture into the peaches. I cook for 1 minute more, then remove it from the heat immediately and stir in the vanilla. Finally, I transfer the filling to a medium bowl to cool completely in the fridge.
Make-Ahead Tip: This peach filling can be made up to 3 days ahead of time. I store it in a jar in the fridge until I’m ready to use it.
Step 2: Mixing Up Your Chewy Cookie Dough
Next, I move on to the cookie dough. In a large bowl, I cream the softened vegetable shortening with an electric mixer on medium-high speed. I then add the sugars and mix until they are well-creamed together with the vegetable shortening, which usually takes about 1 minute. After that, I add the vanilla and eggs, mixing until they are just combined.
The dry ingredients go in last, and I mix until a dough just forms. I then chill the dough for 30 minutes to make it easier to roll into balls later.
Make-Ahead Tip: This dough can be balled and frozen for 1-2 months before using. Just be sure to thaw it in the fridge overnight before you plan to bake.
Step 3: The Crucial Chill for Your Cookie Dough
This step is super important for achieving the perfect cookie texture and preventing them from spreading too much in the oven. I scoop the dough into balls, each weighing 55 grams, using a large cookie scoop.
Then, I place them in an airtight container to chill. They need at least 3 hours in the fridge, or 2 hours in the freezer, or up to 48 hours in the fridge. I’ve found that chilling them for 24 hours in the fridge gives the best results.
I’ve actually added a bit of extra flour and baking powder to this recipe based on feedback about cookie spread, so proper chilling is even more essential. Remember, you must scoop the dough into balls before any of these chill times.
If you chill the dough solid and then try to scoop it, it will be very difficult, and the dough will re-warm in the process, causing them to likely spread more when they bake. In that vein, these Chocolate Chip Cheesecake Cookies also use the chilling method for better baking results.
Step 4: Preparing the Golden Crumble Topping
While the cookie dough chills, I get started on the crumble. I preheat my oven to 350° F. I melt the vegetable shortening in a medium mixing bowl, then stir in the remaining streusel ingredients.
You should end up with a wonderfully crumbly mixture. I crumble this onto a parchment-lined pan and bake for 12-14 minutes, until it’s a deep golden brown. I set it aside to cool, and as it cools, I break up the pieces further with a metal spatula if I want smaller crumbles.
Make-Ahead Tip: This crumble can be made 1-2 days ahead of time. I store it in a container at room temperature.
Step 5: Baking Your Peach Cobbler Cookies to Perfection
Now it’s time to bake! I preheat my oven to 350° F and line a few cookie sheets with parchment paper or silicone baking mats. In a small bowl, I stir together the sugar and spices for the coating. I then roll the chilled dough balls in this cinnamon sugar mixture. I place about 6 cookies on each sheet, making sure to leave plenty of room for them to spread.
I bake them for 11-13 minutes. The edges should look and feel set when tapped with a fingertip, and the centers will be puffy and look just a tad underdone. Immediately after taking them out of the oven, I place a round cutter around the outside of each cookie and swirl the cookie within it to “scoot” them into perfect circles.
This simple trick keeps them round and helps them stay thicker. The cookies will set up as they cool. I let them rest on the cookie sheet for 1-2 minutes, then I press an indent into their centers with the back of a tablespoon. I let them cool a few more minutes on the cookie sheet, then, once they feel sturdy enough, I transfer them to a wire rack to cool completely.
Step 6: The Optional, Drizzly Glaze
For an extra touch of sweetness, I sometimes make a simple glaze. I whisk together the powdered sugar, vanilla extract, a pinch of cinnamon, and milk. I adjust the glaze consistency with more milk as needed; I actually prefer it on the runny side here so it melts over the top of the cookie a bit, creating a lovely drizzle.
Step 7: Assembling Your Delicious Peach Cobbler Cookies
The best part! Once the cookies are completely cool, I spoon the peach cobbler filling into the indents in the centers. Then, I sprinkle on the golden crumble. If I’m using the glaze, I drizzle it generously over the top. And that’s it! Your beautiful Peach Cobbler Cookies are ready.
Expert Tips for Peach Cobbler Cookie Success
I want you to have the best experience baking these Peach Cobbler Cookies, so I’ve gathered some of my favorite tips to help ensure perfect results every time.
- Measure Flour Accurately: Flour is one of the most common mis-measured ingredients. I always spoon my flour into the measuring cup and then level it off with a straight edge. If you have a kitchen scale, I highly recommend weighing your flour for the most precise results.
- Don’t Skip the Chill Time: This is non-negotiable for these cookies! The chilling time allows the fats in the dough to firm up and the flavors to meld, preventing excessive spreading and ensuring a chewy texture.
- Know Your Oven: Oven temperatures can vary quite a bit. If you find your cookies are baking too fast or too slow, consider using an oven thermometer to ensure your oven is truly at 350°F.
- The “Scoop and Scoot” Method: That little trick of swirling a round cookie cutter around your hot cookies immediately after baking is a game-changer! It perfects their shape and helps create a thicker, chewier cookie.
- Perfect Peach Filling Consistency: When cooking the peach filling, make sure it’s bubbly before adding the cornstarch mixture. Cook for the full minute after adding it to allow it to thicken properly. It should be thick enough to spoon but still spreadable.
- Glaze Consistency is Key: If you decide to make the glaze, add milk a tiny bit at a time. I aim for a consistency that’s thin enough to drizzle beautifully but not so watery that it disappears completely.
Troubleshooting Common Peach Cobbler Cookie Hiccups
Even seasoned bakers run into little issues sometimes! Here are some common problems you might encounter with these Peach Cobbler Cookies and how I usually fix them.
- Cookies Spreading Too Much: This is usually due to dough that’s too warm or has been overmixed. My solution is always to ensure the dough is thoroughly chilled as instructed. Also, make sure your butter (or shortening, in this case) isn’t too soft; it should still be cool to the touch when you cream it.
- Filling Too Runny/Thick: If your peach filling is too runny, you can gently heat it again on the stovetop and add a tiny bit more cornstarch mixed with an equal part of cold water, stirring constantly until it thickens. If it’s too thick, you can stir in a tablespoon of water or peach juice at a time until it reaches your desired consistency.
- Cookies Are Hard/Dry: This often happens from overbaking. The cookies should look a little underdone in the center when you pull them out of the oven, as they will continue to set as they cool. Investing in an oven thermometer can also help ensure accurate baking temperatures.
- Crumble Not Crumbly Enough: If your crumble turns out more like a paste, it might have too much liquid (like if your shortening was extremely hot when melted) or not enough dry ingredients. You can try adding a touch more flour until it reaches a sandy, crumbly consistency.
Customize Your Cookies: Substitutions and Variations
I love how versatile baking can be, and these Peach Cobbler Cookies are no exception! Feel free to personalize them to fit your dietary needs or just to try a fun new flavor.
Making These Peach Cobbler Cookies Fit Your Dietary Needs
I believe everyone should be able to enjoy delicious treats, so here are some ways I adapt this recipe for different dietary needs:
| Adaptation | Ingredient to Substitute | Recommendation | Notes |
|---|---|---|---|
| Dairy-Free | Vegetable Shortening | Dairy-free butter sticks or coconut oil (solid) | May alter texture slightly. |
| Gluten-Free | All-Purpose Flour | 1:1 gluten-free all-purpose flour blend (containing xanthan gum) | Follow package instructions; may need slight adjustments. |
| Vegan | Eggs, Vegetable Shortening | Flax eggs (1 tbsp ground flax + 3 tbsp water per egg), vegan butter | Ensure all other ingredients are also vegan-friendly. |
Flavor Swaps and Creative Twists
Don’t be afraid to experiment with these cookies! Instead of peaches, I sometimes use other fruits like diced apples (perfect with a little extra cinnamon), mixed berries, or even pitted cherries. You could also try adding different spices to the cookie dough or filling, such as a touch of ginger, cardamom, or allspice.
For the glaze, I’ve occasionally swapped the vanilla for almond extract or a tiny bit of orange zest for a different flavor profile. If you like apples, try these Amazing Apple Brownies: A Delicious and Easy Recipe.
Make-Ahead, Gifting, and Serving Your Peach Cobbler Cookies
These cookies are a labor of love, but I promise they’re designed to make your life a little easier, whether you’re planning ahead or sharing them with loved ones.
Prepping Ahead and Gifting Ideas
I love that many components of these Peach Cobbler Cookies can be prepped in advance. As I mentioned, the peach filling can be made up to 3 days ahead, and the crumble 1-2 days ahead. The cookie dough balls can even be frozen for 1-2 months! This phased approach makes assembly on bake day so much smoother.
These cookies also make truly special gifts. I like to arrange them in a pretty box lined with parchment paper, perhaps tied with a ribbon. They travel well, especially if you assemble them just before gifting, or give the filling and crumble separately with instructions for assembly. They’re such a unique and thoughtful homemade treat!
Best Ways to Serve and Store Your Masterpiece
I always say to enjoy these Peach Cobbler Cookies immediately once assembled! The flavors are at their peak when fresh. I especially love them served slightly warm, maybe even with a scoop of vanilla bean ice cream on the side for a truly decadent experience.
To store your assembled cookies, I recommend placing them in an airtight container in the fridge for 4-5 days. Because of the fresh fruit in the filling, I don’t recommend leaving them at room temperature overnight. If you have extra unbaked cookie dough balls, you can store them in an airtight container in the fridge for up to 48 hours or freeze them for longer-term storage.
Essential Tools for Baking Peach Cobbler Cookies
Having the right tools always makes baking more enjoyable and successful! Here are the key kitchen items I use when I make these Peach Cobbler Cookies:
- Electric Mixer: A hand mixer or stand mixer makes creaming the shortening and sugars a breeze.
- Medium Saucepan: Essential for cooking down that delicious peach filling.
- Large Cookie Scoop: I use a 55-gram scoop for consistent cookie sizes, which ensures even baking.
- Parchment Paper or Silicone Baking Mats: These prevent sticking and make for easy cleanup.
- Cookie Sheets: Of course, you’ll need a few!
- Round Cookie Cutter: This is my secret weapon for the “scoop and scoot” method to get perfectly round cookies.
- Wire Rack: Crucial for cooling the cookies completely and preventing soggy bottoms.
- Measuring Cups and Spoons: Accurate measurements are always important.
- Small Bowls: Handy for mixing the cornstarch slurry, cinnamon sugar, and glaze.
- Airtight Containers: For chilling dough and storing finished cookies.
FAQs About Peach Cobbler Cookies
I often get questions about recipes, so I’ve put together some common ones about these Peach Cobbler Cookies to help you out!
Can I use frozen peaches for the filling?
Absolutely! I recommend thawing them completely and draining any excess liquid to prevent the filling from becoming too watery. You might even pat them dry with a paper towel before dicing.
How do I know if my cookie dough has chilled enough?
The dough should be firm to the touch and easy to roll into balls without being sticky. If it feels too soft, pop it back in the fridge for a bit longer. The full chill time is really important for texture.
My cookies spread too much; what went wrong?
The most common culprit is insufficient chilling time for the dough, or the dough might have gotten too warm while you were working with it. Ensure you scoop the dough into balls before chilling for the recommended duration. Also, make sure your oven temperature is accurate.
Can I make the peach filling less sweet?
Yes, you can reduce the amount of granulated or brown sugar in the filling by 1-2 tablespoons. I’d suggest tasting it before adding cornstarch to make sure it’s to your liking.
How do I store leftover cookies?
Because of the fresh fruit filling, I always store these cookies in an airtight container in the fridge for 4-5 days. I don’t recommend leaving them at room temperature overnight.
Can I freeze the baked cookies?
I actually don’t recommend freezing the assembled cookies because the peach filling can become watery upon thawing. However, you can freeze the unbaked cookie dough balls (as mentioned in Step 2) or the baked, plain cookies without filling and crumble. Just add the filling and crumble after thawing the cookies.
More Peachy Delights from Gather And Cook
If you adore peaches as much as I do, I’m sure you’ll love exploring some of my other favorite peachy delights from the blog. I have recipes that celebrate this wonderful fruit in all sorts of comforting ways. I encourage you to check out my other creations for more ways to bring the sweetness of peaches to your table.
Peaches are a good source of vitamins A and C, beta-carotene, potassium and fiber, making them a delicious and nutritious addition to any recipe.
Conclusion
There’s something truly magical about baking a batch of these Peach Cobbler Cookies. I love how they perfectly combine the comforting warmth of a peach cobbler with the delightful chewiness of a homemade cookie. Each bite is a blend of spiced fruit, tender cookie, and crunchy topping, making them an unforgettable treat for any occasion.
I really hope you enjoy making and sharing these unique cookies with your loved ones. I would absolutely love to hear about your baking experience! Please feel free to leave a comment below with your thoughts, any questions you might have, or even your own creative twists on the recipe. Happy baking, my friends!
Follow us on Pinterest for cozy baking inspiration, seasonal desserts, and warm, spiced recipes that fill your kitchen with comfort and joy.

Incredible Peach Cobbler Cookies Recipe
Ingredients
Equipment
Method
- To start, I make the peach filling. I add the diced peaches, sugars, lemon juice, cinnamon, and nutmeg to a medium saucepan over medium heat. I cook this mixture for 6 minutes, and it will get quite bubbly. Then, I stir the corn starch and water together in a small bowl before stirring that mixture into the peaches. I cook for 1 minute more, then remove it from the heat immediately and stir in the vanilla. Finally, I transfer the filling to a medium bowl to cool completely in the fridge. Make-Ahead Tip: This peach filling can be made up to 3 days ahead of time. I store it in a jar in the fridge until I’m ready to use it.
- Next, I move on to the cookie dough. In a large bowl, I cream the softened vegetable shortening with an electric mixer on medium-high speed. I then add the sugars and mix until they are well-creamed together with the vegetable shortening, which usually takes about 1 minute. After that, I add the vanilla and eggs, mixing until they are just combined. The dry ingredients go in last, and I mix until a dough just forms. I then chill the dough for 30 minutes to make it easier to roll into balls later. Make-Ahead Tip: This dough can be balled and frozen for 1-2 months before using. Just be sure to thaw it in the fridge overnight before you plan to bake.
- This step is super important for achieving the perfect cookie texture and preventing them from spreading too much in the oven. I scoop the dough into balls, each weighing 55 grams, using a large cookie scoop. Then, I place them in an airtight container to chill. They need at least 3 hours in the fridge, or 2 hours in the freezer, or up to 48 hours in the fridge. I’ve found that chilling them for 24 hours in the fridge gives the best results. I’ve actually added a bit of extra flour and baking powder to this recipe based on feedback about cookie spread, so proper chilling is even more essential. Remember, you must scoop the dough into balls before any of these chill times. If you chill the dough solid and then try to scoop it, it will be very difficult, and the dough will re-warm in the process, causing them to likely spread more when they bake.
- While the cookie dough chills, I get started on the crumble. I preheat my oven to 350° F. I melt the vegetable shortening in a medium mixing bowl, then stir in the remaining streusel ingredients. You should end up with a wonderfully crumbly mixture. I crumble this onto a parchment-lined pan and bake for 12-14 minutes, until it’s a deep golden brown. I set it aside to cool, and as it cools, I break up the pieces further with a metal spatula if I want smaller crumbles. Make-Ahead Tip: This crumble can be made 1-2 days ahead of time. I store it in a container at room temperature.
- Now it’s time to bake! I preheat my oven to 350° F and line a few cookie sheets with parchment paper or silicone baking mats. In a small bowl, I stir together the sugar and spices for the coating. I then roll the chilled dough balls in this cinnamon sugar mixture. I place about 6 cookies on each sheet, making sure to leave plenty of room for them to spread. I bake them for 11-13 minutes. The edges should look and feel set when tapped with a fingertip, and the centers will be puffy and look just a tad underdone. Immediately after taking them out of the oven, I place a round cutter around the outside of each cookie and swirl the cookie within it to “scoot” them into perfect circles. This simple trick keeps them round AND helps them stay thicker. The cookies will set up as they cool. I let them rest on the cookie sheet for 1-2 minutes, then I press an indent into their centers with the back of a tablespoon. I let them cool a few more minutes on the cookie sheet, then, once they feel sturdy enough, I transfer them to a wire rack to cool completely.
- For an extra touch of sweetness, I sometimes make a simple glaze. I whisk together the powdered sugar, vanilla extract, a pinch of cinnamon, and milk. I adjust the glaze consistency with more milk as needed; I actually prefer it on the runny side here so it melts over the top of the cookie a bit, creating a lovely drizzle.
- The best part! Once the cookies are completely cool, I spoon the peach cobbler filling into the indents in the centers. Then, I sprinkle on the golden crumble. If I’m using the glaze, I drizzle it generously over the top. And that’s it! Your beautiful Peach Cobbler Cookies are ready.