
Welcome to Gather and Cook! I absolutely love finding ways to bring the warmth and comfort of fall into my kitchen, especially when it means an easy, delicious treat.
I know sometimes the thought of turning on the oven feels like too much, but don’t worry, I’ve got you covered with these incredible No Bake Pumpkin Cheesecake Balls. They are truly the perfect solution for satisfying those autumnal cravings without any baking fuss.
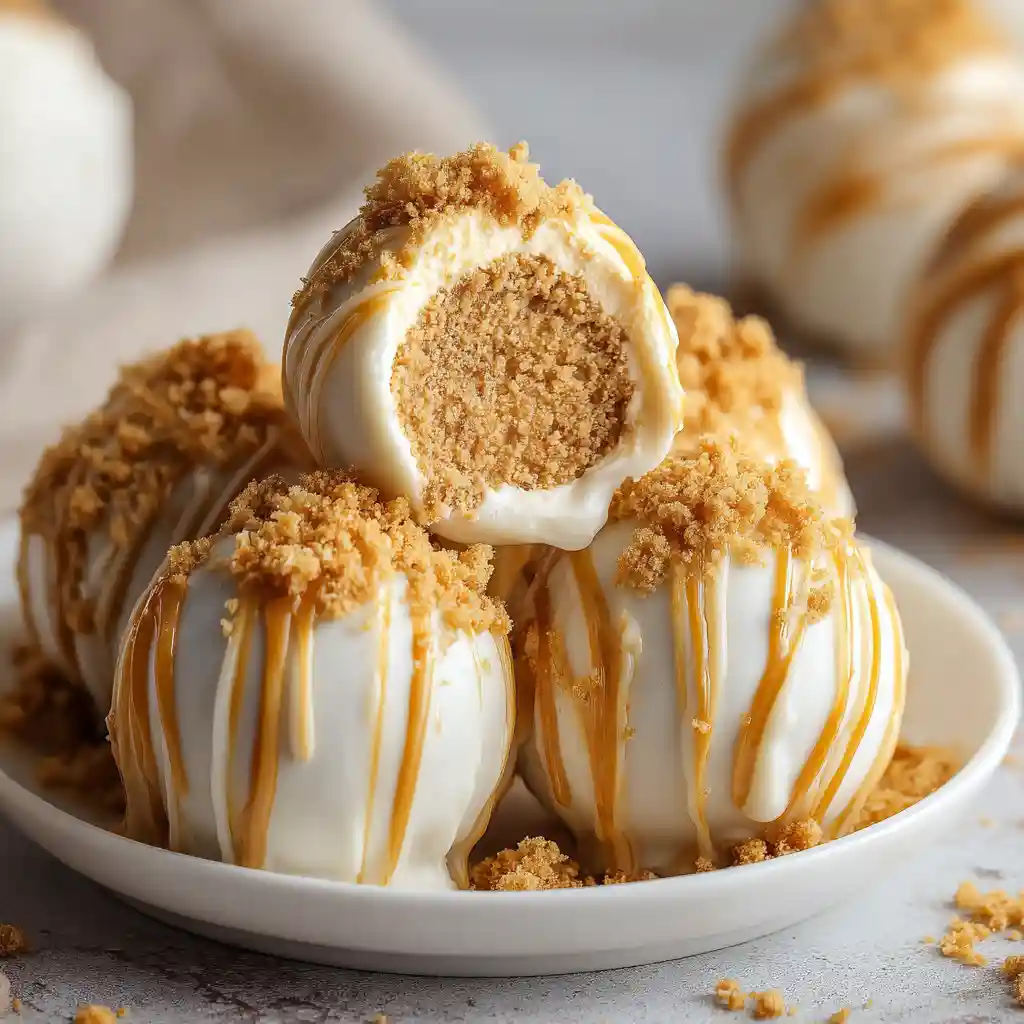
You can whip up a batch of these delightful No Bake Pumpkin Cheesecake Balls in about 20-30 minutes of active prep time, plus chilling, making them an ideal dessert for any occasion. I promise, they’re so simple and utterly delicious, they’ll become a fall favorite in your home.
Table of Contents
Why You’ll Absolutely Love These No Bake Pumpkin Cheesecake Balls
I truly believe these No Bake Pumpkin Cheesecake Balls are a game-changer for your fall dessert lineup. Here’s why I think you’ll adore them as much as I do:
- Effortlessly Convenient: No need to preheat the oven or spend hours baking; these treats come together quickly, freeing up your time for other autumn activities.
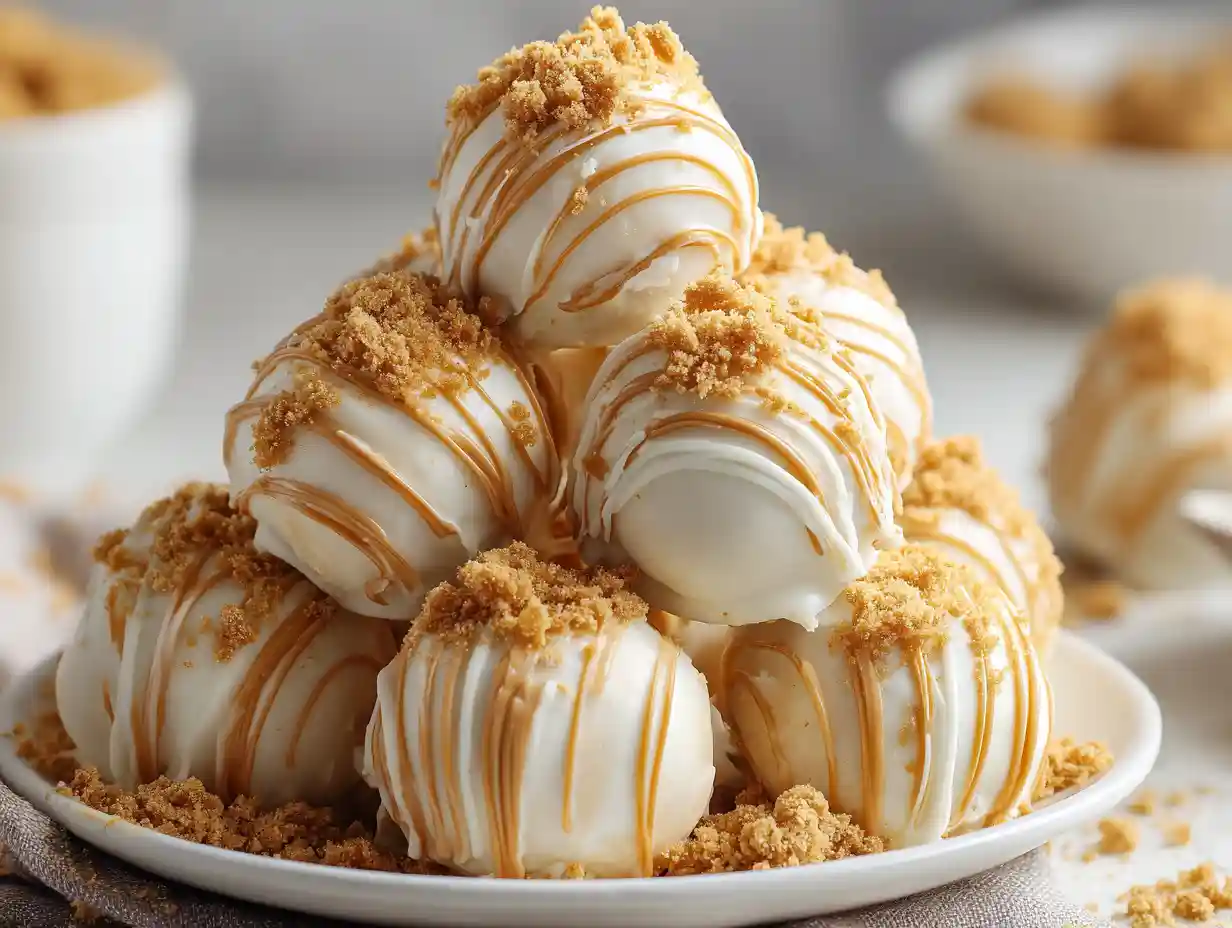
- Irresistibly Delicious: Each bite is a creamy, spiced pumpkin cheesecake dream, encased in a delicate white chocolate shell that just melts in your mouth.
- Impressively Versatile: Whether you’re hosting a holiday gathering, bringing a dish to a party, or simply want a quick fall treat, these balls are always a crowd-pleaser and look beautiful on any dessert platter.
- Perfect for Any Skill Level: If you’re new to baking or just prefer no-fuss recipes, the straightforward steps make this a truly enjoyable and rewarding experience.
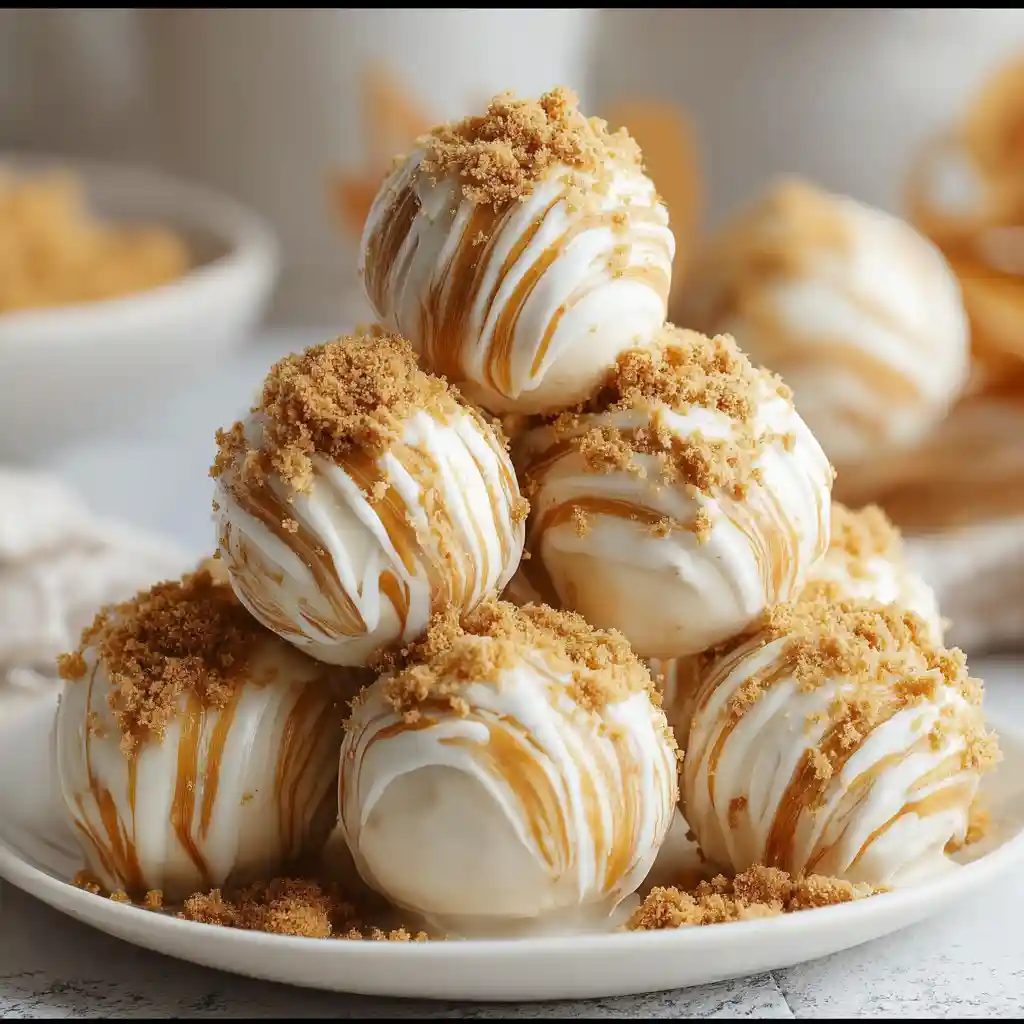
Ingredients for Your Perfect No Bake Pumpkin Cheesecake Balls
Gathering your ingredients is the first step to creating these delightful Pumpkin Cheesecake Balls. I always find it helpful to have everything laid out before I start mixing.
Here’s exactly what you’ll need:
- 2 1/2 C White Chocolate (either chips or broken into pieces) divided
- 3/4 C Vanilla Wafer Crumbs (See instructions may double amount)
- 1/2 C Pumpkin Puree
- 6 ounces Cream Cheese
- 1/4 C Powdered Sugar
- 1 1/2 tsp Pumpkin Pie Spice
I always recommend using full-fat cream cheese for the best texture in these No Bake Pumpkin Cheesecake Balls; it really makes them wonderfully rich and creamy. The real pumpkin puree brings that authentic fall flavor, which is key to a truly delicious treat. Just a quick note: make sure you’re using pumpkin puree, not pumpkin pie filling, as the filling has added spices and sugar that would change the balance of this recipe.
Pumpkin is also a nutritional powerhouse, offering vitamins and antioxidants that can benefit every function of the body,” according to Lizzy Davis, Ph.D. from the University of Alabama. If you’re looking for more ways to utilize pumpkin this season, why not try these Amazing Baked Pumpkin Donuts Recipe You’ll Love?
Essential Tools for Easy Pumpkin Cheesecake Ball Making
Having the right tools on hand makes a big difference when I’m in the kitchen, especially for recipes like these. You don’t need anything fancy, but these essentials will ensure your No Bake Pumpkin Cheesecake Balls come out perfectly.
Here are the tools I recommend:
- Food Processor (or a hand mixer or blender will also work for mixing the base)
- Mixing Bowls (one for mixing, one for chilling)
- Cookie Sheet
- Wax Paper
- Small Scoop or Spoon (for forming the balls)
Step-by-Step Instructions: How to Make No Bake Pumpkin Cheesecake Balls
Let’s get cooking! I’ve broken down each step to make sure your No Bake Pumpkin Cheesecake Balls come out absolutely perfect. Just follow along, and you’ll have a delicious fall treat in no time.
- Melt White Chocolate: Take 1/2 cup of the white chocolate and melt it slowly. I always use a microwave-safe bowl and melt in 15-second intervals, stirring well after each, to prevent burning. White chocolate can seize easily, so gentle heating is key.
- Combine Base Ingredients: While your chocolate is melting, combine the vanilla wafer crumbs, pumpkin puree, cream cheese, powdered sugar, and pumpkin pie spice in your food processor. I find the food processor makes this step super easy, but a hand mixer or blender can also work if that’s what you have. Mix until everything is well combined and smooth.
- Add Melted Chocolate: Once the initial 1/2 cup of white chocolate is melted and smooth, add it directly to your pumpkin mixture in the food processor. Blend again, letting it run for about 2-3 minutes. This longer blending time helps everything fully incorporate and creates the perfect consistency for rolling into balls.
- Taste and Adjust: Now for the fun part: taste your mixture! If you feel it needs a little more sweetness, go ahead and add a bit more powdered sugar. I always adjust to my preference, and you should too.
- Chill the Mixture: Transfer the mixture to a bowl, cover it, and place it in the refrigerator for at least 30 minutes. This chilling time is crucial for the dough to firm up, making it easier to roll. If you plan to chill it longer, just make sure it’s well covered.
- Troubleshoot Consistency (if needed): Sometimes, even after refrigeration, the dough might still be a little “mushy.” If this happens, I recommend placing it in the freezer for 15-30 minutes. You’ll need to work quickly after this step, as it will soften as it warms. I also like to refrigerate the formed balls again before dipping, just to ensure they hold their shape.
- Adjust Crumb Amount (if needed): If you find the consistency of the dough isn’t quite right for rolling, you can add more vanilla wafer crumbs. Start with a little extra and mix it in until you reach a texture that’s easy to handle, up to a total of 1 1/2 cups of crumbs.
- Prepare for Rolling: Line a cookie sheet with wax paper. This will prevent your freshly rolled balls from sticking and makes cleanup a breeze.
- Form the Balls: Take the chilled dough out of the fridge or freezer. Using about one heaping spoonful at a time, roll the mixture into even balls. I try to work quickly here so the dough stays firm.
- Melt Remaining White Chocolate: Once all your balls are formed, melt the remaining white chocolate. Again, I use the microwave method, stirring frequently, to get a smooth, dippable consistency.
- Dip and Set: Dip each pumpkin cheesecake ball into the melted white chocolate, ensuring it’s fully coated. Let any excess chocolate drip off, then place the dipped balls back onto the wax paper-lined cookie sheet.
- Refrigerate and Serve: Refrigerate the dipped balls until the white chocolate coating is completely set. Store them in the fridge and serve them chilled for the best flavor and texture.
If you are looking for a great breakfast idea to pair this dessert with, check out this Ultimate Fall Pumpkin French Toast Breakfast Recipe.
Expert Tips for Flawless No Bake Pumpkin Cheesecake Balls
I’ve learned a few tricks over the years that really help make these No Bake Pumpkin Cheesecake Balls perfect every time. I’m excited to share my best advice with you!
- Melting White Chocolate: White chocolate can be a bit finicky, so always melt it slowly. I prefer using the microwave in 15-20 second bursts, stirring well after each, until it’s smooth. Alternatively, a double boiler method works beautifully; just make sure no water gets into the chocolate, as this can cause it to seize. If your chocolate does seem a bit thick, a tiny bit of shortening or vegetable oil can sometimes help thin it out for easier dipping, but it’s not usually necessary for this recipe if melted correctly.
- Achieving the Right Consistency: The chilling steps are your best friend here! If your mixture still feels too soft to roll after the initial refrigeration, don’t hesitate to pop it into the freezer for 15-30 minutes. If it’s still too soft after that, gently mix in a tablespoon or two of extra vanilla wafer crumbs until it’s workable.
- Dipping Techniques: To get a smooth, even coating on your Pumpkin Cheesecake Balls, I like to use a fork or a candy dipping tool. Drop a ball into the melted chocolate, tap off the excess by gently tapping the fork against the side of the bowl, and then slide it onto the wax paper. Working quickly ensures the chocolate stays liquid and easy to manage.
- Working Quickly: Once you take the chilled dough out, it will start to soften as it sits at room temperature. I recommend forming all your balls first, then melting the chocolate, and dipping them in batches. This helps maintain the optimal texture and prevents your balls from getting too soft before they’re coated. You can find more tasty recipes in our Desserts & Drinks category.
Flavorful Variations & Smart Substitutions for Your Pumpkin Cheesecake Balls
I love how versatile these No Bake Pumpkin Cheesecake Balls are. If you’re feeling adventurous or just want to try something a little different, here are some fun variations and smart substitutions I’ve enjoyed.
| Component | Original | Variation/ Substitution |
|---|---|---|
| Base Crackers | Vanilla Wafer Crumbs | Graham crackers for a classic cheesecake flavor, or gingersnaps for a spicier, warm autumn kick. |
| Chocolate Coatings | White Chocolate | Milk chocolate for a sweeter, creamier taste, dark chocolate for a richer, more intense flavor, or colored candy melts (orange, brown, or red) for a festive look. |
| Flavor Boosters | Pumpkin Pie Spice | Add 1/2 tsp of vanilla extract or maple extract to the mixture for an extra layer of warmth. Stir in a sprinkle of extra cinnamon or nutmeg, or even mini chocolate chips, to the pumpkin mixture before chilling. |
Creative Serving Suggestions for No Bake Pumpkin Cheesecake Balls
These No Bake Pumpkin Cheesecake Balls are delicious all on their own, but I always enjoy adding a little flair when I serve them. Here are a few creative ideas to make them even more special:
- Festive Platter: Arrange them artfully on a beautiful fall-themed platter, perhaps with a scattering of cinnamon sticks or small autumn leaves for decoration.
- Drizzle Delight: Once the white chocolate coating has set, I love to drizzle a contrasting chocolate (like melted dark chocolate) or a luscious caramel sauce over the top for an extra touch of decadence.
- Spiced Dusting: Before the chocolate coating fully sets, or just before serving, a light dusting of extra pumpkin pie spice or ground cinnamon adds a lovely aroma and visual appeal.
- Charming Party Favors: For a special touch, place a few Pumpkin Cheesecake Ballsin small, clear bags tied with a festive ribbon. They make delightful take-home treats for guests.
Storing Your No Bake Pumpkin Cheesecake Balls
To keep your Pumpkin Cheesecake Balls fresh and delicious, proper storage is key. I want to make sure you can enjoy these treats for as long as possible!
I always store my No Bake Pumpkin Cheesecake Balls in an airtight container in the refrigerator. This helps maintain their creamy texture and keeps the chocolate coating firm. They will stay fresh and tasting wonderful for up to 5-7 days in the fridge.
If you want to make them ahead or keep them longer, these balls freeze beautifully. Arrange them in a single layer on a parchment-lined tray and freeze until solid, about 1-2 hours.
Then, transfer them to an airtight freezer-safe container or a heavy-duty freezer bag, separated by layers of wax paper to prevent sticking. They can be stored in the freezer for up to 1-2 months. When you’re ready to enjoy them, simply thaw them in the refrigerator for a few hours before serving.
FAQs About No Bake Pumpkin Cheesecake Balls
I often get asked some common questions when I share recipes like these, so I thought I’d address a few here to help you out!
Why are my Pumpkin Cheesecake Bites not firm?
I find this usually happens if the mixture hasn’t been chilled long enough. Make sure to refrigerate for at least 30 minutes, or even an hour. If it’s still too soft, pop it in the freezer for 15-30 minutes. You can also mix in a little more vanilla wafer crumbs, up to 1 1/2 cups total, to help absorb excess moisture and firm up the dough.
Does No Bake Cheesecake need to be refrigerated?
Absolutely, yes! Since these No Bake Pumpkin Cheesecake Balls contain cream cheese and pumpkin puree, they must be stored in the refrigerator to keep them fresh and safe to eat. The cold also helps them maintain their shape.
How long do Cheesecake Balls last?
When stored in an airtight container in the refrigerator, these Cheesecake Balls will last for about 5-7 days. I always enjoy them best within the first few days, though!
Can you freeze Pumpkin Cheesecake Bites?
Yes, you definitely can! I recommend freezing them on a parchment-lined tray until solid, then transferring them to an airtight freezer-safe container or bag, separating layers with wax paper. They’ll keep well in the freezer for up to 1-2 months.
How can I prevent the white chocolate from seizing when melting?
The key is low heat and no moisture! I melt white chocolate in short bursts (15-20 seconds) in the microwave, stirring well after each interval until smooth. If using a double boiler, ensure the bowl doesn’t touch the water and no steam or water gets into the chocolate. Stirring consistently helps, too.
How can I easily double or halve this recipe?
It’s quite simple! I just adjust all the ingredient quantities proportionally. To double, multiply each ingredient by two. To halve, divide each ingredient by two. The prep times will remain roughly the same, but you might need slightly more chilling time for a doubled batch.
Are there any simple dietary adaptations (e.g., using gluten-free wafers or dairy-free cream cheese alternatives, noting changes to the original recipe)?
Yes, you can certainly try some adaptations! For a gluten-free version, I suggest using gluten-free vanilla wafers or gluten-free graham crackers. For a dairy-free option, you could experiment with dairy-free cream cheese alternatives and dairy-free white chocolate chips. Keep in mind that these substitutions might alter the texture and flavor slightly from the original recipe, so you might need to adjust other components to achieve the desired consistency. You can even add a cup of pumpkin puree, which contains 7g of fiber, and they are high in beta-carotene.
If you enjoy this recipe, you are certain to enjoy these Amazing Soft Pumpkin Cookies With Cinnamon Frosting.
Conclusion
There you have it! My absolute favorite recipe for no bake pumpkin cheesecake balls. I truly hope you enjoy making and sharing these delightful treats as much as I do. They embody everything I love about fall desserts: easy, comforting, and absolutely bursting with flavor. I promise, they’re going to make your kitchen feel warm and your table a little fuller.
I love hearing from you! If you try this recipe, please let me know how your no bake pumpkin cheesecake balls turn out. Do you have any favorite variations? Share your tips or even a picture of your delicious creations in the comments below!
Love simple, cozy fall desserts? Follow us on Pinterest for more comforting, easy-to-make recipes like these No Bake Pumpkin Cheesecake Balls, plus cheesecakes, cookies, and all your favorite seasonal treats!

No Bake Pumpkin Cheesecake Balls Recipe
Ingredients
Equipment
Method
- Melt White Chocolate: Take 1/2 cup of the white chocolate and melt it slowly. I always use a microwave-safe bowl and melt in 15-second intervals, stirring well after each, to prevent burning. White chocolate can seize easily, so gentle heating is key.
- Combine Base Ingredients: While your chocolate is melting, combine the vanilla wafer crumbs, pumpkin puree, cream cheese, powdered sugar, and pumpkin pie spice in your food processor. I find the food processor makes this step super easy, but a hand mixer or blender can also work if that’s what you have. Mix until everything is well combined and smooth.
- Add Melted Chocolate: Once the initial 1/2 cup of white chocolate is melted and smooth, add it directly to your pumpkin mixture in the food processor. Blend again, letting it run for about 2-3 minutes. This longer blending time helps everything fully incorporate and creates the perfect consistency for rolling into balls.
- Taste and Adjust: Now for the fun part: taste your mixture! If you feel it needs a little more sweetness, go ahead and add a bit more powdered sugar. I always adjust to my preference, and you should too.
- Chill the Mixture: Transfer the mixture to a bowl, cover it, and place it in the refrigerator for at least 30 minutes. This chilling time is crucial for the dough to firm up, making it easier to roll. If you plan to chill it longer, just make sure it’s well covered.
- Troubleshoot Consistency (if needed): Sometimes, even after refrigeration, the dough might still be a little “mushy.” If this happens, I recommend placing it in the freezer for 15-30 minutes. You’ll need to work quickly after this step, as it will soften as it warms. I also like to refrigerate the formed balls again before dipping, just to ensure they hold their shape.
- Adjust Crumb Amount (if needed): If you find the consistency of the dough isn’t quite right for rolling, you can add more vanilla wafer crumbs. Start with a little extra and mix it in until you reach a texture that’s easy to handle, up to a total of 1 1/2 cups of crumbs.
- Prepare for Rolling: Line a cookie sheet with wax paper. This will prevent your freshly rolled balls from sticking and makes cleanup a breeze.
- Form the Balls: Take the chilled dough out of the fridge or freezer. Using about one heaping spoonful at a time, roll the mixture into even balls. I try to work quickly here so the dough stays firm.
- Melt Remaining White Chocolate: Once all your balls are formed, melt the remaining white chocolate. Again, I use the microwave method, stirring frequently, to get a smooth, dippable consistency.
- Dip and Set: Dip each pumpkin cheesecake ball into the melted white chocolate, ensuring it’s fully coated. Let any excess chocolate drip off, then place the dipped balls back onto the wax paper-lined cookie sheet.
- Refrigerate and Serve: Refrigerate the dipped balls until the white chocolate coating is completely set. Store them in the fridge and serve them chilled for the best flavor and texture.