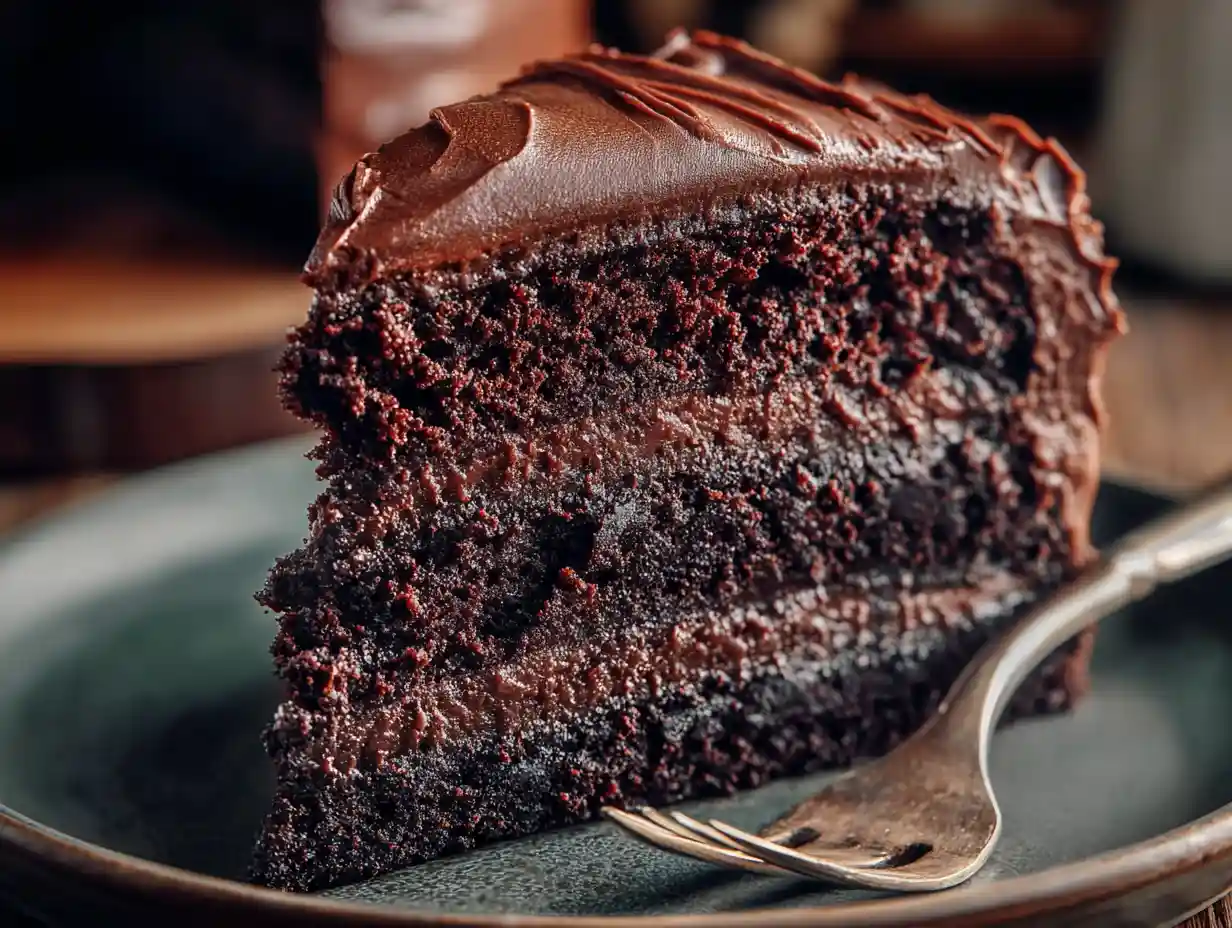

There’s something truly magical about a perfectly rich, deeply chocolatey cake, isn’t there? I think back to my own childhood, and the sheer delight of a homemade treat. That’s why I’m so excited to share my ultimate Matilda cake recipe with you today. It’s a cake that doesn’t just taste incredible, it tells a story.
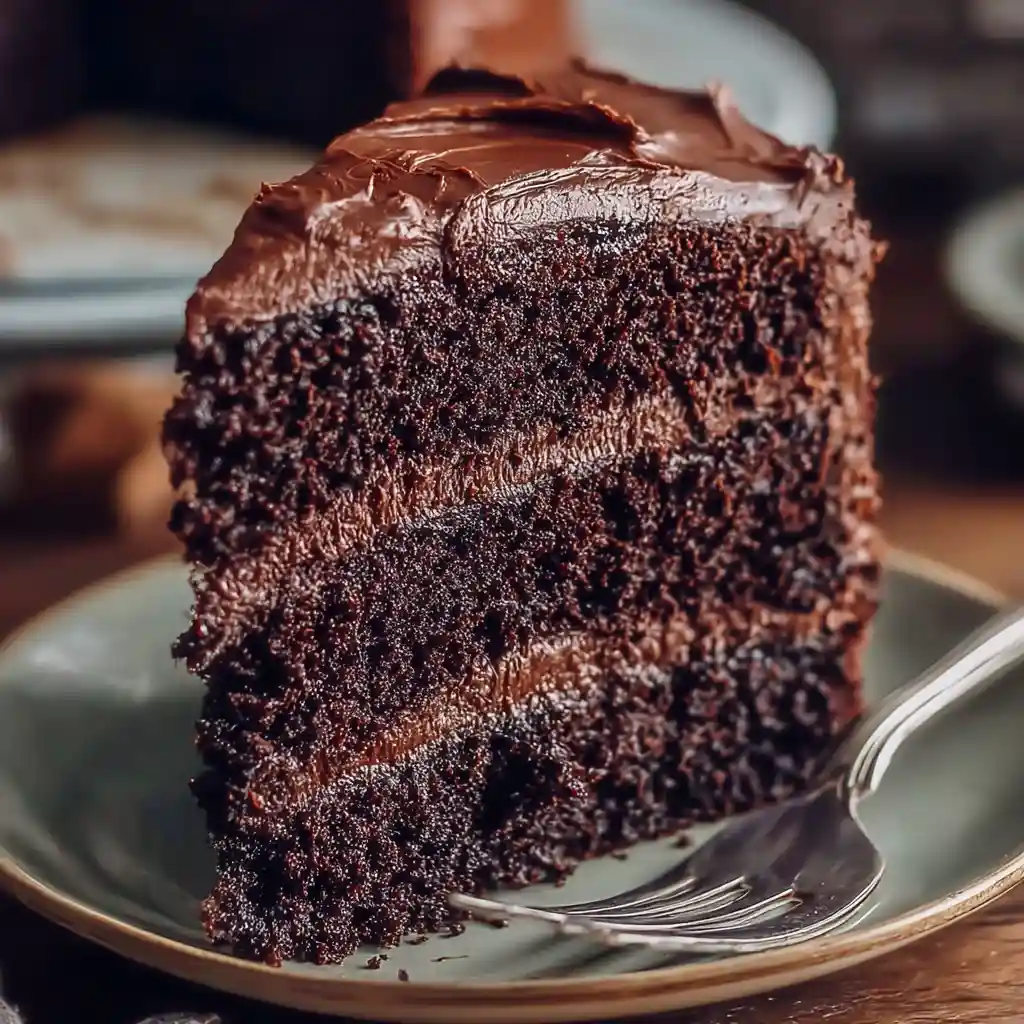
This recipe delivers an intensely fudgy texture and a chocolate flavor that will transport you straight to culinary bliss. You’ll find the active baking time is about an hour and a half, but don’t worry, the plenty of chilling time for that iconic fudgy frosting is absolutely worth every minute. Get ready to bake a legend!
Table of Contents
What Makes a Matilda Cake So Iconic?
When I hear “Matilda cake,” my mind instantly goes to the enchanting world of Roald Dahl and, of course, the beloved movie adaptation.
I remember watching that famous scene with Bruce Bogtrotter, eyes wide with a mix of horror and utter longing. The sheer scale of that cake, its dark, glossy frosting, and the defiant joy of Bruce eating every last crumb left a permanent mark on my imagination.
This isn’t just any chocolate cake; it’s a symbol. It represents indulgence, rebellion, and a little bit of cinematic magic all rolled into one.
The Matilda cake holds a truly unique place in popular culture, reminding us all of the power of a really good piece of chocolate cake.
Why This is the BEST Matilda Cake Recipe
I truly believe this is the best Matilda cake recipe you’ll ever try, and I’m so eager for you to experience it. I’ve poured my heart into perfecting it, ensuring it lives up to the legend. Here’s why I think you’ll love it:
- Unparalleled Moisture: My recipe guarantees a cake that is incredibly moist, never dry or crumbly. Each bite is tender and rich, truly melting in your mouth.
- Intensely Fudgy Texture: This isn’t just a chocolate cake; it’s a fudge cake. The layers are dense and decadent, perfectly complementing the rich frosting.
- Deep, Complex Chocolate Flavor: I’ve carefully balanced the cocoa and chocolate to create a profound chocolate experience that isn’t overly sweet, allowing the true cocoa notes to shine.
- Iconic, Indulgent Frosting: The frosting is what truly sets this Matilda cake apart. It’s thick, glossy, and so fudgy it feels like biting into a chocolate cloud.
The Science Behind the Moisture: Key Ingredients for Your Matilda Cake
Achieving that signature Matilda cake texture isn’t just about mixing ingredients; it’s about understanding what each one brings to the table. I’ve chosen these components specifically for their roles in creating a moist, fudgy, and intensely flavorful cake.
- Dutch-Processed Cocoa Powder: This is my secret weapon for a deep, dark chocolate color and a less acidic, smoother chocolate flavor. It reacts differently with leavening agents than natural cocoa, contributing to a wonderfully tender crumb.
- Hot Coffee: Don’t worry, you won’t taste the coffee! I use it to bloom the cocoa powder, which intensifies the chocolate flavor dramatically and also helps create a thin batter that bakes into a moist cake.
- Buttermilk and Sour Cream: These dairy heroes are fantastic for moisture. Their acidity tenderizes the cake crumb, making it incredibly soft, while their fat content keeps everything rich and delicious.
- Vegetable Oil: Unlike butter, oil is 100% fat, contributing directly to moisture without adding any water. It ensures a consistently moist cake that stays fresh for longer.
Essential Equipment for Baking Your Matilda Cake
To get started on your Matilda cake, I’ve found having the right tools makes all the difference. Here’s what you’ll need:
- Three 8-inch round cake pans
- Parchment paper
- Non-stick baking spray or butter for greasing
- Large mixing bowls
- A stand mixer with a paddle attachment (a hand mixer works too!)
- Whisk
- Rubber spatulas
- Measuring cups and spoons
- A small saucepan
- Wire cooling racks
- A large serrated knife for leveling cakes
Ingredients for the Perfect Matilda Cake
Here are all the ingredients you’ll need to create this amazing Matilda cake. I always find it helpful to gather everything before I begin!
For the Cake:
- 2 cups all purpose flour (260g), sifted
- 1.5 tsp baking powder
- 1.5 tsp baking soda
- 1 cup granulated sugar (200g)
- 2/3 cup light brown sugar (135g)
- 1 tsp salt
- 3 large eggs, ideally room temp
- ⅔ cup vegetable oil (133g)
- 1/3 cup buttermilk – mix 1/3 cup whole milk (80g) + 1 tsp vinegar
- 1 cup sour cream (240g), ideally room temp
- 3/4 cup cocoa powder, Dutch Processed preferred (75g)
- 2 tsp instant coffee
- 3/4 cup boiling water (180g)
For the Chocolate Fudge Frosting:
- 300g dark chocolate
- 3 tbsp corn syrup
- 8 oz cream cheese, room temperature (226g)
- 1/3 cup cocoa powder (33g)
- 1 cup powdered sugar (100g)
- 1/4 tsp salt
- 1 1/4 cup heavy cream, chilled
Step-by-Step Instructions: How to Bake and Assemble Your Matilda Cake
Baking this Matilda cake is a true joy, and I’ve broken down the steps to make it as smooth as possible for you. Take your time, and enjoy the process!
Prepare the Cake Layers
- Preheat oven to 350F (no fan) and prepare 3 8″ pans with parchment paper and butter.
- In a bowl, combine the flour, baking powder, baking soda, granulated sugar, light brown sugar and salt. Whisk together until no lumps remain.
- In a separate bowl, whisk together the eggs, vegetable oil, buttermilk and sour cream until smooth.
- Add the dry ingredients to the wet in 2 additions, and gently whisk and fold until they are just combined and no big lumps remain. Do not overmix.
- In a separate small bowl, add the cocoa powder and instant coffee. Pour over the boiling water and whisk until a smooth shiny mixture forms.
- Pour the cocoa mixture onto the remaining batter, and gently fold until a chocolate cake batter forms.
- Divide the batter evenly between the 3 prepared cake pans.
- Bake for ~22-24 minutes until a toothpick inserted in the center comes out with light moist crumbs attached.
- Let the cakes cool in the pans for 20 minutes, then carefully remove them and place on a wire rack. Let cool completely (I recommend refrigerating for 1 hour).
Make the Chocolate Fudge Frosting
- Add the chocolate and corn syrup to a saucepan and heat over the lowest flame while stirring constantly until the chocolate has fully melted. Set aside.
- In the bowl of your stand mixer, add the room temperature cream cheese and sift in the cocoa powder, powdered sugar and salt. Use the paddle attachment and whisk on medium speed until the mixture becomes creamy (1-2 minutes). Scrape the bowl.
- Add the heavy cream and whisk again on low speed until a fluffy, whipped consistency is reached. Scrape the bowl in the middle. This should not take too long; avoid overmixing.
- At this point, the melted chocolate should be warm and runny but not very hot. Slowly pour it in while whisking on low speed until the chocolate is fully combined into the frosting. Due to the temperature of the chocolate, the frosting will become a more runny consistency.
- Let the frosting cool down until it becomes spreadable. I recommend doing this at room temperature for ~30 minutes but you can also do it in the fridge (it won’t take too long). If it becomes too firm, remove 1 cup, microwave for just a few seconds it until it is warm, and whisk back into the remaining frosting.
Assemble the Matilda Cake
- Once the cakes and frosting have cooled down, it’s time to assemble.
- Use a large serrated knife to carefully trim off the domes from the cakes.
- Layer them on top of each other with a generous layer of the frosting in between (don’t be stingy!). Cover the cake with a thin layer of frosting (crumb coat) and refrigerate for 20 minutes. Then slather on the remaining frosting all over.
- Serve & enjoy! This cake is best eaten at room temperature.
Achieving the Iconic Matilda Cake Look (The Bruce Bogtrotter Finish!)
The Matilda cake from the movie isn’t perfectly smooth; it has a wonderfully rustic, slightly messy, and incredibly indulgent look. I actually think this makes it even more appealing, like it’s begging you to dig in!
To get that irresistible, fudgy aesthetic, I suggest using your offset spatula to create swirls and peaks in the frosting, embracing the natural texture.
For a beautiful, shiny finish, just like in the movie, I have a special trick for you. Once your cake is fully frosted, use a blow dryer set to the lowest heat setting. Gently wave it about 1 foot away from the cake, moving constantly, for a minute or two. This slight warmth will melt the very surface of the frosting, giving it that gorgeous, glossy sheen.
Evelyn’s Expert Tips for Matilda Cake Perfection
I’ve learned a few things over the years that can help you achieve Matilda cake perfection. These little nuggets of advice are what I share with my friends and family!
Ingredient Prep Tips
- Room Temperature Ingredients are Key: For the eggs, buttermilk, sour cream, and cream cheese, bringing them to room temperature truly helps them emulsify better with the other ingredients. This creates a smoother batter and a more uniform, tender cake crumb. I usually set them out an hour or two before I start baking.
- Sifting Flour: Sifting the all-purpose flour might seem like an extra step, but it helps aerate the flour and prevents lumps. This ensures a smoother batter and a lighter, more even cake texture.
Baking & Cooling Tips
- Don’t Overmix the Batter: When combining the wet and dry ingredients, mix just until no large lumps remain. Overmixing develops the gluten in the flour, which can lead to a tough, dry cake. I always stop as soon as it’s incorporated.
- Cool Cakes Completely: I know it’s tempting, but let your cake layers cool completely before you even think about frosting them. Warm cakes will melt your beautiful frosting, creating a messy situation. Refrigerating them for an hour after they’ve cooled on the rack really helps.
Frosting & Assembly Tips
- The Power of the Crumb Coat: Don’t skip the crumb coat! It’s a thin layer of frosting that traps any loose crumbs, ensuring your final layer of frosting is perfectly smooth and crumb-free. It makes a huge difference in the final look.
- Don’t Be Shy with Frosting: This is a Matilda cake, after all! Be generous with your frosting between the layers and on top. It’s meant to be rich and decadent.
Substitutions and Variations for Your Matilda Cake
Sometimes you need to adapt a recipe, and that’s perfectly fine! Here are a few common substitutions and variations you might consider for your Matilda cake.
| Ingredient/Component | Substitution Option | Notes/Impact |
|---|---|---|
| Buttermilk | Milk + Lemon Juice | For 1/3 cup buttermilk, use 1/3 cup regular milk with 1 tsp lemon juice or white vinegar. Let sit 5-10 mins. |
| Sour Cream | Plain Greek Yogurt | Use an equal amount of full-fat plain Greek yogurt for similar moisture and tang. |
| Dutch Processed Cocoa | Natural Unsweetened Cocoa Powder | Cake color might be lighter; may need to slightly adjust baking soda/powder for acidity balance. |
| Dark Chocolate | Semi-Sweet or Bittersweet | Adjust based on your preferred sweetness level for the frosting. |
| Corn Syrup (frosting) | Glucose Syrup or Golden Syrup | Helps with shine and texture; can omit but frosting may be slightly less glossy. |
Scaling Your Matilda Cake Recipe
I know that sometimes three 8-inch cakes might be more than you need, or you might want to try a different pan size. Here’s how I approach scaling this Matilda cake recipe:
For different pan sizes, I always think in terms of surface area. If you want to use two 9-inch pans instead of three 8-inch, you’ll need slightly more batter, perhaps 1.25 times the recipe. For a smaller 6-inch cake, you might want to halve the recipe and bake in two or three 6-inch pans.
When adjusting quantities, it’s usually best to scale all ingredients proportionally. For baking times, remember that smaller, shallower cakes (like cupcakes) will bake much faster, while a larger, deeper cake (like a bundt or sheet cake) will take significantly longer. Always use the toothpick test to determine doneness, as oven temperatures can vary!
Common Matilda Cake Problems & Troubleshooting
Even experienced bakers like me run into snags sometimes! If you encounter any issues with your Matilda cake, I’m here to help you troubleshoot.
- Dry Cake: This is often due to overmixing the batter, overbaking, or not enough moisture-rich ingredients. Make sure you’re measuring accurately, watch your oven carefully, and mix just until combined.
- Cake Sinks in the Middle: This usually happens if the cake is underbaked, or if the oven door was opened too early causing a temperature shock. It can also be caused by too much leavening. Be patient, ensure your oven temperature is accurate, and don’t open the oven door for at least two-thirds of the baking time.
- Runny Frosting: This can happen if your heavy cream wasn’t cold enough, if the cream cheese was too warm, or if your melted chocolate was too hot when added. Ensure ingredients are at the correct temperature, chill the frosting if it’s too soft, or as I mentioned, warm a small portion and re-whisk if it seizes.
- Hard Frosting: If your frosting became too firm, it likely cooled down too much. You can usually fix this by removing about 1 cup of the frosting, microwaving it for just a few seconds until it’s warm, and then whisking it back into the remaining frosting. This will help bring it back to a spreadable consistency.
- Lumpy Batter: This often means your dry ingredients weren’t whisked thoroughly, or your wet ingredients (especially sour cream or cream cheese) weren’t smooth enough before combining. Sifting the flour and ensuring smooth wet ingredients will prevent this.
Creative Serving & Presentation Ideas for Your Matilda Cake
This Matilda cake is a showstopper on its own, but there are so many fun ways to serve and present it! I love getting creative in the kitchen. If you’re looking for another delightful dessert, consider whipping up some Amazing Apple Brownies: A Delicious and Easy Recipe for a complementary treat.
For a true movie-inspired experience, serve generous, almost comically large slices, just like Bruce Bogtrotter received. You could even put a small spoonful of extra fudge sauce on the side for ultimate indulgence.
For a birthday or special occasion, I love to keep it simple but elegant. A sprinkle of cocoa powder, some fresh raspberries, or even a few chocolate shavings can really elevate the presentation. You could also serve it with a scoop of vanilla bean ice cream or a dollop of fresh whipped cream for a delightful contrast.
Matilda Cake vs. Other Chocolate Cakes
You might be wondering, how does this Matilda cake differ from other beloved chocolate cakes? I think it’s important to understand what makes it unique. If you’re planning a weekend breakfast, consider this cake a great choice, or make something smaller, like Amazing Apple Cinnamon Muffins: Simple Recipe!
Unlike a classic Devil’s Food cake, which is often very rich but typically lighter in crumb and flavor, my Matilda cake leans heavily into a dense, incredibly fudgy texture. It’s less about airiness and more about pure, unadulterated chocolate decadence. German Chocolate cake, with its distinct coconut-pecan frosting, offers a completely different flavor profile, while a Black Forest cake relies on cherries, whipped cream, and often kirsch.
Matilda cake is a celebration of pure, intense chocolate through and through, with a frosting that feels more like a soft, spreadable fudge. It’s truly a unique and memorable chocolate experience.
Storing and Freezing Your Matilda Cake
If you happen to have any Matilda cake leftover (which is a big “if” in my house!), I want to make sure you know how to keep it fresh and delicious.
To store the cake, I keep it covered loosely at room temperature for up to 2 days for the best flavor and texture. After that, you can refrigerate it in an airtight container for up to 5 days. Just remember that it’s best eaten at room temperature, so let it sit out for about 30 minutes before serving if it’s been in the fridge.
For longer storage, this cake freezes beautifully! I wrap individual slices or the entire cake (if unfrosted) tightly in plastic wrap, then again in aluminum foil. It will keep in the freezer for up to 3 months. To thaw, simply unwrap it and let it come to room temperature on your counter.
FAQs About Matilda Cake
I often get asked questions about this iconic cake, so I’ve put together some answers for you!
What is the Matilda cake?
The Matilda cake is a rich, intensely fudgy chocolate cake, famously depicted in Roald Dahl’s Matilda and the movie adaptation. It’s known for its decadent chocolate layers and thick, glossy chocolate frosting, often associated with indulgence and cinematic charm.
Why is the Matilda cake so famous?
It gained immense fame from the iconic scene in the movie Matilda where Bruce Bogtrotter is forced to eat an entire, massive chocolate cake. The scene became a cultural touchstone, making the cake a symbol of defiance and deliciousness.
Can you taste the coffee in this Matilda cake?
No, you won’t taste the coffee at all! I use instant coffee in the recipe to enhance and deepen the chocolate flavor. It acts as a natural flavor enhancer, bringing out the best in the cocoa without adding a coffee taste.
What’s the best way to make my own buttermilk?
It’s incredibly simple! To make 1/3 cup of buttermilk, just pour 1/3 cup of whole milk into a measuring cup and stir in 1 teaspoon of white vinegar or lemon juice. Let it sit for about 5-10 minutes until it slightly curdles. Voila, homemade buttermilk!
Can I make this Matilda cake in advance?
Absolutely! The cake layers can be baked a day or two in advance, wrapped tightly, and stored at room temperature or refrigerated. The frosting can also be made a day ahead and refrigerated. Just make sure to bring the frosting back to a spreadable consistency before assembling.
Conclusion: Your Ultimate Matilda Cake Awaits!
Baking this Matilda cake is more than just following a recipe; it’s about creating a little bit of magic in your own kitchen. I truly hope you enjoy the process of bringing this iconic, fudgy, and incredibly rich chocolate cake to life. Every bite is a journey, and I promise, it’s worth every single step.
I can’t wait to hear about your baking adventures! Please leave a comment below with any questions you might have, or better yet, share your results and experiences with our Gather And Cook community. Happy baking, my friends!
Follow us on Pinterest for more cozy, indulgent desserts like this legendary Matilda Cake, rich, fudgy, and baked with love.

Matilda Cake Recipe: Rich and Magical
Ingredients
Equipment
Method
- ### Prepare the Cake Layers
- Preheat oven to 350F (no fan) and prepare 3 8″ pans with parchment paper and butter.
- In a bowl, combine the flour, baking powder, baking soda, granulated sugar, light brown sugar and salt. Whisk together until no lumps remain.
- In a separate bowl, whisk together the eggs, vegetable oil, buttermilk and sour cream until smooth.
- Add the dry ingredients to the wet in 2 additions, and gently whisk and fold until they are just combined and no big lumps remain. Do not overmix.
- In a separate small bowl, add the cocoa powder and instant coffee. Pour over the boiling water and whisk until a smooth shiny mixture forms.
- Pour the cocoa mixture onto the remaining batter, and gently fold until a chocolate cake batter forms.
- Divide the batter evenly between the 3 prepared cake pans.
- Bake for ~22-24 minutes until a toothpick inserted in the center comes out with light moist crumbs attached.
- Let the cakes cool in the pans for 20 minutes, then carefully remove them and place on a wire rack. Let cool completely (I recommend refrigerating for 1 hour).
- ### Make the Chocolate Fudge Frosting
- Add the chocolate and corn syrup to a saucepan and heat over the lowest flame while stirring constantly until the chocolate has fully melted. Set aside.
- In the bowl of your stand mixer, add the room temperature cream cheese and sift in the cocoa powder, powdered sugar and salt. Use the paddle attachment and whisk on medium speed until the mixture becomes creamy (1-2 minutes). Scrape the bowl.
- Add the heavy cream and whisk again on low speed until a fluffy, whipped consistency is reached. Scrape the bowl in the middle. This should not take too long; avoid overmixing.
- At this point, the melted chocolate should be warm and runny but not very hot. Slowly pour it in while whisking on low speed until the chocolate is fully combined into the frosting. Due to the temperature of the chocolate, the frosting will become a more runny consistency.
- Let the frosting cool down until it becomes spreadable. I recommend doing this at room temperature for ~30 minutes but you can also do it in the fridge (it won’t take too long). If it becomes too firm, remove 1 cup, microwave for just a few seconds it until it is warm, and whisk back into the remaining frosting.
- ### Assemble the Matilda Cake
- Once the cakes and frosting have cooled down, it’s time to assemble.
- Use a large serrated knife to carefully trim off the domes from the cakes.
- Layer them on top of each other with a generous layer of the frosting in between (don’t be stingy!). Cover the cake with a thin layer of frosting (crumb coat) and refrigerate for 20 minutes. Then slather on the remaining frosting all over.
- Serve & enjoy! This cake is best eaten at room temperature.