
Fall is my absolute favorite time of year, and nothing says cozy comfort quite like the smell of pumpkin baking in the kitchen. As much as I adore elaborate desserts, sometimes life gets busy, and I need a recipe that delivers big on flavor without requiring hours of fuss.
That’s where this incredible Pumpkin Dump Cake Recipe comes in. It’s truly a “dump and bake” dream, making it the perfect simple yet incredibly satisfying dessert for those crisp autumn evenings or any busy holiday gathering.
Table of Contents
What Exactly Is A Dump Cake? The Magic Behind the Layers
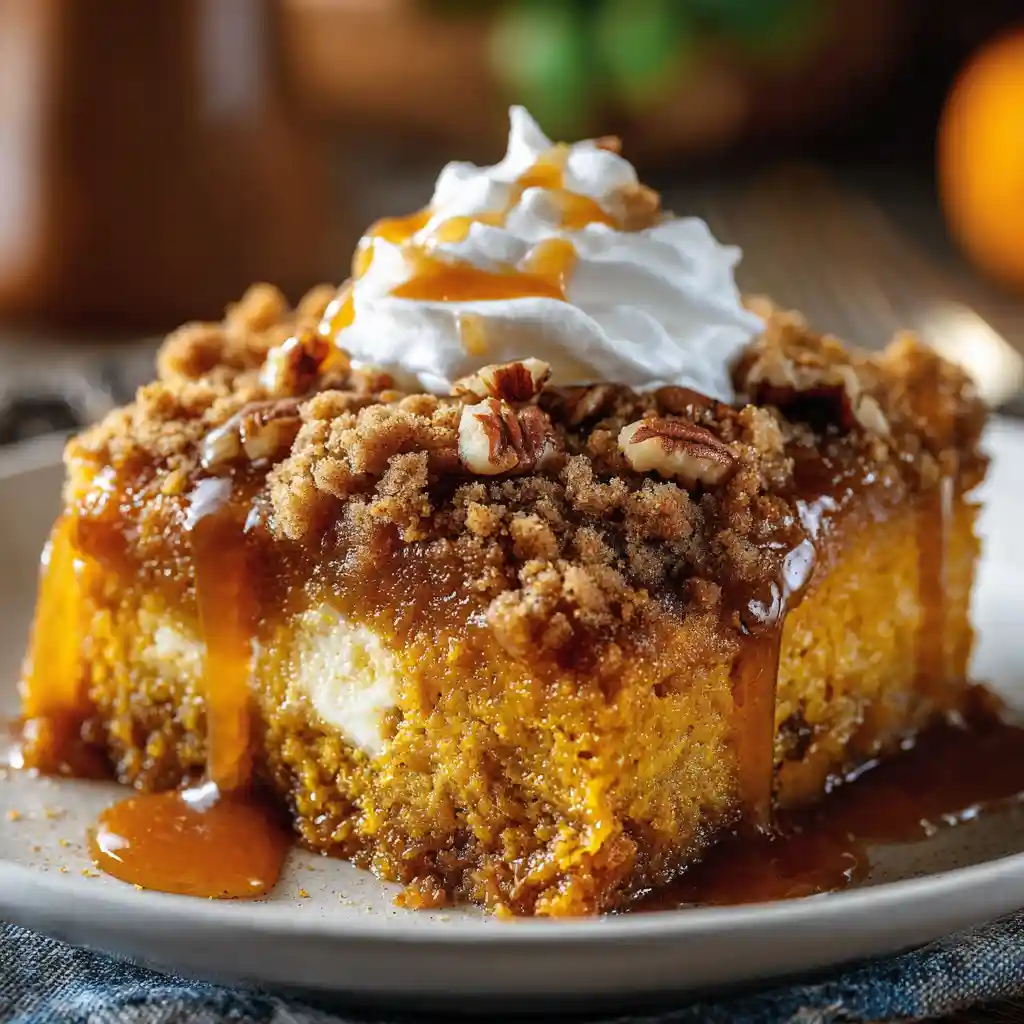
If you’re new to the world of dump cakes, prepare to be amazed by their sheer simplicity and delicious results. Essentially, a dump cake gets its name because you literally “dump” all the ingredients into a pan, layer by layer, without much mixing involved. The magic happens in the oven as the dry cake mix and melted butter combine with the wet pumpkin base.
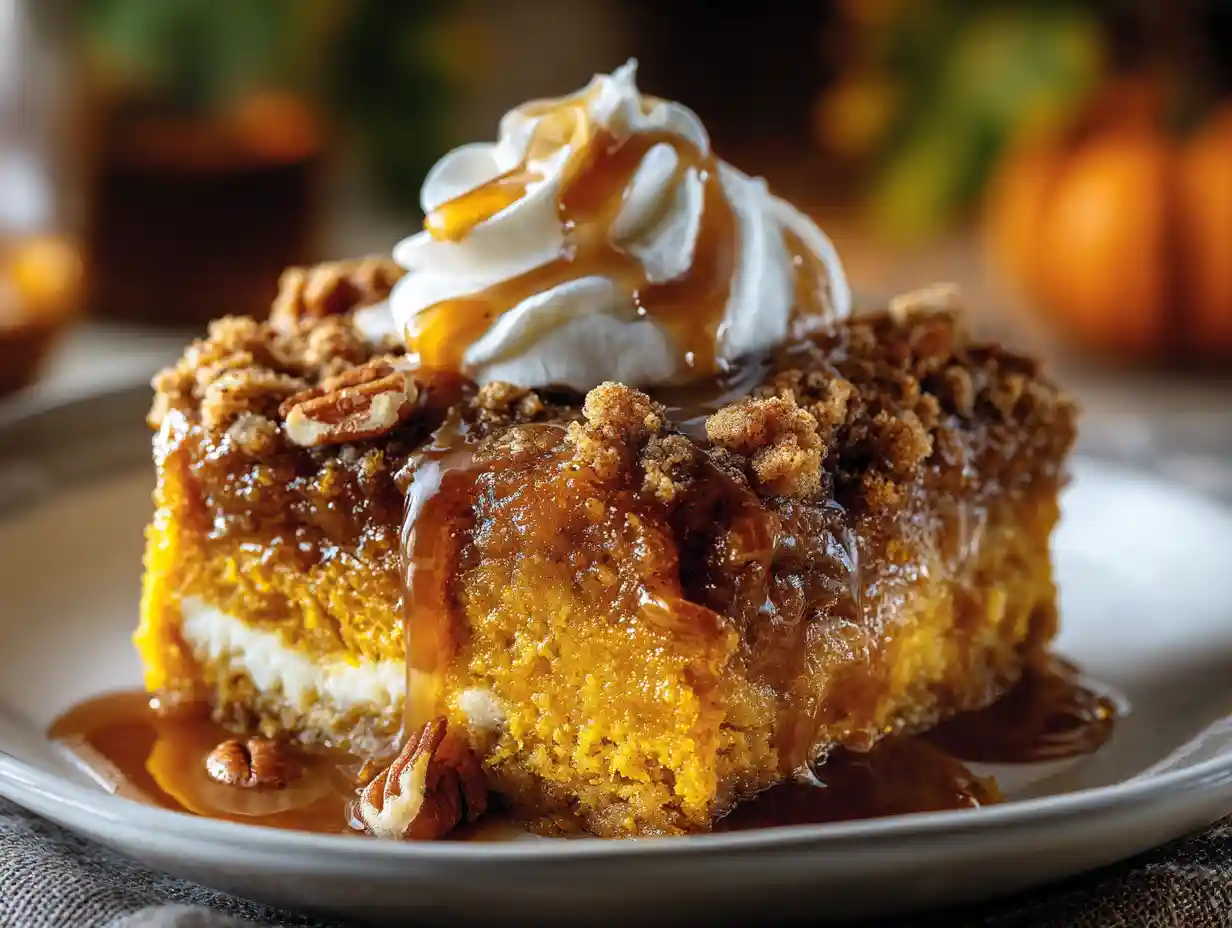
What emerges is a dessert with distinct, delicious layers. I adore how the bottom forms a creamy, custardy pumpkin pie-like base, while the middle transforms into a moist, cakey texture.
The top, where the butter melts into the cake mix and pecans, bakes into a delightfully buttery, crisp, and slightly crunchy topping. It’s this unique process that makes dump cakes so popular for their ease and incredible flavor.
Why This Pumpkin Dump Cake Recipe Is Your New Fall Favorite
I truly believe this particular Pumpkin Dump Cake Recipe will become a staple in your autumn baking routine. It’s more than just easy; it’s a showstopper.
- Effortless Elegance: This recipe requires minimal effort for maximum impact. You’ll spend less time in the kitchen and more time enjoying the season.
- Perfectly Balanced Flavors: I’ve found the combination of pumpkin, spice, and buttery cake mix creates a harmony of fall flavors that isn’t overly sweet but utterly satisfying.
- Minimal Cleanup: With just one pan and a mixing bowl, cleanup is a breeze, which is always a win in my book, especially during busy holidays like Thanksgiving.
- Crowd-Pleasing Dessert: This dump cake consistently receives rave reviews. It’s a comforting, substantial dessert that’s ideal for family dinners, potlucks, or holiday celebrations.
Gather Your Tools: Essential Equipment
You don’t need a lot of fancy gadgets for this Pumpkin Dump Cake Recipe. Just a few essentials will have you baking in no time.
- 9×13 inch cake pan: I always recommend a glass or ceramic pan for even heat distribution, which helps the cake bake beautifully and allows you to see the golden-brown edges.
- Large mixing bowl: You’ll need this to combine the wet ingredients for the pumpkin layer.
- Whisk: Essential for ensuring your pumpkin mixture is perfectly smooth.
- Non-stick cooking spray: For thoroughly greasing your pan, making sure your delicious cake comes out easily.
Ingredients You’ll Need for the Best Pumpkin Dump Cake
I like to keep things straightforward with ingredients you can easily find. Here’s exactly what you’ll need for this cozy Pumpkin Dump Cake Recipe.
- 15 oz canned pumpkin puree
- 12 oz evaporated milk
- 1 cup (213g) packed brown sugar
- 3 large eggs
- 2 tsp pumpkin pie spice
- 15.25 oz yellow cake mix
- 1 cup (114g) chopped pecans
- 1 cup (226g) unsalted butter (melted)
Step-by-Step: How To Make The Perfect Pumpkin Dump Cake
I’m going to walk you through each step to ensure your Pumpkin Dump Cake turns out absolutely perfect.
- Preheat the oven to 350ºF. Get your oven warmed up and ready to go.
- Grease the bottom and sides of a 9×13 inch cake pan with non-stick cooking spray. This step is so important! I make sure to get into all the corners and up the sides to guarantee your cake slides out easily after baking.
- In a large bowl combine the pumpkin, evaporated milk, brown sugar, eggs and pumpkin pie spice. Just toss them all into your mixing bowl.
- Whisk until combined. Pour this mixture into the greased pan. Make sure to whisk until the mixture is completely smooth and there are no lumps of brown sugar or egg streaks, then carefully pour it into your prepared pan.
- Sprinkle the cake mix powder on top of the batter as evenly as possible. This is a crucial step! To prevent any dry spots in your finished cake, I suggest using a spoon to spread the powder thinly and evenly over the entire surface, or even sifting it if you want extra assurance.
- Sprinkle the pecans evenly over the batter. For an extra layer of flavor and crunch, I sometimes like to lightly toast my pecans in a dry pan for a few minutes before sprinkling them. It really brings out their nutty essence.
- Pour the melted butter evenly over the top of the cake. Achieving even butter coverage is key for a consistently crisp topping. I recommend drizzling the melted butter slowly and moving your hand across the entire surface. If you’re feeling adventurous and want the crispiest topping possible, try grating frozen butter over the top instead; it helps distribute the butter even more uniformly.
- Bake for 45-50 minutes, until the edges are browned and the center is set. A knife inserted in the middle should come out clean. Start checking around the 45-minute mark. When I say a “clean knife,” I mean it should come out with moist crumbs but no wet batter, indicating the center is fully cooked but still wonderfully moist.
The best part is you can serve this after other desserts & drinks.
Knowing When Your Pumpkin Dump Cake Is Perfectly Baked
It can be a little tricky to tell when a dump cake, especially one with a moist pumpkin base, is perfectly done. Beyond the “clean knife” test, I look for a few specific cues. The edges of the cake should be beautifully golden brown and pull slightly away from the sides of the pan.
I also gently jiggle the pan; the center should feel mostly set, with just a slight, subtle wiggle, not a liquid slosh. This indicates that the custardy pumpkin layer is fully cooked without being overbaked, which can dry out the cake.
Tips for Storing & Making Ahead Your Pumpkin Dump Cake
I find that this Pumpkin Dump Cake is almost better the next day as the flavors meld. Here’s how I like to store it:
- Room Temperature: You can store any leftover cake, tightly covered with plastic wrap, at room temperature for up to 2 days.
- Refrigerator: For longer storage, I keep it in the refrigerator, again tightly covered, for up to 5 days. The pumpkin layer keeps it extra moist.
- Freezer: This cake freezes beautifully! Once completely cooled, I wrap the entire cake (or individual slices) tightly in plastic wrap, then aluminum foil. It will keep in the freezer for up to 3 months.
- Reheating: To reheat a whole frozen cake, thaw it overnight in the refrigerator, then warm it in a 300ºF oven for about 15-20 minutes until heated through. For individual slices, I pop them in the microwave for 30-60 seconds, or a toaster oven until warm.
This reminds me of how great the Simple Caramel Apple Upside Down Cake Recipe is!
Creative Variations & Smart Substitutions for Your Pumpkin Dump Cake
I love a recipe that offers flexibility, and this Pumpkin Dump Cake is wonderfully adaptable. Here are some of my favorite ways to change it up.
Cake Mix Flavors
The type of cake mix you choose can really transform the flavor profile.
| Cake Mix Flavor | Flavor Profile/Notes |
|---|---|
| Yellow Cake Mix | Classic, buttery base that lets the pumpkin shine. |
| Spice Cake Mix | Enhances the pumpkin spice flavor, adds warmth. |
| White Cake Mix | Lighter, subtly sweet; allows the pumpkin and butter to dominate. |
| Butter Pecan | Adds a nutty, rich dimension; complements pecans if used. |
| Chocolate | For a “chocolate pumpkin” twist; surprisingly delicious! |
Milk Substitutions
If you don’t have evaporated milk, or want to try something different, I’ve had success with these:
- Heavy Cream: Will make the pumpkin layer even richer and more decadent.
- Half-and-Half: A good middle-ground that adds richness without being too heavy.
- Dairy-Free Options: Full-fat coconut milk or almond milk can work, but may slightly alter the texture and add a subtle flavor profile to the pumpkin layer.
Nut-Free & Alternative Toppings
For those with nut allergies or just different preferences, I have some great ideas:
- Streusel Topping: You can make a simple streusel with flour, brown sugar, oats, and butter to sprinkle over the cake mix layer.
- Toasted Coconut: Adds a lovely chewy texture and tropical note.
- Crumbled Cookies: Crushed graham crackers, gingersnaps, or shortbread cookies sprinkled on top can create a delicious new crust.
Make Your Own Pumpkin Pie Spice
If you want the freshest, most vibrant spice blend, I encourage you to make your own. Here’s my simple recipe:
- 1 tablespoon ground cinnamon
- 1 teaspoon ground ginger
- 1 teaspoon ground nutmeg
- 1/2 teaspoon ground allspice
- 1/2 teaspoon ground cloves
Just mix these together, and you’ll have a fragrant blend ready to go!
Add-Ins & Layers
I love experimenting with extra layers and mix-ins for added texture and flavor:
- Cream Cheese Swirl: Soften 4 oz cream cheese with 1/4 cup sugar and an egg yolk. Dollop it over the pumpkin mixture before adding the cake mix, then swirl with a knife.
- Chocolate Chips: Sprinkle a handful of chocolate chips over the pumpkin layer for a delightful surprise.
- Dried Cranberries: Adds a tart counterpoint to the sweetness.
- Different Fruits: Finely diced apples or pears can be gently folded into the pumpkin layer for another layer of flavor and texture.
Troubleshooting Common Pumpkin Dump Cake Challenges
Even with a simple recipe, sometimes little things can go awry. Here are my go-to tips for solving common dump cake dilemmas.
- Preventing Dry Cake Mix Patches: The key is truly even butter distribution. As I mentioned, drizzling slowly or even grating frozen butter over the top ensures every bit of dry mix gets saturated. This transforms the powder into a delicious cakey crust instead of leaving unpleasant dry pockets.
- Watery Pumpkin Layer: This can sometimes happen if your pumpkin puree has too much moisture or if the evaporated milk isn’t fully incorporated. I always make sure to whisk the pumpkin mixture thoroughly until it’s completely smooth and uniform. Using canned pumpkin puree, not pumpkin pie filling, is also important as pie filling has added ingredients that can alter the consistency.
- Uneven Baking/Different Pan Sizes: A 9×13 pan is ideal for this recipe. If you use a different size, you’ll need to adjust the bake time. A smaller, deeper pan might require a longer bake, while a larger, shallower pan will bake faster. I always recommend keeping a close eye on it and using the “jiggle test” and “clean knife” method to gauge doneness.
- Achieving Your Preferred Topping Texture: If you prefer a really crispy, crunchier topping, ensure your butter is very evenly distributed, and consider grating frozen butter. For a softer, more cake-like crust, simply pouring melted butter will give you that lovely texture. Baking until the edges are deep golden will also help with crispness.
This would be perfect alongside our Irresistible Apple Fritter Cake Recipe!
Elevate Your Dessert: Serving & Pairing Suggestions
While this Pumpkin Dump Cake is delicious on its own, I love adding a little something extra to truly elevate the experience.
- Classic Toppings with a Twist: Of course, a dollop of fresh whipped cream or a scoop of vanilla bean ice cream is always welcome. But for an upgrade, try adding a drizzle of homemade salted caramel or a sprinkle of toasted coconut flakes.
- Candied Pecans: Instead of regular pecans, sprinkle on some candied pecans for an extra layer of sweetness and crunch.
- Cream Cheese Frosting: A light, tangy cream cheese frosting dolloped on top before serving adds a lovely contrast to the warm spices.
- Beverage Pairings: I find this cake pairs beautifully with a steaming mug of spiced apple cider, a rich cup of coffee, or even a glass of dessert wine like a late harvest Riesling.
- Presentation: A simple dusting of powdered sugar over the top, or a few extra toasted pecans, can make your dessert look bakery-worthy.
FAQs About Pumpkin Dump Cake
I often get asked some common questions about this delightful dessert, so I’ve gathered my answers here for you.
What if I have powdery spots on top of my cake after baking?
This usually means the melted butter wasn’t distributed evenly enough over the dry cake mix. Next time, I suggest taking extra care to drizzle the butter slowly over the entire surface, or try the frozen grated butter method for ultimate evenness.
Can I mix the cake mix into the pumpkin layer?
While you can, it wouldn’t be a “dump cake” in the traditional sense, and it would drastically change the texture. The beauty of a dump cake is that the layers combine in the oven to create distinct textures, which is why I recommend keeping them separate as instructed.
My pumpkin layer seems too runny. What happened?
Ensure you’re using 100% pure pumpkin puree, not pumpkin pie filling, which has different ingredients and can affect consistency. Also, making sure your evaporated milk, eggs, and pumpkin are thoroughly whisked together until smooth helps create that perfect custardy base.
Can I make this with a gluten-free cake mix?
I haven’t personally tested it, but many readers have reported success using a 1:1 gluten-free yellow cake mix. The texture might be slightly different, but the overall flavor should remain delicious.
Conclusion
I hope you’re as excited as I am to try this incredible Pumpkin Dump Cake Recipe. It truly embodies everything I love about fall baking: comforting flavors, minimal fuss, and a result that brings a smile to everyone’s face. There’s something so satisfying about pulling a warm, bubbly dessert out of the oven, especially one that came together with such ease.
I really encourage you to give this recipe a try; I promise it will make your kitchen feel a little warmer and your table a little fuller. I’d love to hear how your cake turns out! Please leave a comment below, ask any questions you have, or share your own creative variations. Happy baking, my friends!
Craving something warm and pumpkin-spiced? Follow us on Pinterest for simple, irresistible dessert recipes all season long!

Simple Pumpkin Dump Cake Recipe
Ingredients
Equipment
Method
- Preheat the oven to 350ºF. Get your oven warmed up and ready to go.
- Grease the bottom and sides of a 9×13 inch cake pan with non-stick cooking spray. This step is so important! I make sure to get into all the corners and up the sides to guarantee your cake slides out easily after baking.
- In a large bowl combine the pumpkin, evaporated milk, brown sugar, eggs and pumpkin pie spice. Just toss them all into your mixing bowl.
- Whisk until combined. Pour this mixture into the greased pan. Make sure to whisk until the mixture is completely smooth and there are no lumps of brown sugar or egg streaks, then carefully pour it into your prepared pan.
- Sprinkle the cake mix powder on top of the batter as evenly as possible. This is a crucial step! To prevent any dry spots in your finished cake, I suggest using a spoon to spread the powder thinly and evenly over the entire surface, or even sifting it if you want extra assurance.
- Sprinkle the pecans evenly over the batter. For an extra layer of flavor and crunch, I sometimes like to lightly toast my pecans in a dry pan for a few minutes before sprinkling them. It really brings out their nutty essence.
- Pour the melted butter evenly over the top of the cake. Achieving even butter coverage is key for a consistently crisp topping. I recommend drizzling the melted butter slowly and moving your hand across the entire surface. If you’re feeling adventurous and want the crispiest topping possible, try grating frozen butter over the top instead; it helps distribute the butter even more uniformly.
- Bake for 45-50 minutes, until the edges are browned and the center is set. A knife inserted in the middle should come out clean. Start checking around the 45-minute mark. When I say a “clean knife,” I mean it should come out with moist crumbs but no wet batter, indicating the center is fully cooked but still wonderfully moist.