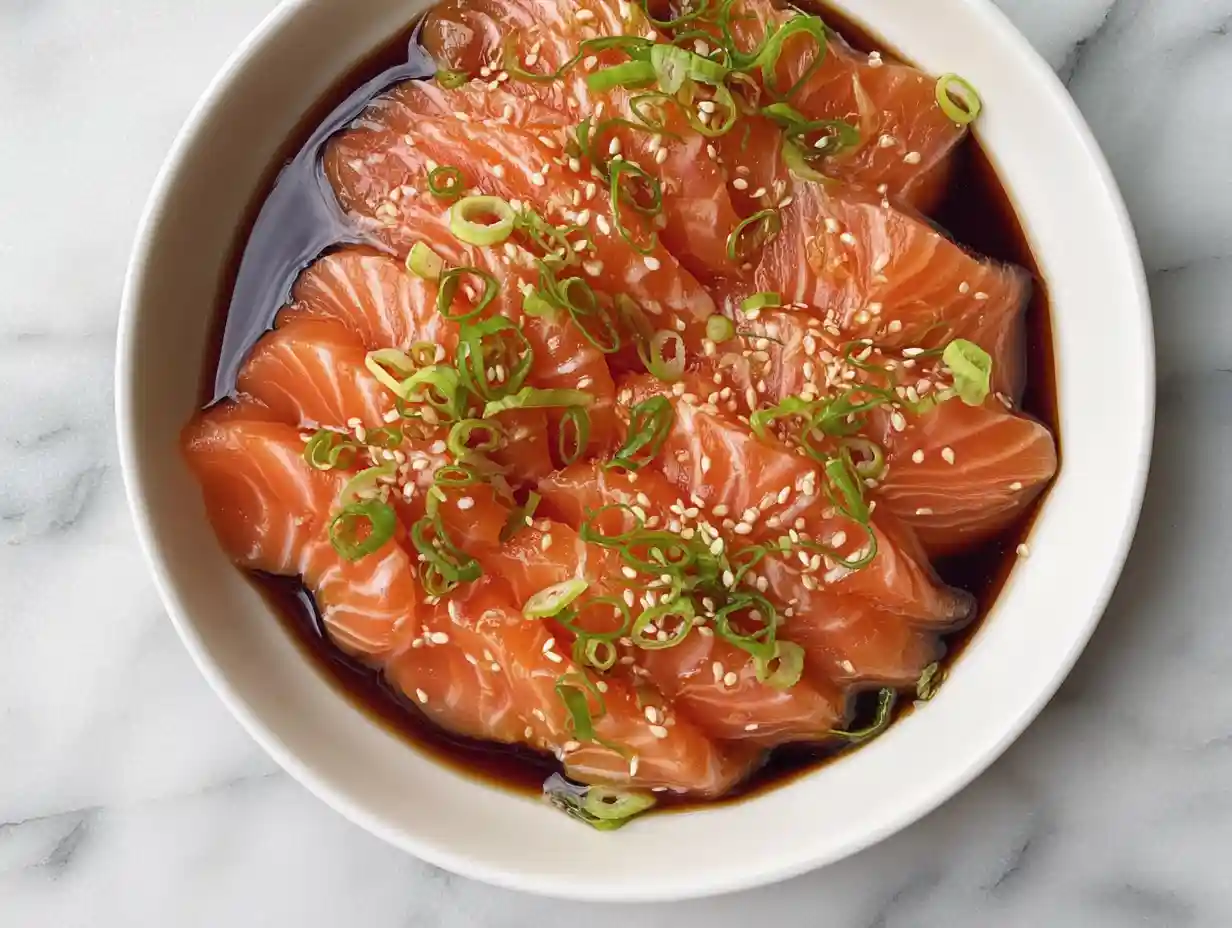

Oh, hello there! I am so thrilled you are joining me today at Gather and Cook because I am about to share one of my absolute favorite culinary adventures: making delicious Salmon Sashimi right here in my own kitchen.
There is just something incredibly satisfying about transforming a beautiful piece of fresh salmon into elegant, melt-in-your-mouth sashimi. It feels like bringing a little piece of restaurant magic home, and I promise you, it is much easier than you might think.
This recipe is all about celebrating the natural flavor and incredible health benefits of salmon, preparing it with care, and enjoying a truly gourmet experience without ever leaving your home.
Table of Contents
Why You’ll Love Making Salmon Sashimi at Home
- Unbeatable Freshness and Flavor: When I make Salmon Sashimi myself, I control the quality from start to finish. I choose the freshest fish available, ensuring every bite is vibrant and pure.
- Cost-Effective Indulgence: Enjoying sashimi at a restaurant can be quite an expense. Preparing it at home allows me to savor this delicacy more often, making it a sustainable treat for my budget.
- Mastering a Culinary Art: There is immense satisfaction in learning a new skill. Slicing perfect sashimi feels like a true accomplishment, and it is a wonderful way to expand my cooking repertoire.
- Complete Ingredient Control: I know exactly what goes into my food. This means no hidden additives, just pure, wholesome salmon prepared exactly how I like it.
What is Salmon Sashimi?
Salmon sashimi is a truly elegant dish, simply consisting of thinly sliced raw salmon, typically served with just a few complementary condiments. It is a cornerstone of Japanese cuisine, celebrated for its pristine flavor and delicate texture. Unlike sushi, which often includes rice and other ingredients, sashimi focuses solely on the exquisite quality of the fish itself. It is a testament to the idea that sometimes, the simplest preparations are the most profound.
Choosing the Best Salmon for Sashimi
Selecting the right salmon is the first and most crucial step in making exceptional sashimi. I always look for fish that looks vibrant and healthy. Its flesh should be firm, moist, and have a beautiful, bright orange-pink color.
A good piece of salmon will have clean, fresh smell, reminiscent of the ocean, with no strong “fishy” odor. When I gently press on the flesh, it should spring back immediately.
Different types of salmon, like King (Chinook), Sockeye, or Atlantic, offer varying fat contents; King salmon, for instance, is often prized for its high fat content and buttery texture, making it superb for sashimi.
“Sushi-Grade” Salmon Explained
You might hear the term “sushi-grade” often, and I want to clarify what that really means. It is important to know that “sushi-grade” is not an official government regulation by bodies like the FDA.
Instead, it is a designation primarily used by knowledgeable fishmongers and suppliers. It generally means the fish has been handled with extreme care, processed quickly, and, most importantly for raw consumption, frozen to specific FDA guidelines.
These guidelines require freezing at very low temperatures (such as -4°F (-20°C) or below for 7 days, or -31°F (-35°C) or below for 15 hours) to effectively kill any potential parasites, making it safe for raw consumption.
Farmed vs. Wild Salmon: What to Know
The choice between farmed and wild salmon for sashimi often comes down to personal preference, though there are important considerations for each.
- Farmed Salmon: Often boasts a higher, more consistent fat content, leading to a richer, buttery texture ideal for sashimi. They are typically raised in controlled environments, and reputable farms often implement strict feeding and handling practices. For sashimi, farmed salmon from trusted sources is frequently preferred because its controlled environment can lead to lower parasite risk, especially if properly processed and frozen according to safety standards.
- Wild Salmon: Known for its leaner profile and more robust, distinct flavor, reflecting its natural diet. While some chefs adore the taste of wild salmon, it generally carries a higher inherent risk of parasites compared to properly raised and processed farmed salmon. This makes the freezing step absolutely critical if I choose wild salmon for sashimi. Regardless of the source, always ensure the salmon has been appropriately frozen to eliminate any parasitic concerns.
Remember, after preparing your salmon dish, you can enjoy one of our desserts and drinks as well.
Making Salmon “Sushi-Grade” at Home: A Comprehensive Guide
While the term “sushi-grade” usually refers to fish processed commercially, I can take steps at home to make my salmon safe for raw consumption, primarily through proper freezing. This method targets and eliminates potential parasites.
First, I always source the freshest possible salmon from a reputable fishmonger. Even with the best fish, the freezing step is non-negotiable for safety. The scientific basis for this is that parasites, which can sometimes be present in fish, are killed when subjected to sufficiently low temperatures for a sustained period. This renders them harmless.
After preparing my salmon as detailed in the steps below, I follow these freezing guidelines:
- I ensure my freezer can consistently reach and maintain a temperature of 4°F (-20°C) or colder.
- I freeze the salmon for at least 7 days at this temperature. For extra caution, I might extend this to a month. This duration is crucial to ensure any potential parasites are completely neutralized.
Maintaining strict food safety precautions, such as using clean utensils and surfaces, is paramount throughout the entire process to prevent cross-contamination.
Essential Equipment for Slicing Perfect Salmon Sashimi
Having the right tools makes all the difference when I am aiming for those beautiful, uniform slices of sashimi.
- A Very Sharp Knife: This is absolutely the most critical tool. A long, thin, single-bevel knife, like a traditional Japanese Yanagiba, is ideal for sashimi as it allows for a clean, single draw through the fish. However, a very sharp, high-quality chef’s knife can work beautifully too. I keep my knives meticulously sharp; a dull knife will tear the fish instead of slicing it cleanly.
- Cutting Board: A stable, clean cutting board is essential. I prefer a wooden or good quality plastic board.
- Paper Towels: These are indispensable for patting the salmon dry at various stages, which is crucial for a clean cut and firm texture.
- Freezer Bags: For safely storing the salmon during the freezing process.
- Optional: Pichit Sheets: For those who want to go an extra step, these specialized sheets can draw out additional moisture and condense the flavor of the fish, similar to a traditional Japanese curing method. I find them helpful for an even firmer texture.
Ingredients for Your Homemade Salmon Sashimi
I love how simple the ingredients are for this dish. It truly lets the quality of the salmon shine.
For the Sashimi
- 1 pound salmon
- 1 teaspoon salt
Recommended Dipping Sauces & Garnishes
While the beauty of sashimi is its simplicity, the right dipping sauces and garnishes can elevate the experience immensely. I will share some of my favorite ways to complement this delicate dish in a moment.
How to Make Salmon Sashimi: Step-by-Step Instructions
Here is exactly how I prepare my Salmon Sashimi, from start to finish.
Step 1: Preparing Your Salmon
I always begin by getting fresh salmon from my local market; I am using 1 pound salmon fillet for this recipe. I start by patting the salmon dry with a paper towel. Then, I add 1 teaspoon salt (per pound) evenly over the fillet and let it sit for 20 minutes. I always notice that water will start coming out of the fish during this dry brining process.
After 20 minutes, I rinse the salmon thoroughly with running water to remove the salt and any impurities. Finally, I pat the salmon dry again with a paper towel, then store it in a freezer bag.
Step 2: Freezing for Safety
This step is critical for safety. I freeze the salmon for at least 7 days at 4°F (-20°C) to a month to kill parasites. This ensures it is safe for raw consumption.
Step 3: Thawing Your Salmon
When I am ready to eat the salmon, I always plan ahead. I defrost it in the refrigerator the night before I plan to serve it. This slow, gentle thawing helps maintain the salmon’s texture and flavor.
Step 4: The Art of Slicing Salmon Sashimi
Once thawed, I take the salmon out of the refrigerator before eating and pat it dry with a paper towel one last time.
For slicing, I position the salmon on my cutting board with the skin side down (if still attached; otherwise, skin removed). I use a very sharp knife and hold it at a slight angle, typically around 30-45 degrees, making a single, fluid draw towards me.
This long, smooth motion creates a clean cut without tearing the delicate flesh. I aim to cut against the grain of the fish whenever possible. For hira-zukuri, a common rectangular cut, I make slices about 1/4 inch thick and 1 to 1 1/2 inches wide.
Uniform slices are key for both aesthetics and a consistent texture in every bite.
Step 5: Plating and Serving
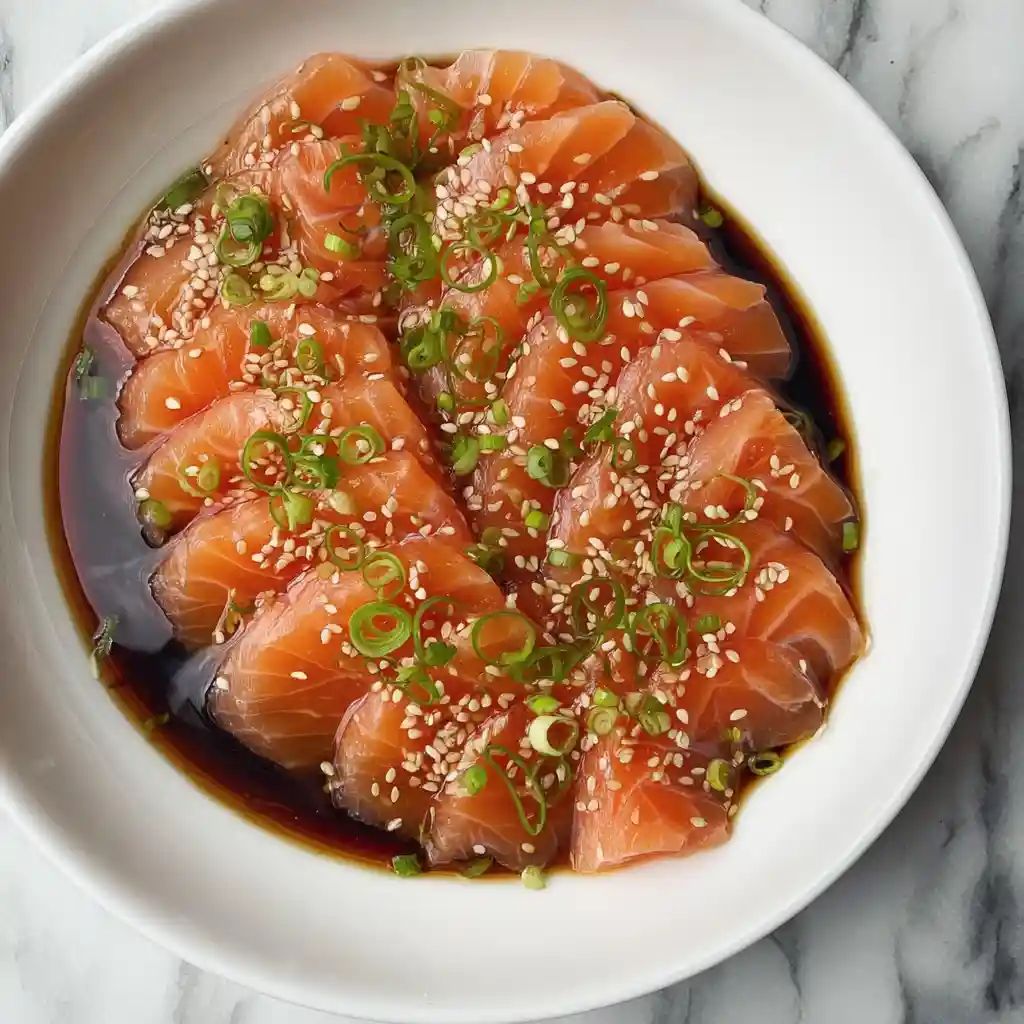
After carefully slicing the salmon, I arrange the beautiful pieces elegantly on a plate. I like to eat with sushi rice and dip with wasabi & soy sauce. If I have salmon skin left, I definitely don’t throw it away! I fry it in some oil for 5-7 minutes until crispy; it tastes just like chips!
Optionally, I sometimes serve the salmon sashimi with yuzu aioli for a slight citrus note. You can also serve the sashimi with lemon, cucumbers, and avocado for extra freshness and texture.
Like this recipe, you can make some delicious strawberry shortcake sushi rolls; this is definitely a dessert to try!
Elevate Your Salmon Sashimi: Dipping Sauces & Accompaniments
The right dipping sauces and accompaniments truly complete the sashimi experience. Here are a few of my favorites:
Classic Soy-Wasabi
This is the quintessential pairing. I pour a small amount of good quality soy sauce into a shallow dish. For the wasabi, I recommend putting a small dab on the side of my plate rather than mixing it directly into the soy sauce.
This allows me to control the amount of heat with each bite, or simply enjoy the clean flavor of the fish. Gently dabbing a tiny bit of wasabi onto the salmon slice before dipping it into the soy sauce is the traditional way, and I find it allows the distinct flavors to shine individually before blending.
Homemade Ponzu Sauce
Making ponzu sauce at home is incredibly rewarding, and it offers a brighter, tangier profile than regular soy sauce.
Ingredients:
- 1/4 cup soy sauce
- 1/4 cup fresh yuzu juice (or equal parts lemon and lime juice)
- 2 tablespoons mirin
- 1 tablespoon rice vinegar
- 1/2 teaspoon dashi granules (optional)
Instructions:
- In a small bowl, combine the soy sauce, yuzu juice (or lemon/lime), mirin, and rice vinegar.
- If using, dissolve the dashi granules in a tiny bit of hot water first, then stir into the mixture.
- Whisk everything together until well combined.
- Taste and adjust seasoning if needed. I sometimes add a pinch of sugar if the citrus is very tart.
- Let it sit for at least 15 minutes for the flavors to meld, or chill for an hour.
Yuzu Aioli
This aioli is a lovely creamy accompaniment, offering a subtle citrus lift.
Ingredients:
- 1/2 cup mayonnaise (I prefer a good quality Japanese mayo)
- 1 tablespoon fresh yuzu juice
- 1 teaspoon Dijon mustard
- Pinch of salt
- Pinch of white pepper
Instructions:
- In a small bowl, combine the mayonnaise, yuzu juice, and Dijon mustard.
- Whisk until smooth and well incorporated.
- Season with a pinch of salt and white pepper.
- Taste and adjust if desired; I might add a tiny bit more yuzu for extra zing.
- Cover and refrigerate for at least 30 minutes to allow the flavors to deepen.
Creative Garnishes & Presentation Tips
Garnishes are not just for beauty; they enhance the entire eating experience.
- Grated Daikon: A small mound of freshly grated daikon radish offers a refreshing, peppery palate cleanser between bites.
- Shiso Leaves: These vibrant green leaves provide a unique, slightly minty and peppery aroma that complements salmon beautifully. I often place a slice of sashimi directly on a shiso leaf.
- Thinly Sliced Radish: Adds a lovely crunch and a touch of color.
- Lemon Wedges: A squeeze of fresh lemon juice brightens the flavor of the salmon.
- Avocado and Cucumber: As mentioned in my recipe, thin slices of these add a creamy or crisp texture contrast.
For presentation, I focus on simplicity and clean lines. I arrange the sashimi in an appealing pattern, perhaps fanned out or in a neat row. Adding a few carefully placed garnishes creates a stunning visual, making the dish feel even more special.
Pairing Suggestions for Salmon Sashimi
To complete my homemade sashimi experience, I enjoy pairing it with certain beverages and small dishes.
- Sake: A crisp, dry Junmai or Ginjo sake is a classic choice, its clean profile beautifully complementing the richness of the salmon.
- Green Tea: For a non-alcoholic option, a high-quality sencha or genmaicha green tea is wonderfully refreshing and aids digestion.
- Miso Soup: A small bowl of warm miso soup provides a comforting contrast.
- Edamame: Lightly salted edamame makes for a simple, satisfying appetizer.
Common Mistakes to Avoid When Making Salmon Sashimi
I have learned a few things over time, and avoiding these common pitfalls will help me achieve perfect sashimi every time:
- Dull Knife: This is the biggest culprit for poorly sliced sashimi. A dull knife will tear the fish, ruining its texture and appearance. I always make sure my knife is razor-sharp.
- Improper Thawing: Rushing the thawing process, such as using hot water or a microwave, can damage the delicate proteins and make the salmon mushy. Always thaw slowly in the refrigerator overnight.
- Incorrect Slicing Technique: Hacking at the fish or using a sawing motion will create jagged edges. I aim for a single, smooth, decisive cut with my sharpest knife.
- Poor Presentation: While taste is primary, presentation elevates the experience. Sloppy plating can detract from the elegance of the dish. Take a moment to arrange the slices artfully.
- Ignoring Safety: Skipping the freezing step or improper handling of raw fish can lead to health risks. I always prioritize food safety.
Food Safety and Storage for Salmon Sashimi
When working with raw fish, food safety is absolutely paramount. I take every precaution to ensure my homemade sashimi is delicious and safe.
Handling Raw Fish Safely
- Hygiene: I always wash my hands thoroughly with soap and water before and after handling raw fish.
- Temperature Control: Keep the salmon cold at all times. I only take it out of the refrigerator when I am ready to slice and serve, and I work quickly.
- Avoiding Cross-Contamination: I use separate cutting boards and utensils for raw fish, or I thoroughly wash and sanitize them after use before they touch any other foods. I also ensure raw fish juices do not come into contact with other ingredients.
Storage Tips for Fresh and Prepared Sashimi
- Raw “Sushi-Grade” Fillets: After the initial freezing and thawing (if done at home), I aim to prepare and consume the salmon within 1-2 days if stored properly in the coldest part of my refrigerator. The sooner, the better.
- Already Sliced Salmon Sashimi: Once sliced, sashimi is best consumed immediately for optimal freshness and texture. If I have leftovers, I store them in an airtight container in the refrigerator and aim to eat them within 24 hours. I do not recommend storing sliced sashimi for longer periods.
Nutritional Benefits of Salmon Sashimi
Beyond its incredible taste, I love that salmon sashimi is a powerhouse of nutrition. It is exceptionally rich in Omega-3 fatty acids, particularly EPA and DHA, which are crucial for heart health, brain function, and reducing inflammation.
Salmon also provides high-quality protein, essential for muscle repair and growth, along with a host of important vitamins and minerals, including Vitamin D, B vitamins, selenium, and potassium. It is a fantastic way to nourish my body. The American Heart Association highlights the health benefits of fish as being rich in calcium, phosphorus, and a great source of minerals, such as iron, zinc, iodine, magnesium, and potassium.
However, I always remember that consuming raw fish carries some risks for certain populations, such as pregnant women, young children, older adults, and individuals with compromised immune systems. If you fall into one of these categories, I recommend consulting with your doctor before enjoying raw fish.
This is especially important to be aware of in our lunch and dinner recipes.
Cultural Context & Etiquette for Enjoying Sashimi
Sashimi is more than just food; it is an experience rooted in Japanese culinary tradition. I appreciate understanding a bit of its cultural context. Sashimi is often considered the purest expression of the fish’s quality and is typically eaten at the beginning of a meal to appreciate its delicate flavors fully.
When eating sashimi, I follow a few simple etiquette tips:
- Soy Sauce: I use soy sauce sparingly, usually just dipping one corner of the fish, not drenching it. I also avoid mixing wasabi directly into the soy sauce, as traditionalists believe it diminishes the flavors.
- Wasabi and Ginger: I can place a tiny dab of wasabi directly on the salmon before dipping in soy sauce. The pickled ginger (gari) is meant to be eaten between different types of sashimi or sushi to cleanse the palate, not on top of the fish itself.
- No Rice: Sashimi is meant to be eaten without rice; if I want rice, I would opt for nigiri or a sushi roll.
- Chopsticks: I use my chopsticks to gently pick up the sashimi slices.
FAQs about Salmon Sashimi
Here are some common questions I hear about making salmon sashimi at home.
What exactly is “sushi-grade” salmon?
“Sushi-grade” salmon is a designation given by fishmongers, not an official regulation. It means the salmon has been handled and processed with extreme care, and most importantly, frozen to specific FDA guidelines (e.g., -4°F for 7 days) to kill any potential parasites, making it safe for raw consumption.
Can I use wild-caught salmon for sashimi?
Yes, I can use wild-caught salmon for sashimi, but it is absolutely crucial that it undergoes the proper freezing process. Wild salmon generally has a higher risk of parasites than farm-raised fish, so the freezing step for at least 7 days at 4°F (-20°C) is essential for safety.
How long can salmon sashimi be stored?
Once sliced, salmon sashimi is best eaten immediately. If I have any leftovers, I store them in an airtight container in the coldest part of my refrigerator and consume them within 24 hours. I do not recommend storing it longer than that.
Is freezing salmon at home safe for sashimi?
Yes, freezing salmon at home can be safe for sashimi, provided my freezer can consistently reach and maintain the necessary temperatures (4°F (-20°C) or colder) and I follow the required freezing duration of at least 7 days to eliminate parasites.
What are some good alternatives if I don’t have fresh wasabi?
If I do not have fresh wasabi root, the green paste or powder commonly sold as wasabi is a perfectly acceptable alternative. It offers a similar pungent heat. For something different, a spicy mayo (mayo mixed with sriracha), a dash of chili oil, or even finely grated horseradish can provide a different kind of kick.
There you have it! I hope I have demystified the art of making Salmon Sashimi at home for you. It truly is a rewarding experience, transforming a simple fillet into something so elegant and delicious. There is nothing quite like the satisfaction of serving a dish that feels gourmet, knowing I prepared it with my own hands.
I would love to hear about your sashimi adventures! Please leave a comment below with any questions, share your beautiful creations, or tag Gather And Cook on social media. I am so excited for you to pull up a chair and enjoy this incredible dish!
Into elegant salmon sashimi presentation and easy sauces? Follow us on Pinterest for step-by-step inspo.

Amazing Salmon Sashimi: Simple Recipe For A Delightful Treat
Ingredients
Equipment
Method
- I always begin by getting fresh salmon from my local market; I am using 1 pound salmon fillet for this recipe. I start by patting the salmon dry with a paper towel. Then, I add 1 teaspoon salt (per pound) evenly over the fillet and let it sit for 20 minutes. I always notice that water will start coming out of the fish during this dry brining process. After 20 minutes, I rinse the salmon thoroughly with running water to remove the salt and any impurities. Finally, I pat the salmon dry again with a paper towel, then store it in a freezer bag.
- This step is critical for safety. I freeze the salmon for at least 7 days at 4°F (-20°C) to a month to kill parasites. This ensures it is safe for raw consumption.
- When I am ready to eat the salmon, I always plan ahead. I defrost it in the refrigerator the night before I plan to serve it. This slow, gentle thawing helps maintain the salmon’s texture and flavor.
- Once thawed, I take the salmon out of the refrigerator before eating and pat it dry with a paper towel one last time. For slicing, I position the salmon on my cutting board with the skin side down (if still attached; otherwise, skin removed). I use a very sharp knife and hold it at a slight angle, typically around 30-45 degrees, making a single, fluid draw towards me. This long, smooth motion creates a clean cut without tearing the delicate flesh. I aim to cut against the grain of the fish whenever possible. For hira-zukuri, a common rectangular cut, I make slices about 1/4 inch thick and 1 to 1 1/2 inches wide. Uniform slices are key for both aesthetics and a consistent texture in every bite.
- After carefully slicing the salmon, I arrange the beautiful pieces elegantly on a plate. I like to eat with sushi rice and dip with wasabi & soy sauce. If I have salmon skin left, I definitely don’t throw it away! I fry it in some oil for 5-7 minutes until crispy; it tastes just like chips! Optionally, I sometimes serve the salmon sashimi with yuzu aioli for a slight citrus note. You can also serve the sashimi with lemon, cucumbers, and avocado for extra freshness and texture.
- In a small bowl, combine the soy sauce, yuzu juice (or lemon/lime), mirin, and rice vinegar.
- If using, dissolve the dashi granules in a tiny bit of hot water first, then stir into the mixture.
- Whisk everything together until well combined.
- Taste and adjust seasoning if needed. I sometimes add a pinch of sugar if the citrus is very tart.
- Let it sit for at least 15 minutes for the flavors to meld, or chill for an hour.
- In a small bowl, combine the mayonnaise, yuzu juice, and Dijon mustard.
- Whisk until smooth and well incorporated.
- Season with a pinch of salt and white pepper.
- Taste and adjust if desired; I might add a tiny bit more yuzu for extra zing.
- Cover and refrigerate for at least 30 minutes to allow the flavors to deepen.