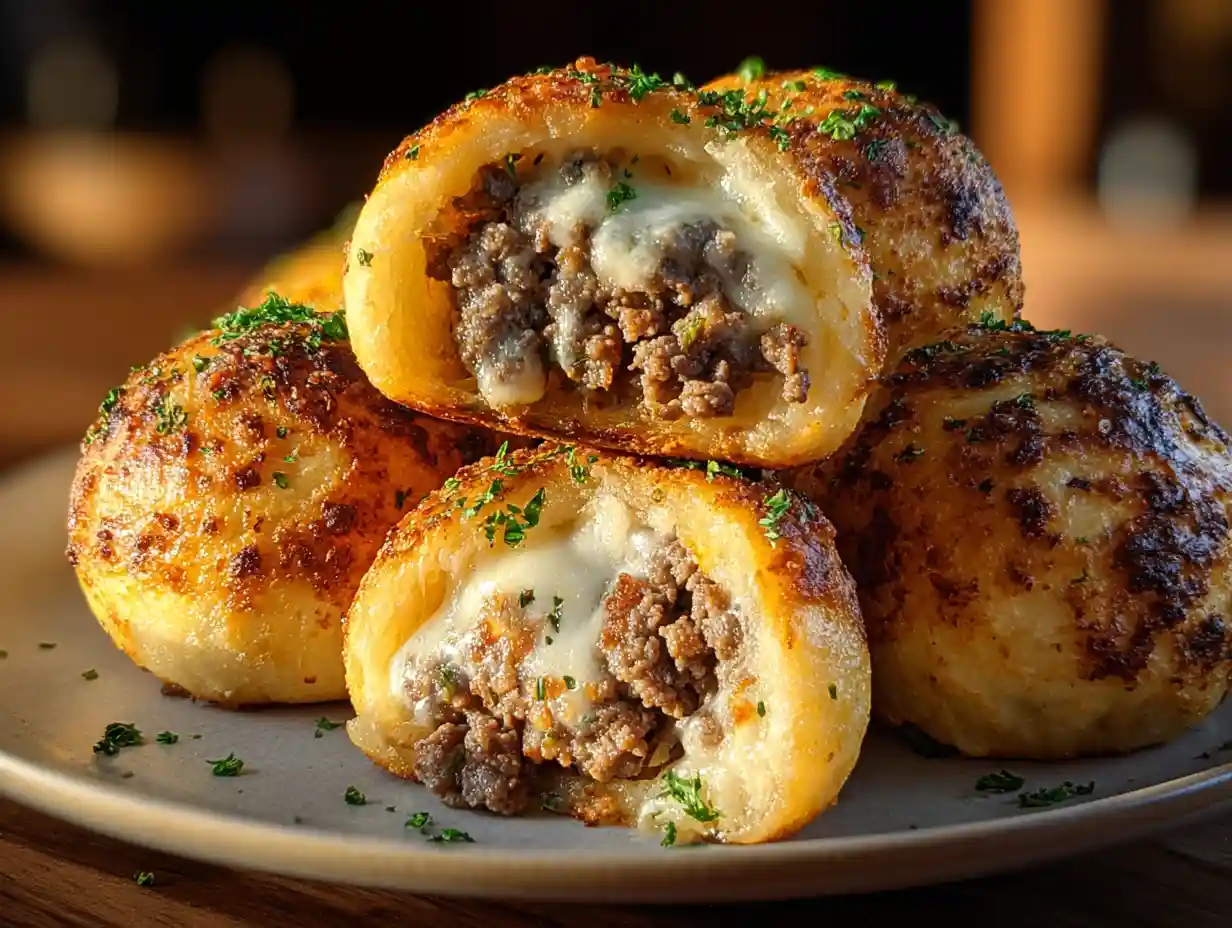

I’ve always believed that the best meals don’t have to be complicated to be incredibly satisfying. Sometimes, it’s about taking those classic comfort food flavors and making them accessible, quick, and, most importantly, absolutely delicious. That’s exactly what I set out to do with these Garlic Parmesan Cheeseburger Bombs!
These savory bites are my speedy, dough-free take on a beloved classic. They pack all the juicy, cheesy goodness of a cheeseburger into a neat, poppable package, ready to delight everyone at your table. Plus, the best part is that I can have these ready from prep to plate in about 30 minutes, making them perfect for busy weeknights or impromptu gatherings.
Table of Contents
Why You’ll Love These Garlic Parmesan Cheeseburger Bombs (My Speedy, Dough-Free Take!)
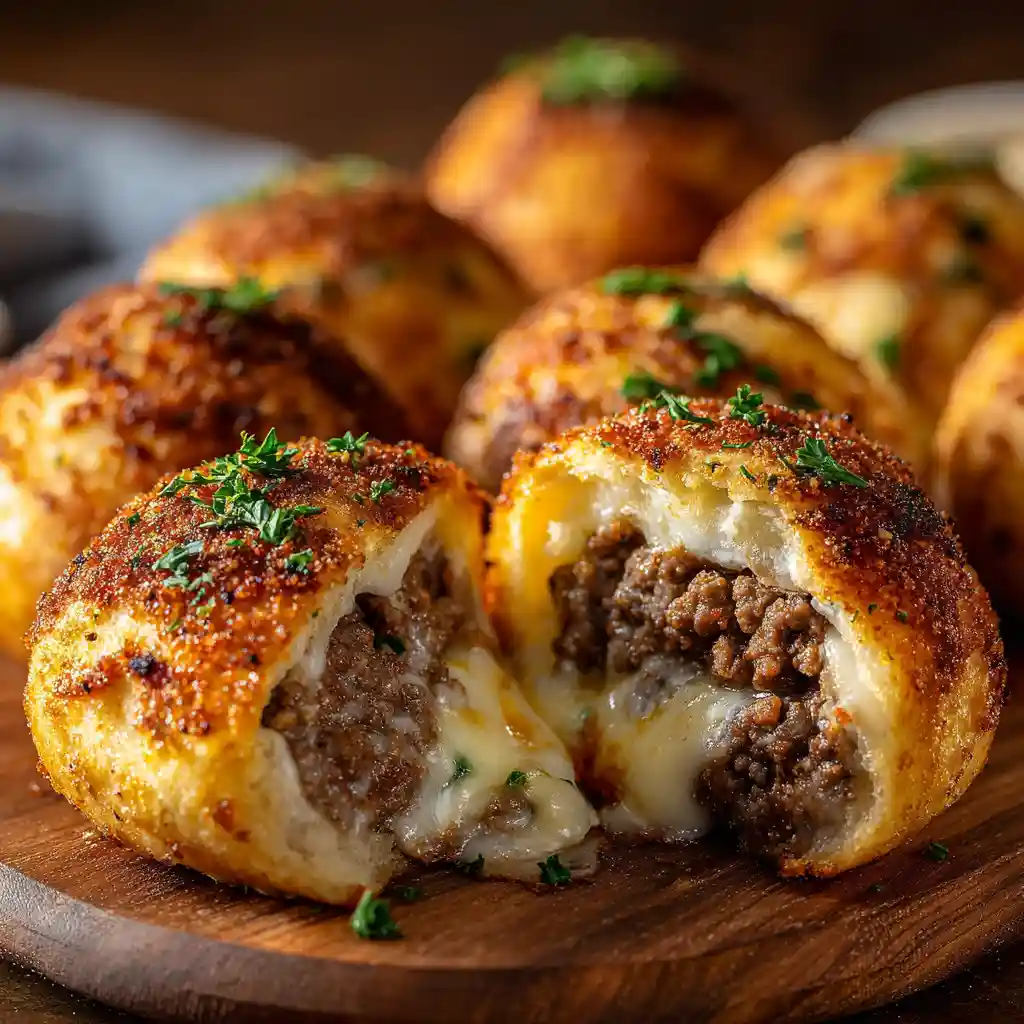
I know you’re going to adore these cheeseburger bombs for so many reasons. I designed them to be a fantastic alternative to traditional dough-wrapped snacks, focusing on maximum flavor with minimal fuss.
- Faster Prep & Cook Time: Since I skip the dough, you save a ton of time on rising and rolling. This recipe gets dinner or appetizers on the table in a flash.
- Pure Cheeseburger Flavor: Without a thick bready layer, the rich, savory taste of the beef and melted cheese really shines through. Each bite is an explosion of classic cheeseburger goodness!
- Incredibly Versatile: These bombs are perfect as a hearty appetizer for game day or a fun, deconstructed main course for the family. I often serve them with a simple side salad for a complete meal.
- Kid-Friendly & Crowd-Pleasing: I find that everyone, from the pickiest eaters to the most discerning adults, absolutely loves these cheesy, meaty morsels. They disappear quickly at my house!
What Makes My Garlic Parmesan Cheeseburger Bombs Stand Out?
I put a lot of thought into making these cheeseburger bombs truly special, elevating the humble ground beef to something extraordinary. It’s all about building layers of flavor that really pop.
I start by creating a robust “cheeseburger” flavor profile right in the beef filling. Minced garlic, onion powder, and paprika aren’t just seasonings; they’re the foundation. For an extra punch, I love to add a dash of Worcestershire sauce or a pinch of my favorite smoky burger seasoning, which truly deepens that savory beef taste. I have another great recipe for using hamburger meat, consider trying out my Crockpot Hamburger Potato Casserole Recipe.
Then comes the magic: a gooey core of shredded mozzarella cheese. This melts beautifully and provides that quintessential cheesy pull. Finally, rolling each bomb in grated Parmesan cheese before baking creates a wonderfully golden, savory crust that adds another layer of irresistible flavor and texture.
Ingredients You’ll Need for Your Delicious Garlic Parmesan Cheeseburger Bombs
Gathering your ingredients is the first step to a delicious meal. I always make sure I have these staples on hand for my cheeseburger bombs.
- 1 lb ground beef
- 1 cup shredded mozzarella cheese
- 1/2 cup grated parmesan cheese
- 2 cloves garlic, minced
- 1/4 cup chopped fresh parsley
- 1/4 cup breadcrumbs
- 1 egg
- 1 tsp salt
- 1/2 tsp black pepper
- 1/2 tsp onion powder
- 1/2 tsp paprika
- Cooking spray or olive oil for greasing
When it comes to ground beef, I always recommend using an 80/20 lean-to-fat ratio. This ensures your bombs stay wonderfully juicy and flavorful, preventing them from drying out during baking.
For the cheese, while pre-shredded works, I often find that shredding my own mozzarella from a block melts much smoother and gives a creamier texture inside.
As for optional enhancements, I sometimes stir in a teaspoon of Worcestershire sauce or a generous pinch of my favorite burger seasoning blend into the beef mixture. This really deepens that classic “cheeseburger” taste I’m aiming for. The USDA states that the maximum fat content in ground beef is 30%.
Essential Equipment for Crafting Your Cheeseburger Bites
Having the right tools makes all the difference in the kitchen. Here’s what I use to make my cheeseburger bombs, plus a few helpful extras.
- Large mixing bowl
- Baking sheet
- Parchment paper (optional)
For best results and to make the process even smoother, I often reach for a cookie scoop. It’s fantastic for portioning out the beef mixture, ensuring all my cheeseburger bombs are a uniform size and cook evenly. Instead of parchment paper, I sometimes use silicone baking mats; they’re reusable and make cleanup incredibly easy.
Consider browsing my other lunch & dinner options if you are looking for something new.
How to Make Garlic Parmesan Cheeseburger Bombs: Step-by-Step Instructions
Making these cheeseburger bombs is such a simple and enjoyable process. Just follow my lead, and you’ll have delicious bites in no time!
First, I preheat my oven to 400°F (200°C). Then, I line a baking sheet with parchment paper or lightly grease it with cooking spray; this helps prevent sticking and makes for easy cleanup later.
Next, in a large mixing bowl, I combine the ground beef, minced garlic, chopped parsley, breadcrumbs, egg, salt, pepper, onion powder, and paprika. I make sure to mix everything until it’s well combined, but I’m careful not to overmix, as that can make the beef tough.
Now for the fun part: I take a small portion of the beef mixture, about the size of a golf ball, and flatten it gently in my hand to create a small patty.
I then place a small amount of mozzarella cheese in the center of the flattened beef. Carefully, I fold the beef around the cheese, sealing it completely to form a snug ball. It’s important to make sure there are no gaps!
After forming the beef balls, I roll each one in the grated Parmesan cheese until it’s fully coated. This step is crucial for that delicious golden crust!
I then place the cheeseburger bombs on the prepared baking sheet, making sure to leave a little space between each one so they can cook evenly.
Finally, I bake them in the preheated oven for 18-20 minutes, or until the outside is beautifully golden brown and the beef is cooked through. When they come out of the oven, I sometimes garnish them with extra parsley for a fresh touch. Serve these hot, and watch them disappear!
If you are looking for another cheesy appetizer, take a look at my Amazing Cheesy Mashed Potato Puff Bites Recipe.
Evelyn’s Expert Tips for Perfect Garlic Parmesan Cheeseburger Bombs
I’ve made these many times, and I’ve picked up a few tricks to ensure they turn out perfect every time. These expert tips will help you achieve the best results with your cheeseburger bombs!
Sealing the Deal: Preventing Cheese Leaks
The key to a perfectly gooey center with no messy cheese leaks is a tight seal. When I’m forming the beef around the mozzarella, I gently but firmly press the beef mixture together.
I always double-check to make sure there are no cracks or gaps where that precious cheese could escape during baking. A well-sealed ball means all the cheesy goodness stays right where it belongs!
Achieving a Golden Exterior
That beautiful golden and slightly crispy crust comes from two things: the Parmesan coating and the oven temperature. I make sure to roll each beef ball generously in the grated Parmesan cheese; this forms a delicious savory exterior. Baking them at 400°F (200°C) helps the Parmesan toast and the beef brown beautifully, creating that irresistible outer texture.
Ensuring Even Cooking
For consistent cooking, uniform sizing is important. I find that using a cookie scoop really helps me create beef balls that are all roughly the same size. This way, they all cook through at about the same rate.
Also, don’t overcrowd your baking sheet; I make sure to leave a little space between each bomb. This allows for proper air circulation, which promotes even cooking and browning.
Serving Suggestions & Pairing Ideas for Your Cheeseburger Bites
These cheeseburger bombs are incredibly versatile, and I love how they can adapt to almost any occasion! They make a delightful appetizer for a party, but I also often transform them into a satisfying family meal.
For a fun family dinner, I might serve them alongside some gourmet seasoned fries or a big, fresh garden salad. Creamy coleslaw or crisp pickle spears also make fantastic companions, really leaning into that classic cheeseburger vibe. These pairings make the meal feel complete and incredibly satisfying.
Homemade Dipping Sauces to Elevate Your Bites
To truly elevate these bites, I love offering a few homemade dipping sauces. They’re quick to whip up and add a wonderful burst of flavor.
- Zesty Special Sauce: I whisk together 1/2 cup mayonnaise, 2 tablespoons ketchup, 1 tablespoon sweet pickle relish, 1 teaspoon yellow mustard, and a pinch of garlic powder. It’s a tangy, creamy classic that tastes amazing with these bombs!
- Quick Garlic Aioli: I combine 1/2 cup mayonnaise with 1 minced clove of garlic, a squeeze of fresh lemon juice, and a pinch of salt and pepper. This provides a rich, garlicky counterpoint that I adore.
Flavorful Variations & Customization Ideas
I love experimenting with different flavors, and these cheeseburger bombs are perfect for customization. Here are some of my favorite ways to change them up!
| Variation Name | Description/Key Ingredients |
|---|---|
| Spicy Jalapeño Popper Bites | Mix finely diced jalapeños into the beef mixture and use a cream cheese core. |
| Mushroom Swiss Bombs | Sautéed mushrooms mixed into the beef, with a cube of Swiss cheese inside. |
| Loaded Bacon Cheddar Bombs | Add cooked, crumbled bacon bits to the beef and stuff with a cheddar cheese cube. |
| Pizza Bombs | Mix dried oregano and basil into the beef, use mozzarella, and serve with marinara. |
Dietary Adaptations
I also understand that dietary needs vary, so I’ve thought about how you can easily adapt this recipe to suit different preferences.
| Adaptation | Suggestion/Ingredient Swap |
|---|---|
| Healthier Meat | Swap ground beef for ground chicken or turkey. Be mindful that leaner meats may require a bit more oil. |
| Dairy-Free Cheese | Use a plant-based shredded mozzarella and a dairy-free Parmesan alternative. |
| Gluten-Free | Substitute regular breadcrumbs with certified gluten-free breadcrumbs. |
Make-Ahead, Storage, and Reheating Your Cheeseburger Bites
Life gets busy, and I’m a big fan of making meals easier. These cheeseburger bombs are fantastic for prepping ahead, storing, and reheating!
To prepare them in advance, I form all the beef balls, stuff them with cheese, and roll them in Parmesan. Then, I arrange them on a baking sheet, cover it tightly with plastic wrap, and refrigerate for up to 24 hours. When I’m ready to bake, I just pop them in the oven.
For storing baked leftovers, I let the bombs cool completely, then place them in an airtight container in the refrigerator for up to 3-4 days.
Reheating is a breeze! My favorite method for baked bombs is in the oven: I preheat to 350°F (175°C) and bake for 10-15 minutes, or until heated through. An air fryer at 350°F (175°C) for 5-7 minutes also works wonders, giving them a lovely crispness. The microwave can work in a pinch for about 30-60 seconds per bomb, but the texture won’t be as good.
You can also freeze uncooked or cooked bombs! For uncooked, I place the formed, unbaked bombs on a baking sheet and freeze until solid, then transfer to a freezer-safe bag for up to 3 months. To bake from frozen, I add an extra 5-10 minutes to the baking time.
For cooked bombs, I follow the same freezing process and then reheat in the oven or air fryer from frozen, adding extra time until they are hot.
Troubleshooting Common Issues with Your Cheeseburger Bites
I’ve learned a few things over the years about what can sometimes go wrong, and more importantly, how to fix it! Don’t worry, I have solutions for common issues you might encounter with your cheeseburger bites.
If your beef is drying out, you might be overcooking them. I always make sure to keep an eye on the clock and cook just until golden brown and the beef is cooked through, usually 18-20 minutes. Using 80/20 ground beef, as I recommended, also helps maintain juiciness. If it’s still an issue, try reducing the cooking time slightly or lowering the temperature next time.
When the cheese is leaking, it’s usually a sign that the beef wasn’t sealed tightly enough around the mozzarella. When I’m forming the balls, I pay extra attention to pressing the beef firmly and ensuring there are no visible cracks or gaps. It takes a little practice, but a good seal is key to keeping that cheese inside.
If you notice uneven cooking, where some bombs are more done than others, it often comes down to inconsistent sizing or overcrowding the baking sheet. I use a cookie scoop to ensure all my beef balls are roughly the same size, which helps them cook at the same rate. Also, I always make sure to space them out on the baking sheet so hot air can circulate evenly around each one. This ensures every bomb gets perfectly cooked.
FAQs About Garlic Parmesan Cheeseburger Bombs
Can I make these ahead of time?
Absolutely! I often prepare the beef mixture, form the bombs, and then refrigerate them for up to 24 hours before baking. Just cover them tightly with plastic wrap to keep them fresh.
What kind of cheese works best for the filling?
I find shredded mozzarella cheese to be the best for the filling because it melts beautifully and gets wonderfully gooey. Cheddar, Monterey Jack, or even a blend of cheeses would also be delicious, but mozzarella is my top pick for that classic stretch.
Can I freeze these cheeseburger bites?
Yes, you can! I often freeze them both before and after baking. For unbaked bombs, freeze them on a baking sheet until solid, then transfer to a freezer-safe bag. Bake from frozen, adding extra cooking time. For baked bombs, cool completely, then freeze and reheat from frozen in the oven or air fryer.
How do I prevent the cheese from leaking?
The most important step is to ensure the beef mixture is tightly sealed around the mozzarella. I press the beef firmly and carefully, making sure there are no cracks or gaps in the meat before I roll it in Parmesan.
Can I add other ingredients to the beef mixture?
Please do! I encourage you to customize. Finely diced onions, bell peppers, or even a pinch of red pepper flakes for a little heat are great additions. Just make sure not to add too many wet ingredients, as this can make the mixture hard to form.
What’s the best way to reheat them?
I prefer reheating them in the oven at 350°F (175°C) for 10-15 minutes, or in an air fryer at 350°F (175°C) for 5-7 minutes. This helps maintain a nice texture and keeps the outside slightly crispy. The microwave works in a pinch but might make them a bit softer.
Conclusion
I truly hope you’re feeling inspired to try these Garlic Parmesan Cheeseburger Bombs in your own kitchen! I crafted this recipe to be a perfect blend of ease, comfort, and irresistible flavor. They’re such a simple way to bring big, satisfying tastes to your table, whether you’re looking for a quick appetizer or a fun family meal.
There’s nothing I love more than seeing what you create, so please pull up a chair and let me know how these turn out for you! Share your own serving ideas, any twists you’ve added, or ask any questions you might have in the comments below. And if you snap a picture of your delicious creations, I’d love to see them! Happy cooking!
Follow us on Pinterest for quick, comforting recipes that bring big flavor to your weeknights, from irresistible bites to easy family dinners.

Garlic Parmesan Cheeseburger Bombs Recipe
Ingredients
Equipment
Method
- First, I preheat my oven to 400°F (200°C). Then, I line a baking sheet with parchment paper or lightly grease it with cooking spray; this helps prevent sticking and makes for easy cleanup later.
- Next, in a large mixing bowl, I combine the ground beef, minced garlic, chopped parsley, breadcrumbs, egg, salt, pepper, onion powder, and paprika. I make sure to mix everything until it’s well combined, but I’m careful not to overmix, as that can make the beef tough.
- Now for the fun part: I take a small portion of the beef mixture, about the size of a golf ball, and flatten it gently in my hand to create a small patty.
- I then place a small amount of mozzarella cheese in the center of the flattened beef. Carefully, I fold the beef around the cheese, sealing it completely to form a snug ball. It’s important to make sure there are no gaps!
- After forming the beef balls, I roll each one in the grated Parmesan cheese until it’s fully coated. This step is crucial for that delicious golden crust!
- I then place the cheeseburger bombs on the prepared baking sheet, making sure to leave a little space between each one so they can cook evenly.
- Finally, I bake them in the preheated oven for 18-20 minutes, or until the outside is beautifully golden brown and the beef is cooked through. When they come out of the oven, I sometimes garnish them with extra parsley for a fresh touch. Serve these hot, and watch them disappear!