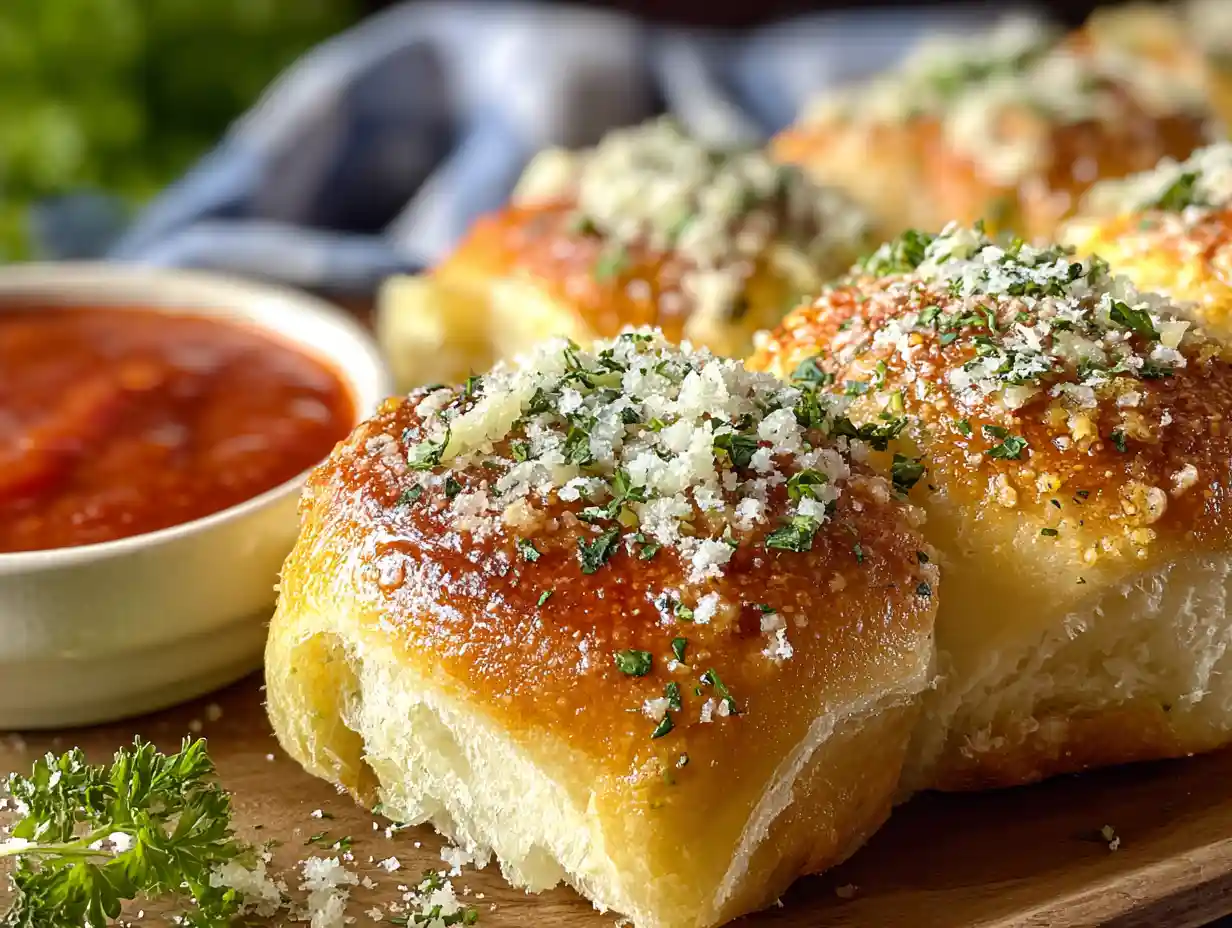

Oh, the aroma of warm bread, garlicky and golden, always brings me back to my own kitchen, surrounded by happy faces. Sometimes the simplest recipes are the most delightful, aren’t they?
That’s exactly how I feel about this irresistible Hawaiian Roll Garlic Bread. It’s the kind of quick, easy, and incredibly flavorful side dish or appetizer that comes together in approximately 15-20 minutes, making it a perfect last-minute addition to any meal.
Table of Contents
What Makes Hawaiian Rolls Perfect for Garlic Bread?
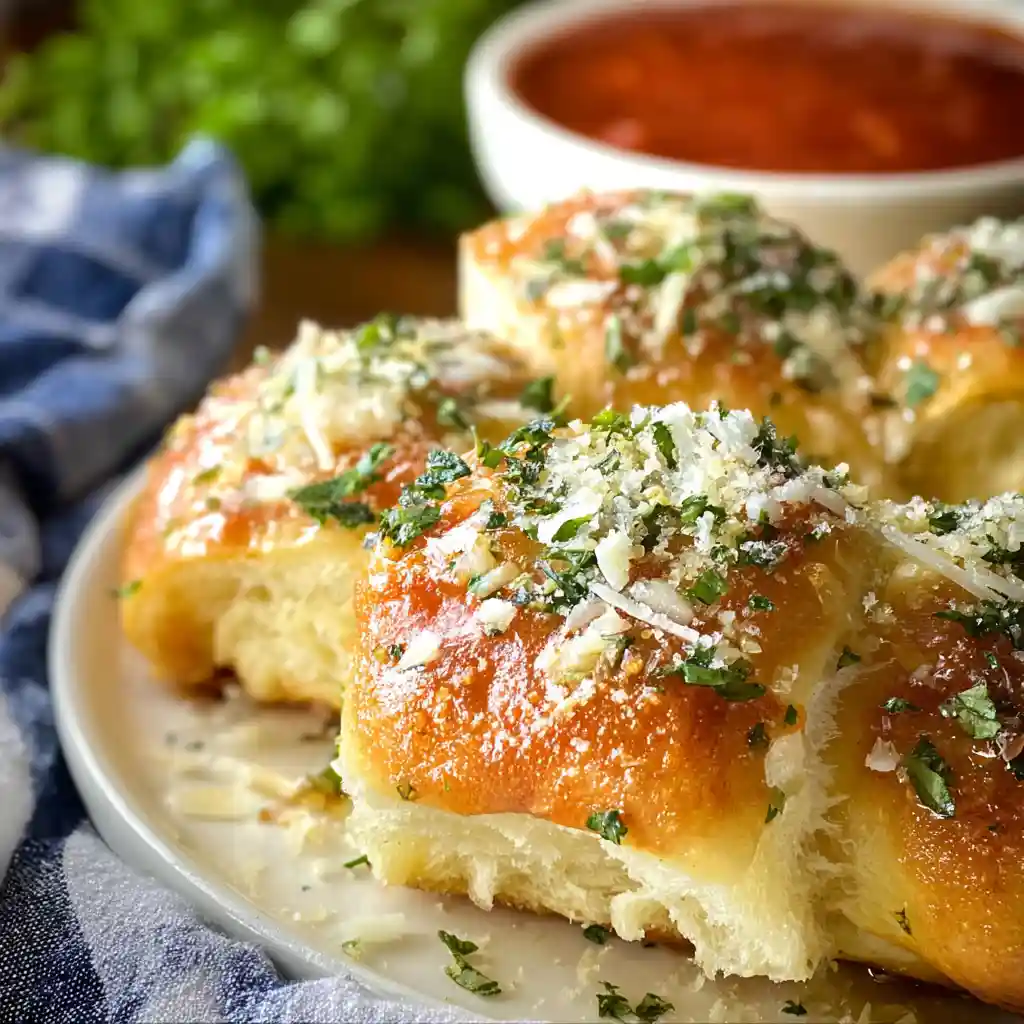
I find that Hawaiian rolls bring something truly special to the table, especially when it comes to garlic bread. Their signature sweetness isn’t just a background note; it actually complements the savory garlic butter beautifully. This creates a flavor profile that’s a little unexpected and utterly addictive.
Beyond the taste, the texture is key. These rolls are incredibly soft and fluffy with just a slight chewiness, which means they soak up all that herby garlic butter like a dream. The result is a moist, flavorful interior and an irresistibly golden, slightly crispy exterior. It’s truly a match made in heaven!
Why You’ll Fall in Love with This Hawaiian Roll Garlic Bread Recipe
I honestly think you’ll adore this specific recipe for Hawaiian Roll Garlic Bread for so many reasons. First, it’s incredibly easy and fast; you can have warm, delicious garlic bread on the table in minutes.
Second, that blend of sweet and savory flavors is just irresistible, hitting all the right notes for a truly satisfying bite. As with the flavors found in an Ultimate Slow Cooker Cowboy Casserole Recipe, the Hawaiian roll garlic bread is a treat.
This recipe is also wonderfully versatile. It works perfectly as a cozy side dish for a pasta night or a flavorful appetizer for game day. I guarantee it’s a crowd-pleaser that disappears quickly, no matter the occasion!
Essential Tools for Perfect Hawaiian Roll Garlic Bread
While this recipe is wonderfully simple, having a few essential tools can make the process even smoother. I always reach for a serrated knife to cut those deep “X” marks in the rolls cleanly and easily. It ensures the butter has plenty of nooks and crannies to seep into.
A small whisk is perfect for thoroughly combining the melted butter, garlic, and parsley. It makes sure every drop is infused with flavor. I also find a sturdy rimmed baking sheet indispensable; it keeps the rolls together and catches any delicious drips of butter, preventing a mess in my oven.
Ingredients You’ll Need for Amazing Hawaiian Roll Garlic Bread
I always say that good ingredients are the foundation of great food, and this recipe is no exception. Using fresh garlic and parsley really makes a difference here. And a good quality butter? Absolutely essential for that rich, satisfying flavor in your Hawaiian Roll Garlic Bread.
Here’s exactly what I use:
- 6 Tablespoons Butter, melted
- 2 Tablespoons Parsley, finely chopped (optional)
- 4 cloves Garlic, finely chopped
- 12 Hawaiian Rolls (like King’s brand)
- Coarse Salt, like Maldon Sea Salt (optional)
I’ve put together a quick guide for common substitutions, too:
| Ingredient | Substitution/Notes |
|---|---|
| Butter | Use unsalted butter and add a pinch of salt if preferred, or opt for a high-quality plant-based/dairy-free butter for dietary needs. |
| Parsley | Fresh is best, but dried parsley can be used (use 1/2 the amount). Other fresh herbs like chives, oregano, or thyme also work well. |
| Garlic | Freshly minced garlic is highly recommended for best flavor. Garlic powder can be used in a pinch (approx. 1/2 tsp per clove). |
| Hawaiian Rolls | While King’s Hawaiian are ideal, any brand of sweet dinner rolls will work. |
| Coarse Salt | Flaky sea salt (like Maldon) adds a gourmet touch and textural contrast. Skip if your butter is salted or for a less salty option. |
How to Make Hawaiian Roll Garlic Bread: Step-by-Step
Making this Hawaiian Roll Garlic Bread is incredibly straightforward, and I’ll walk you through each step to ensure perfect results.
- Preheat oven to 400°F. I always like to get my oven ready first so it’s at the right temperature when I’m ready to bake.
- Whisk together melted butter, parsley, and garlic. In a small bowl, combine these ingredients. Give it a good whisk to make sure the garlic and parsley are evenly distributed throughout the butter; this ensures every bite is flavorful.
- Place Hawaiian rolls on a rimmed baking sheet. Cut a deep X in the top of each roll. Arrange your rolls snuggly on the baking sheet. When I say “deep X,” I mean about three-quarters of the way through the roll. This creates a perfect little pocket for the butter to seep into, making sure the interior gets just as much love as the exterior.
- Pour the herb garlic butter over the rolls, making sure to get plenty of the butter in the X you formed in the top of each roll and letting some drip down the sides. Don’t be shy here! I carefully spoon or pour the butter over each roll, paying extra attention to those “X” cuts. I often tilt the baking sheet slightly to help the butter pool and coat the sides of the rolls as well.
- Bake rolls until warmed through and golden around the edges, 7 to 10 minutes. Keep a close eye on them during this time. “Golden around the edges” means they’ve started to crisp up and turn a beautiful light brown, but aren’t burnt. Every oven is a little different, so start checking at the 7-minute mark.
- Serve warm. This Hawaiian Roll Garlic Bread is truly at its best straight from the oven, when it’s still warm and the butter is glistening. Enjoy this bread with other great lunch and dinner dishes.
Comparing Cooking Methods: Oven vs. Air Fryer for Hawaiian Roll Garlic Bread
I’ve tried making this Hawaiian Roll Garlic Bread in both the oven and my air fryer, and each method has its perks. The traditional oven method, as described in my recipe, gives you a lovely even warmth and a gentle golden crust. It’s perfect if you’re making a larger batch or already have your oven on for another dish.
Using an air fryer, however, is fantastic for a quicker cook time and can yield an even crispier top. I typically set my air fryer to 350°F and bake the rolls for 3-5 minutes, checking frequently. The air fryer tends to cook faster and can sometimes get the tops crispier more quickly, so keep a close watch to prevent burning. If you love that extra crunch, the air fryer might become your new favorite way to make this!
Expert Tips for the Best Hawaiian Roll Garlic Bread Every Time
Through countless batches, I’ve gathered a few expert tips to ensure your Hawaiian Roll Garlic Bread turns out perfectly every single time. To achieve those lovely crispy edges without burning, I recommend keeping an eye on them from the 7-minute mark in the oven; every oven is different, so yours might cook a little faster or slower.
Ensuring even butter distribution, especially within those cuts, is crucial for maximum flavor. I make sure to really spoon the butter into the “X” marks. And please, serve this immediately! The optimal warmth and texture are truly best right out of the oven.
Make-Ahead, Storage, and Reheating Your Hawaiian Roll Garlic Bread
I love a recipe that offers flexibility, and this Hawaiian Roll Garlic Bread certainly does! You can prepare the garlic butter mixture ahead of time; simply whisk it together and store it in an airtight container in the fridge for up to 3 days. When you’re ready to use it, just gently warm it to melt the butter again.
For any delicious leftovers, I store them in an airtight container at room temperature for up to 2 days, or in the fridge for up to 5 days. For longer storage, you can freeze the baked rolls in a freezer-safe bag for up to a month. Like with the Best Red Lobster Biscuit Chicken Pot Pie Recipe, this bread can be easily stored and reheated.
To reheat, I find a quick warm-up in the oven or air fryer is best. A few minutes at 350°F will revive the warmth and crispness, preventing any sogginess. I try to avoid the microwave for reheating, as it can make them a bit chewy.
Troubleshooting Common Issues with Hawaiian Roll Garlic Bread
Even with simple recipes, sometimes little things can go awry. If your rolls are burning too quickly, I recommend checking your oven temperature with an oven thermometer; sometimes they run hotter than you think. You can also try tenting them loosely with foil during the last few minutes of baking.
If they’re becoming soggy, it might be from too much butter sitting on the surface, or not enough baking time to absorb and crisp up. Make sure the butter really seeps into the cuts, and extend baking by a minute or two if needed. For uneven cooking, rotating your baking sheet halfway through the bake time often helps, especially if your oven has hot spots.
Delicious Variations for Your Hawaiian Roll Garlic Bread
While I adore the classic version, I also love to play around with variations for this Hawaiian Roll Garlic Bread. It’s so easy to customize! You can add different cheeses, other fresh herbs, or even some savory additions to really change things up.
Here are some of my favorite ways to get creative:
| Variation Name | How to Achieve It |
|---|---|
| Cheesy Garlic Bread | After buttering, sprinkle 1/2 cup shredded mozzarella, Parmesan, or a blend over the rolls before baking. |
| Herb Garden Blend | Swap or combine parsley with other fresh herbs like chives, oregano, or a touch of fresh rosemary. |
| Spicy Kick | Add 1/4 teaspoon red pepper flakes or a dash of hot sauce to the butter mixture for a touch of heat. |
| Everything Bagel | Sprinkle 1-2 teaspoons of everything bagel seasoning over the buttered rolls before baking for extra crunch and savory flavor. |
| Sun-Dried Tomato & Basil | Add 2 tablespoons finely chopped sun-dried tomatoes and 1 tablespoon fresh basil to the butter mixture. |
What to Serve with Hawaiian Roll Garlic Bread
This Hawaiian Roll Garlic Bread is so versatile, it pairs wonderfully with almost anything! I love it alongside a big bowl of my favorite spaghetti and meatballs; the sweetness of the rolls really cuts through the richness of the pasta sauce. It’s also fantastic with a hearty stew or a simple tomato soup on a chilly evening.
For a lighter meal, I’ll serve it with a crisp green salad, or as a dipper for warm marinara sauce or even a creamy artichoke dip. The sweet and savory profile just works with so many different flavors!
Dietary Accommodations for Your Garlic Bread
I believe everyone should be able to enjoy delicious food, and this recipe can be easily adapted for various dietary needs. If you’re avoiding dairy, simply swap out the regular butter for a high-quality plant-based or dairy-free butter; it works beautifully.
While traditional Hawaiian rolls contain gluten, some brands now offer gluten-free sweet rolls that would be a fantastic substitute here. Always check the labels to ensure they fit your specific needs!
FAQs About Hawaiian Roll Garlic Bread
How do I prevent the garlic from burning?
Using finely chopped garlic rather than minced can help, as larger pieces are less prone to burning. Also, avoid extremely high oven temperatures, and keep an eye on your rolls. If you notice the garlic browning too quickly, you can always tent the rolls loosely with foil.
Can I make the garlic butter ahead of time?
Yes, you can! I often make my garlic butter ahead of time. Just whisk the melted butter, garlic, and parsley together, then store it in an airtight container in the fridge for up to 3 days. Re-warm it gently to melt the butter before pouring it over the rolls.
Why are my rolls soggy?
Sogginess usually comes from too much butter sitting on the surface without being absorbed, or not enough baking time. Ensure you’re cutting deep enough “X” marks for the butter to seep into, and bake until the rolls are truly golden and warmed through.
What’s the best way to store leftovers?
I recommend storing any leftover Hawaiian Roll Garlic Bread in an airtight container at room temperature for up to 2 days, or in the fridge for up to 5 days. For best results, reheat them in the oven or air fryer to maintain that lovely texture.
Conclusion: Your New Go-To Side Dish!
There you have it, my friends! This Hawaiian Roll Garlic Bread is truly one of those magical recipes that delivers maximum flavor with minimal effort. It’s perfectly sweet, savory, and incredibly easy to make, making it a must-try for any occasion. I just know it will become your new go-to side dish because it brings so much joy and deliciousness to the table.
I’d love to hear how you make it your own! Do you have a favorite cheese to add, or another herb you swear by? Share your favorite variations in the comments below, or feel free to ask any lingering questions.
Follow us on Pinterest for cozy, easy recipes like this Hawaiian Roll Garlic Bread; quick, flavorful, and perfect for any meal!

Hawaiian Roll Garlic Bread Recipe
Ingredients
Equipment
Method
- Preheat oven to 400°F. I always like to get my oven ready first so it’s at the right temperature when I’m ready to bake.
- Whisk together melted butter, parsley, and garlic. In a small bowl, combine these ingredients. Give it a good whisk to make sure the garlic and parsley are evenly distributed throughout the butter; this ensures every bite is flavorful.
- Place Hawaiian rolls on a rimmed baking sheet. Cut a deep X in the top of each roll. Arrange your rolls snuggly on the baking sheet. When I say “deep X,” I mean about three-quarters of the way through the roll. This creates a perfect little pocket for the butter to seep into, making sure the interior gets just as much love as the exterior.
- Pour the herb garlic butter over the rolls, making sure to get plenty of the butter in the X you formed in the top of each roll and letting some drip down the sides. Don’t be shy here! I carefully spoon or pour the butter over each roll, paying extra attention to those “X” cuts. I often tilt the baking sheet slightly to help the butter pool and coat the sides of the rolls as well.
- Bake rolls until warmed through and golden around the edges, 7 to 10 minutes. Keep a close eye on them during this time. “Golden around the edges” means they’ve started to crisp up and turn a beautiful light brown, but aren’t burnt. Every oven is a little different, so start checking at the 7-minute mark.
- Serve warm. This Hawaiian Roll Garlic Bread is truly at its best straight from the oven, when it’s still warm and the butter is glistening.